Pages

Sunday, March 31, 2019

Island Batik Ambassador Vintage Reimagined


The month of March for the Island Batik Ambassador's challenge project was called Vintage Reimagined.  We are taking old vintage blocks and quilts and inspiring them into new creations.  The block I chose was the 54-40 or Fight Quilt Block.


A History lesson on the 54-50 or Fight Quilt Block goes back to the election campaign of James Polk in 1844, the slogan for his campaign was 54-40 or Fight.  Many women of the era would stitch their political views into blocks due to they weren't supposed to voice their opinion at that time. Polk wanted to expand the country to include Texas, California and all of Oregon.  Oregon border latitude was 54 degrees and 40 minutes, so he made his rallying call  "Fifty-Four Forty or Fight."  He did become our 11th United States President, but he didn't win the 54th parallel. 

Also, this Block is a Studio 180 Design BlockBuster Block, the only difference from the original block and the Blockbuster is the color placement and the placement of the V-Block Center.

The block itself is made from 4-Patch and V-block units.  The V-Block has many names, Triangle in the Square or Tri-Recs units; it depends on the tool or technique you are using.  I call them   V-Blocks since I work with the Studio 180 Design V-Block® tool.   


The Island Batik fabrics I used for this project was mainly from batik foundations which include Neutrals, Basics, and blenders.  The gold fabric wasIsland Batik scraps I had from a previous years project.


With this block, I needed  Dual-Colored V-Blocks units.   The center would remain the background color, and green and gold would turn to be the side pieces.  All my pieces were cut using the Studio 180 Design V-Block® Tool.  


Next, I made the 4-Patch units.  The Studio 180 Design Four Patch Square-up© tool for creating your Four-Patch units.  Many of us who have been quilting a while, know it is hard to get the perfect Four-Patch unit.  With this tool, you make your units slightly oversized and then quickly trim them into the correct sized Four-Patch units.


With making four patch units, you will cut strips of each of the colors you will need in your four patches.  Positioning your strips right sides together, stitch down the long edge of the strips with a good 1/4" seam.   Then press the seam of the strips sets to the dark.  Cut your strip in half crosswise and nest on of the strip sets so one the colors are opposite the other color.  You will then sub-cut along the strips using the same width you cut your strip at. 


Remember to keep the sub cuts together.    You then stitch down the long sides of the layered pairs.  This is a great time to chain piece all your pairs.  Press to one side, and spin the seams will help to make your unit lay flat.


Then using your Four Patch Square Up© tool, you will trim up the unit since your four patches are slightly oversized.  


You will have a perfect Four-Patch unit every time when you use this method.  If you would like more information or want to purchase this tool check the Studio 180 Design website.


Once you have all your units made, just layout the 3 x3 grid and stitch all the units into rows.  And then stitching the rows together. 


For my project, I made four blocks with sashing pieces stitch all around the blocks.  My quilt measures 36" x 36" when complete.  

I quilted this quilt with Hobbs Heirloom Premium Cotton Batting.  

I hope you enjoyed this little project, make sure you check out the other Island Batik Ambassador Vintage Reimagined Projects this month. Already planning out we have something planned exciting for our April projects, so stay tuned.
Carolina Asmussen ~Carolina Asmussen
Gene Black ~ Gene Black
Pamela Boatright ~ PamelaQuilts
Connie K Campbell ~ Freemotion by the River
Anja Clyke ~ Anja Quilts
Becca Fenstermaker ~Pretty Piney
Jennifer Fulton ~ Inquiring Quilter
Barbara Gaddy ~ Bejeweled Quilts by Barb
Dione Gardner-Stephen ~ Clever Chameleon
Sarah Goer ~ Sarah Goer Quilts
Vasudha Govindan ~ Storied Quilts
Lori Haase ~ Dakota City Quilter II
Joanne Hart ~ Unicornharts
Mania (Magdalini) Hatziioannidi ~ Mania for Quilts
Carla Henton ~ Creatin in the Sticks
Stephanie Jacobson ~ Steph Jacobson Designs
Connie Kauffman ~ Kauffman Designs
Joan Kawano ~ Moosestash Quilting
Kim Lapacek ~ Persimon Dreams
Emily Leachman ~ The Darling Dogwood
Leanne Parsons ~ Devoted Quilter
Bea Lee ~ BeaQuilter
Toby Lischko ~ Gateway Quilts & Stuff
Bill Locke ~ Studio Bill Locke
Denise Looney ~ For the Love of Geese
Leah Malasky ~ Quilted Delights
Sally Manke ~ Sally Manke
Maryellen McAuliffe ~ Mary Mack's Blog
Kathleen McCormick ~ Kathleen McMusing
Carol Moellers ~ Carol Moellers Designs
Karen Neary ~ Sew Karen-ly Created
Jackie O’Brien ~ If These Threads Could Talk
Laura Piland ~ Slice of Pi Quilts
Michelle Roberts ~ Creative Blonde
Vicki Schlimmer ~ Vicki's Crafts and Quilting
Gail Sheppard ~ Quilting Gail
Sherry Shish ~ Powered by Quilting
Anita Skjellanger ~ Quilt in a not-Shell
Laticia "Tish" Stemple ~ Tish's Adventures in Wonderland
Jennifer Strauser ~ Dizzy Quilter
Jennifer Thomas ~ Curlicue Creations
Terri Vanden Bosch ~ Lizard Creek Quilts
Alison Vermilya ~ Little Bunny Quilts
Sandra Walker ~ mmm! quilts
(Debora) Anne Wiens ~ Seams like a Plan
Geraldine Wilkins ~ Living Water Quilter
Janet Yamamoto ~  Whispers of Yore


See you next month,

Tina

"Designs to Inspire"


Friday, March 29, 2019

Graceful Points QAL Block 5

Hello Everyone!  Today we will be starting block 5 in our Graceful Points QAL.  But before we begin, I would like to recap the first four blocks we have completed.   


All these blocks are so much fun to make, and I just love the various fabric colors that people are using in our Graceful Points Quilt Along Facebook Group


Now let's get started with our next block!  Block #5, is Studio 180 Design Blockbuster #7 - Whimsy Turndash.  In this block, we will continue to use the Square Squared tool to make the center block unit and the Little Houses Units based on the Studio 180 Design Little House Technique Sheet.


We will be using four colors for this block, BG, C1, C2, C3, please refer to your color chart found in your general instructions.   

Before we start, make sure you Download your Block 5, and Blockbuster Block #7 Whimsy Turndash Instructions, remember both are required to make you block.

Please remember that the pictures used in this tutorial are for the 6" block for the Wallhanging.  Be sure to read the Downloaded Block Instructions to get the correct cutting and trimming sizes for the 12" block, which are indicated in (Blue) parenthesis.

Whimsy Turndash

Unit A - Square Squared 


For today's block, I will not be jumping into the full walk-through since we built this in our last block, Rolling Stone. Last time, I walked you through how to use the Square Squared Tool and the process of making the block. If you would like a refresher, please pop over and read the blog post.  You can also watch the Deb Tucker Studio 180 Design Video on the Square Squared tool also.

Unit B - Little Houses

Now let's start working on the Little Houses, which are an extension of what you can do with your Square Squared tools.  You can view the full instructions and cutting charts on the Little Houses Technique Sheet.


Step 1. You will gather two small squares and one large square that you cut out according to your block instructions.

Step 2. Mark one single stitching line along the diagonal of the reverse side of the two small squares.


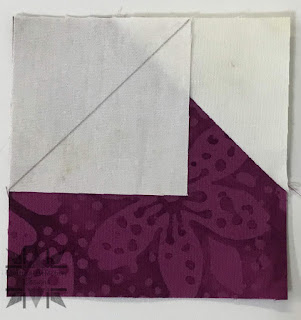
Step 3. Position one small square on one of the corners of the large square, with right sides facing each other, making sure the diagonal is aligned across the corner of the larger square.


Step 4. Stitch on the marked line, then trim 1/4" away from the stitched line. Press away from the large square.


Step 5. Position the second square on the large square next to the one you just finished.  Making sure to align the diagonal across the corner.  


Step 6. Stitch on the line, Trim and Press just like you did in the other corner. 

The trimming process is similar to the way we trim our units down in the Square Squared units.

Right Handed

Left Handed

Step 7. Position the Trim down Section of the Square Squared tool over the unit. Focus on aligning the "X" for your finished block size unit over the sewn seams.  Trim from South to North and across the top.

Right Handed
Left Handed
Step 8. Rotate you Square Squared unit and reposition the Square Squared tool. Again lining up the "X's for you finished block size, and also lining up the cleanup lines on the tool with the previously trimmed edges.  Complete the second trim.


Make 4 Little House Units.


Unit C Half Square Triangles


Step 1.  Gather your squares you cut according to the block instructions.


Step 2. Using you Quilter's Magic Wand tool, mark two stitching lines 1/4"  on either side of the center diagonal line on the wrong side of the lighter fabric.


Step 3. Layer your dark fabric and light fabric squares with right sides together.


Step 4.  Stitch on the drawn lines, and cut down the middle.  Press seam toward the darker fabric.


Right Handed


Left Handed
Step 5. Position you Tucker Trimmer® tool over the unit, carefully aligning the common diagonal and sizing diagonal line with the cutting size you will need for you block your making.


Right Handed

Left Handed
Step 6. Rotate the unit 180° and line up your Tucker Trimmer® tool again, and focusing on the common diagonal and the sizing line is aligned on the cut size of your unit. 


Make 4 Half Square Triangles

Friday, March 15, 2019

Graceful Points QAL Block 4


How is everyone doing with their Graceful Point Blocks so far?  Please remember, there is plenty of time to catch up on the first three blocks if you haven't started.  You can read all about them here Block One - Ohio Star VariationsBlock 2 - Crowning GloryBlock 3 - Capital T Variation blog posts.  Remember the download are always available.


Today we are launching Block 4 - BlockBuster # 6 Rolling Stone.  The Rolling Stone block uses the Studio 180 Design Square Squared® 6" tool to make the corner units. We will be making four patches to make this block.  If you need the Square Squared® 6" tool, you can purchase from my website.  


For this block, you will need the following colors, BG, C1, C2, and C3 to make your units.


Before we start, make sure you Download your Block 4, and Blockbuster Block #6 Rolling Stone Instructions, remember both are required to make you block.

Please remember that the pictures used in this tutorial are for the 6" block for the Wallhanging.  Be sure to read the Downloaded Block Instructions to get the correct cutting and trimming sizes for the 12" block, which are indicated in (Blue) parenthesis.