Showing posts with label Deb Tucker Studio 180 Design. Show all posts

Monday, March 11, 2024

Day One - Squiggles, Dots and Lines Blog Hop


Welcome to Day One of the Squiggle, Dots, and Lines Blog Hop. This week, five Studio 180 Design Certified Instructors will share beautiful and creative projects they have made with Deb Tucker's Studio 180 Design's newest collection, "Squiggles, Dots, and Lines," with Island Batik. The blog hop will include small projects that feature one of Studio 180's design tools and techniques.

Let me start by introducing myself to all the newcomers to my blog. My name is Tina Dillard; I'm a Certified Instructor, author, and designer under Quilting Affection Designs. My two partners in crime in the image above are my sewing buddies, Anna and Lucy. I'm so happy you are here, and I can show you my project. Additionally, I have an announcement later in this blog.


I am very excited to be part of this blog hop again because I love this newest collection, Squiggle, Dots, and Lines. The fabric collection is one of my new favorites because it features bold and bright colors, including various greens, blues, and purples.

Just days before being asked to participate in this blog hop, I was playing with a new design for a table topper that uses the Star 60 Tool and Techniques. When Studio 180 Design asked for volunteers for this Blog Hop, I knew I wanted to make this design to test it out with these fabrics. This was not the first time I had played with the Squiggle, Dots, and Lines fabric collection since I designed a pattern around this collection; more about that later in this blog. 


I used the fabrics I had left from that project: four different values of blues, two greens, and one purple. For the white background, I used an Island Batik neutral called Glaze.

The small hexagon project, which I called Radiant Light Table Topper, features the Star 60 and Capped 60 units, measuring about 23" inches. However, I'm using the Capped 60 units differently in this project. I'm not using them as regular units; I made them as side triangles for the Star 60 units instead of the regular solid piece side triangles. This adds some interest to the block, and depending on how you place your fabric colors, it adds some separation between blocks. I want to highlight the center of the table topper and the six partial hexagon blocks on the outer edges.

As I worked on the fabric placement in the project, I knew I wanted to use dark purple and a variety of blues as the borders. The center diamond flowers were created using two different greens: the lighter color in the center of the project and then the darker green on the outer edges. The white and light blue background added highlights and outer borders for the hexagon project.


I finished the quilt using some straight-line quilting on my sewing machine. Which shows off the shape of the project.

Now that this project is complete, I love how it turned out. I have a good feeling that it will become a pattern later this year. What do you think?

Special Announcement


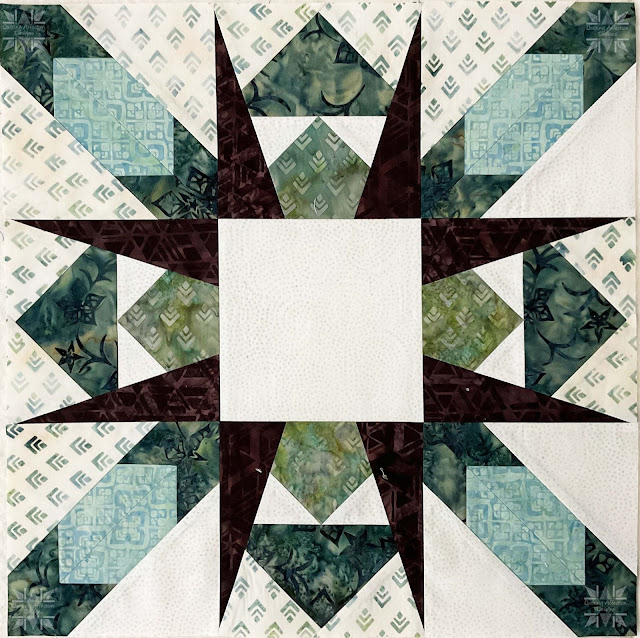
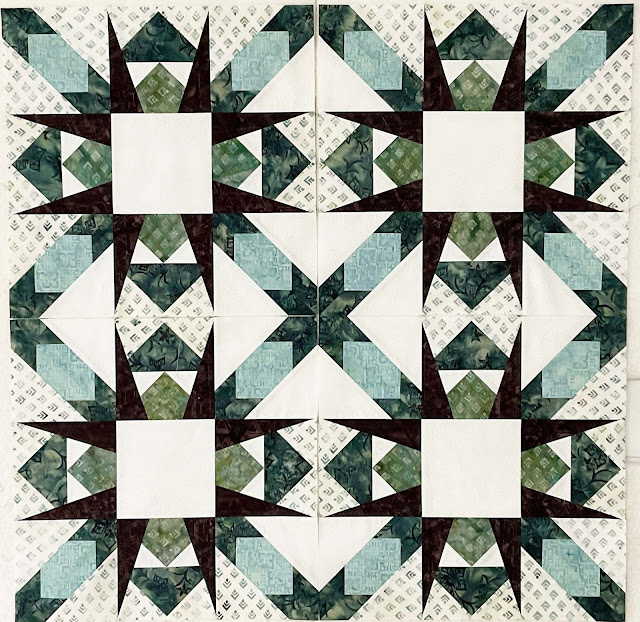
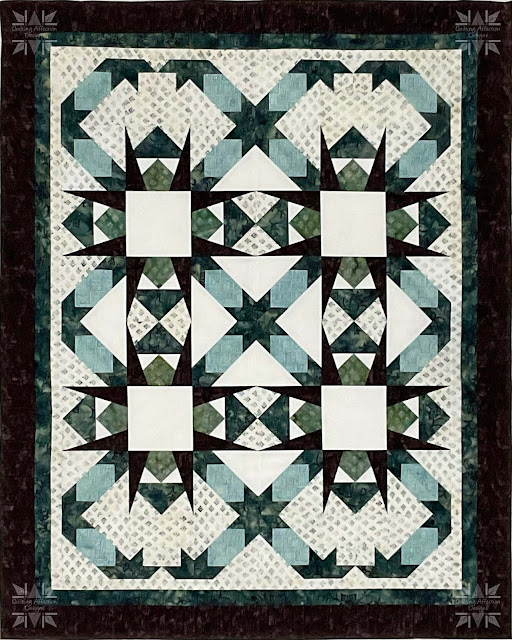
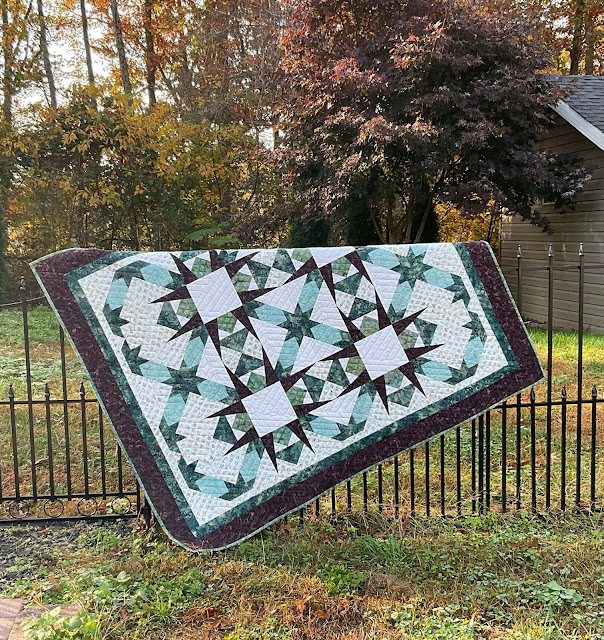
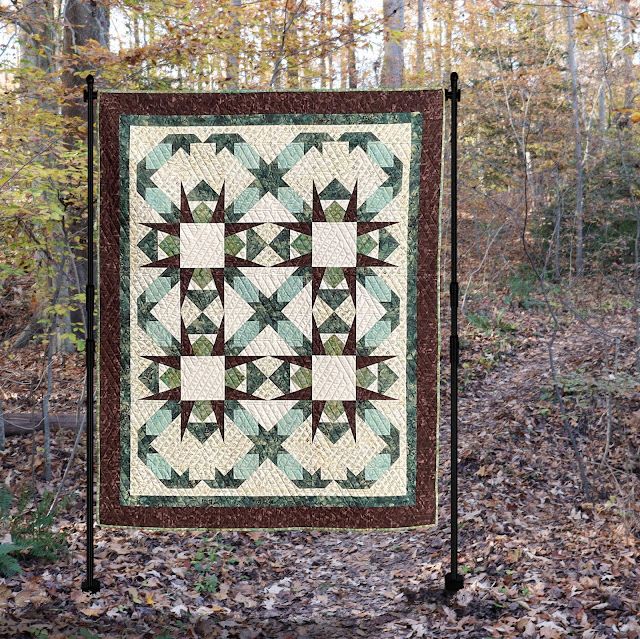
As I told you earlier in this blog, this was not my first time using the Squiggle, Dots, and Line Fabric Collection. In early 2023, the Studio180 Design team and other designers asked me to create a pattern for this new collection. Today, after lots of hard work behind the scenes, I would like to announce I'm releasing this new pattern called "Midnight Snowflake."

This pattern allows you to enjoy the beauty of "Midnight Snowflakes" as they twist and turn on the ground. It uses the Studio 180Design Wedge Star to make twisted wedge blocks and combines them with other fundamental tools to create secondary blocks. Combine them with this new fabric collection to produce a stunning quilt top.


This pattern is now available as a physical or digital copy on my website, quiltingaffection.com. If you are a shop owner and wish to purchase the pattern for your shop, please check out the wholesale page on my website.

Thank you for stopping by my blog today. Check your local quilt shop for the "Squiggle, Dots, and Lines" fabric collection, which is arriving now. If they don't have it, ask if they can order it. 

Please return tomorrow as the blog hop continues with my fellow CI Jackie O'Brien from If These Threads Could Talk. The schedule of featured Certified Instructor bloggers is below; click on the links below.

Friday, March 8 - Welcome on the Studio 180 Design Blog

Monday, March 11 – Tina (me) of Quilting Affection Designs

Tuesday, March 12 – Jackie O'Brien of If These Threads Could Talk

Wednesday, March 13 – Phyllis Fay of Tucker University 

Thursday, March 14 – Diana Mann of Murgaboo Quilts

Friday, March 15 – Toni Reynolds of Love Pieced Perfection

Saturday, March 16 – Wrap Up on the  Studio 180 Design blog

Tuesday, January 17, 2023

Day Two - Modern Opulance Blog Hop


I’m so excited that you have stopped by my blog today during the Deb Tucker Studio 180 Design Modern Opulence Blog Hop. My name is Tina Dillard, and I'm a Studio 180 Design Certified Instructor, author, instructor, designer, and owner of Quilting Affection Designs. Throughout the week, a few of my fellow Certified Instructors are bringing you projects that are either table toppers or table runners.


These projects are using Deb’s newest fabric line with Island Batik, Modern Opulence. It's full of oranges, blues, and golds that are rich and bold. For those fall-themed projects, they're perfect. As soon as I saw this collection, I fell in love. The possibilities are endless with this line. The schedule for this week is below, so make sure to follow each of these as the week progresses.

Monday, January 16th: Studio 180 Design kickoff

Monday, January 16th: Diana Mann of Murgaboo Quilts

Tuesday, January 17th: Tina Dillard of Quilting Affection Designs (today)

Wednesday, January 18th: Phyllis Fay of Stitchin’ in the Ditch

Thursday, January 19th: Raija Salomaa of Quilter’s Treasure Chest

Friday, January 20th: Studio 180 Design wrap up

The project I designed for this Blog Hop will be this month's Block Party Block. I'll quickly explain Block Party Blocks if you're not familiar. Block Party Blocks look just like Blockbuster blocks from Studio 180 Design. They're free downloads that come out around the 15th of every month. These blocks use a variety of Studio 180 Design tools and provide practice, fun, and inspiration. 


Let me introduce you to my Block Party Block #32 and Blog Hop Project "Opulence Puzzle." Deb's Modern Opulence fabric collection inspired this elegant table topper. Using Studio 180 Designs tools and techniques, I made the sample using the 36" x 36" table topper size, Wing Clipper, Large Square Squared, and Corner Beam tools. In addition, I've included Technique Sheets for Pickets and Quickets, Stacked Squares, and Birds of Paradise.

I'll show you how easy this project was by showing you the tools, the units, and the fabrics I used. Stay with me until the end of this blog, and I'll tell you how to download this free project that comes in 36" x 36" and 24" x 24".


I used seven different fabrics from the Modern Opulence collection in this table topper. Their values range from Light to Dark and include a Background and Coordinating fabric for the borders.  

I'll start with the first unit of this table topper, the Corner Beam. With the Corner Beam, you can cut your Side Triangles and Center Beams and trim the units with one tool. No more paper piecing. I used a mix of background and medium/dark fabrics from the collection for my Corner Beam Units.

Next, I made Flying Geese and Quickets units with Light, Medium/Light, and Dark fabrics. The wing clipper tool is used for these units. I love having a Wing Clipper around for flying geese. Use this tool to trim down Quicket units from your Picket and Quickets Technique Sheet.


To finish this project, I used the Large Square Squared Tool to create Birds of Paradise and Stacked Squares (Economy Blocks). Combining Light, Medium, Medium/Light, and Dark fabrics makes this Birds of Paradise unit bright and colorful. Last but not least, the Economy Block from the Stacked Squares Technique Sheet was made for the center using a combination of Background, Light, and Medium fabrics. 

After I make all my units, I can assemble the table topper, starting with the main block. Here's how the three rows look put together. A quilt's center could be a great block by itself.


After that, make another set of flying geese units and combine them with rectangles and squares to create the pieced border. You'll then sew the pieced borders to each side of the center block. It's finished off with coordinating fabric borders.

A gorgeous table topper from Deb Tucker's Studio 180 Design Modern Opulence Fabric Line from Island Batik is easy to make and put together. This Block Party Block #32 "Opulence Puzzle" table topper pattern can be made by clicking on this link and downloading it.

Thanks for joining me on Day Two of the Modern Opulence Blog Hop. I'll see you on Phyllis Fay's Stitchin' in the Ditch blog tomorrow.  

Friday, November 12, 2021

Day 5 - Deb Tucker Studio 180 Design Bellingham Bay Blog Hop


Greetings, and Welcome to the Final Day of the Bellingham Bay Blog Hop! I am Tina Dillard, a Certified Instructor, Author, and Quilt Pattern Designer under Quilting Affection Designs. In addition, I have founded Precision Block Academy, where you can learn and achieve Perfect Points every time with Studio 180 Design tools.

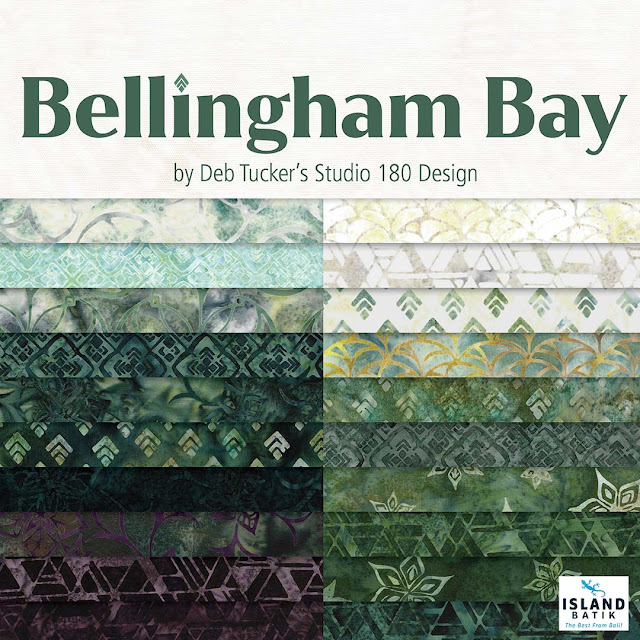
I hope you've enjoyed the Studio 180 Design "Bellingham Bay" Blog Hop. "Bellingham Bay" is Deb Tucker Studio 180 Design's first Original Fabric Collection with Island Batik. This collection is arriving this month at your local quilt shop, so check with your favorite shop. If your shop doesn't have it, request it. Three other Certified Instructors and I are showcasing these beautiful, earth-tone fabrics in quilts. These quilts also feature the Rapid Fire Hunter Star Tool and Studio 180 Design Fundamental tools.

Click on the links below to see and read more about these fantastic quilts.

Day 1 - Studio 180 Design

Day 2 - Terri Welch of Quilter's Journey

Day 3 - Gail Renna of Quilt Haven Threads 

Day 4 - Beth Sidley of Tucker University

Day 5 - Tina Dillard of Quilting Affection Designs


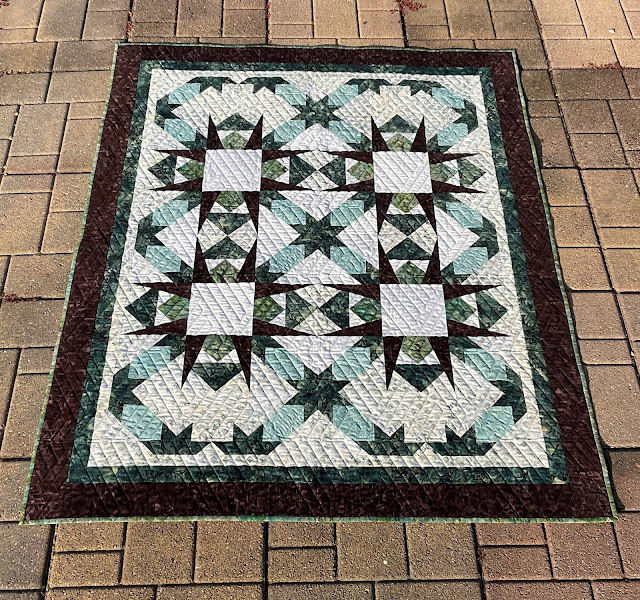
Today, I'm excited to wrap up this blog hop with my quilt. Several elements combine to create this gorgeous quilt. If you are not familiar with my designs, I love to play with the Corner Pop II and III Tools. We were challenged to design a quilt around the Rapid Fire Hunter Star tool and add the fundamental tools. I knew I wanted to add them to my design.

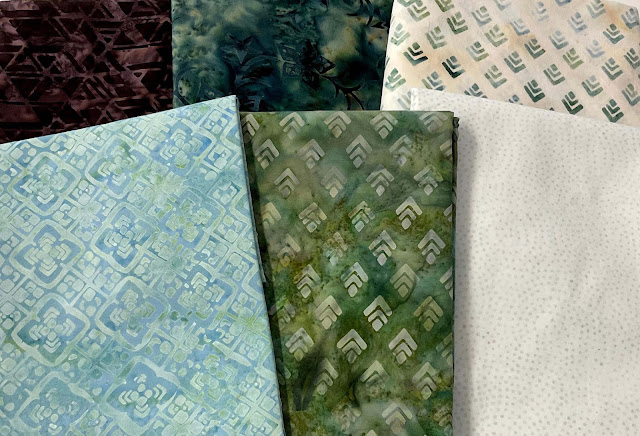
The Bellingham Bay collection is perfect for the Hunter Star Blocks with all the beautiful earth tones in the collection.

Let me introduce you to my quilt, Hunters Point, which is currently under development. This quilt uses several of the Bellingham Bay fabrics to make it stand out. We have a Background, Light, two medium fabrics, and two dark fabrics. 


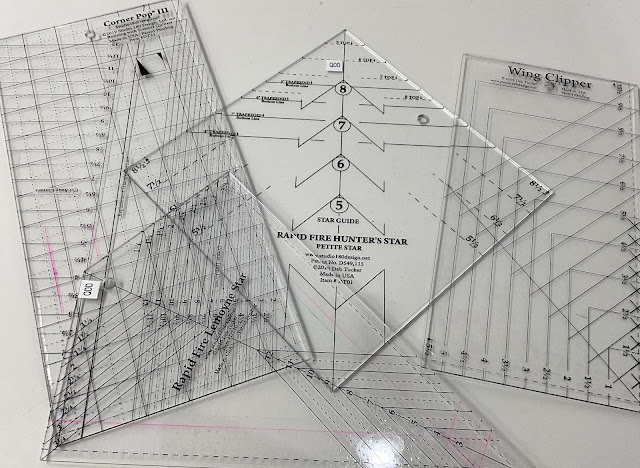
Many of you will look at this quilt and say that it seems way too complicated to make. This blog will break down each element in the quilt to show that it's not so difficult. Hunters Point uses Studio 180 Design tools: Rapid Fire Petite Hunter Star®, Wing Clipper®, Corner Pop® III, and the Rapid Fire Lemoyne Star®.


Let's Start with the Rapid Fire Petite Hunter Star® tool. For the Hunter Star units, I made up three different color combinations. Each of the units used the same color trapezoids and the star points. What makes each of the Hunter Stars different is the Half Square Triangles. One used just the light fabric, background fabric, and the last units combined the two fabrics.


The next thing I want to show you are the Popped Flying Geese units. These units will bring in some of the Spikey Points to the center of the quilt. These units start by making the Non-Waste Method Flying Geese and trimming them with the Studio 180 Design Wing Clipper®. Then combine the two different units with the points heading north.

Then, I used the Studio 180 Design Corner Pop® III tool and removed the bottom left and right corners. Next, the corners were replaced with a new replacement triangle, dark fabric. After the Replacement triangle was stitched and pressed, I trimmed the replacement triangles with the Corner Pop® III tool. 


Once these units were made, I combined the Hunter Stars and the Popped Flying Geese Units to make the main blocks of the quilt top center.


Once I made four blocks, I needed to add a top and bottom row to finish the quilt.


Now I need to finish the top and bottom with some Lemoyne Star quarter units that I made with the Rapid Fire Lemoyne Star Tool. These units were put in between two Hunter Star blocks. The Lemoyne Star Quarter units allow the point to extend the quilt in different directions.  


The final touches to this quilt were adding the borders to the quilt top. Hunter's Point is now complete.


My longarmer, "The Quilted Ginger," quilted the top with the "60 Degree Triangles by Sweet Dreams using Isacord 5664 thread.


I'm glad you're here today, and I hope you liked the Studio 180 Design Bellingham Bay Blog Hop. I had a blast designing and featuring these original fabrics. You can purchase Hunters Point in the near future. Click here to sign up for my newsletter if you'd like to be notified when the pattern becomes available. Additionally, if you would like to see more of my patterns and my book, "Poppin With Wings," visit my website, www.quiltingaffection.com. Finally, check out my Precision Block Academy to learn how to use Studio 180 Design tools and so much more.

Friday, September 10, 2021

Three Essential Steps Before Starting Any New Project!


This week I want to talk about some essential steps before you start any Studio 180 Design Project or just any sewing project at all.  Doing these steps will help you make your projects a success. 


Step 1: Read through the pattern


Understanding a pattern, I feel, is the first step when starting a new project. Read the pattern thoroughly and take note of the following.

Skill Level - Ask yourself, can I make this pattern? Is it at my current comfort or skill level?

Tools Required - Do you have the tools, and do you know how to use them if the pattern requires them?  If you are using the Studio 180 Design tools and haven’t used that tool in a while, you may want to read through the tool or technique instructions.  You can also refer to the Studio 180 Design YouTube page for more help in using the tools.

Fabric Yardage – The fabric yardage is usually on the back and on the first page of any pattern.  You also should look at the Width of Fabric the pattern is based on.  Many patterns these days use 40” – 42” width of fabric. This is important when you go shopping for fabric because if you buy 40” wide fabric and your pattern using a 42” width. You may want to add a little more yardage to that required amount, just to ensure you have enough.


Step 2: Prepare

Now that you have a grasp on making the project let's talk about preparing your sewing area, sewing machine, and fabric for cutting.


Sewing Area
– I recommend cleaning your sewing area if you have one. I know many of you out there just don’t have a dedicated sewing space, so you are just setting up a space to sew.  Now, if you have a dedicated space, let's put away those projects you are in the middle of.  Better yet, finish those projects first.  That way, you don’t have any UFOs sitting around.  Then once complete, clean your area and put everything away that you will not need for the next project.

Sewing Machine – prepare your sewing machine. Make sure it is in good working order before you start any new project. Ask yourself these questions as you prepare a sewing machine for a new project.

  •  When was the last time you cleaned it? You should be cleaning it every time you start a new project, or if you are in the middle of a couple of projects, clean every couple of weeks. Trust me, it will need it.


  •  When was it last serviced? My local quilting shop recommends getting your sewing machine serviced every year.  This also depends on how much you sew.  You want to take good care of those machines.


  • One more thing you need to do to your machines is to oil (if required) and change the needle. I change my needle when I clean my machine. The sharper the needle, the better the project will be.


Fabric
– The biggest debate is whether to pre-wash your new fabrics. Now, I will say that I pre-wash all my fabrics before starting any new project to remove any chemicals, dyes, and wax on the fabrics. I do this because I have seen quilts after the first washing, and some have bled.  The only fabric I do not pre-wash is the pre-cuts because I really don’t want to shrink this fabric too much. However, I feel the decision to pre-wash or not is up to you, the quilter; it is really your choice. 

One more thing you must do with your fabric, regardless if you pre-wash or not, is to make sure your fabric is pressed and all the wrinkles are removed. Ironing your fabric before you start will help with accuracy when you rotary cut your fabric.


Step 3: Gather your Essentials


Now that you have your fabrics ready, a clean sewing area, and the sewing machine prepared, here are a few more things you may need depending on your project.

Special Tools and Tool Instructions – Layout any special tools or tools, such as the Studio 180 Design tools that your pattern calls for.  Now I recommend that you have InvisiGrip™ on the back of any tool. InvisiGrip™ is a thin clear plastic that you place on the back of your tools to help prevent them from slipping on your cutting mat while you are cutting. The plastic adheres to your tool by static cling, so there is no adhesive element used. This makes the product easy to change out when it gets dirty and needs replacing.

Quilter Magic Wand - is a wonderful tool that provides you with an exact 1/2″ reference. In addition, this ruler has an etched line running down the middle that gives you an accurate 1/4″ on each side.

Marking Tools - When it comes to marking tools for your project, I recommend using fine lines mechanical pencils, such as Sewline Fabric Pencil, or a fine pen such as the Ultra-Fine Pigma Micron 01 pen. Make sure your marking tool is easy to see and will give you a nice fine line at the same time.

Rotary Rulers - These thick acrylic rulers are made primarily to be used with your Rotary Cutter and Cutting mat. In addition to the Studio 180 Design tools, it is recommended that you have standard rotary rulers that measure 6″ x 24″ and 6″ x 12″. The 6″ x 24″ ruler is great for cutting strips that are the Width of Fabric (WOF) and for large blocks. The 6″ x 12″ is excellent for sub cutting all your strips into squares. I also recommend having a 12″ x 12″ or larger square ruler for squaring up blocks.

Rotary Cutter and Mats - A good quality rotary cutter and mat are highly recommended for any quilting project you do. When I cut out my pieces for my project, I prefer to use a 45mm rotary cutter with a new blade. I recommend closing or retract the edge every time you set your cutter down on the mat. Safety first!

Iron and Ironing Surface - An excellent clean iron and ironing surface is key to getting a crisp seam and making the blocks lay flat. I use a lint roller periodically over my ironing surface to keep the loose threads from fusing to it. Each day before you start, check your iron before turning it on. Wipe off any excess dirt and lint. If your iron plates are dirty, refer to your iron instructions to clean the surface.

Additional tools and Accessories – Beyond the specific tools above, you’ll need some general quilting items such as a 100% Cotton 50 wt. Thread, needles, 1/4″ piecing foot, scissors/snips, pins, seam ripper, etc. Remember when buying your supplies to look for the best quality equipment you can afford. Doing this will make you happier with your final product.


Now that we have completed all the steps, we are ready to start our projects.  Please remember that organization is a critical element in making your projects a success.  I will be covering this topic soon.  

See you next Friday, with a new tutorial on the latest Block Party Block. 

Thursday, September 2, 2021

Reviving My Blog!


I’m so happy to announce that I’m bringing my blog back full-time starting this Friday, September 3rd.  I’m taking a new approach to this blog; instead of random topics. I have decided to dedicate my blog to educate you on the Deb Tucker Studio 180 Design tools.

To give you a little background on me, I have been a Pattern Designer for over eight years. Five years ago, I found the Studio 180 Design tools and discovered game-changer tools that take your abilities to the next level. A year later, I became a Studio 180 Design Certified Instructor and devoted my pattern Designs to companion patterns for the tools. I love watching my students see the delight in their faces when they have perfect-looking units and blocks.

I wanted to share my love for the tools and educate you on the Studio 180 Design tools via my blog.  So starting this Friday and every Friday, you will be introduced to new topics, tools or techniques, tutorials, and so much more on Studio 180 Design.

So if you have a love of the Studio 180 Design tools or are just curious about the tools, you will not want to miss each Friday's blog post. If you haven't signed up to receive your blog delivered to your email each week, then click on this link.

See you tomorrow for the first post.


Tina


Tuesday, January 21, 2020

Stormy Seas


Today, I would like to introduce you to one of my newest patterns, Stormy Seas. This pattern is made using the Studio 180 Design Tucker Trimmer® I and the Wing Clipper® I tools to make this striking quilt that measures 62" x 74".


The rich fabric used to make this stunning pattern is the Island Batik "Blue Sea" Collection by Kathy Engle, which is now available at your local shop.


The quilt is built upon only two blocks that use a combination of two units, the Four Patch technique, and Flying Geese.


Once you have all the units built, the fun part is putting it all together and seeing the beautiful design come to life. Then to add that extra enhancement a four patch border is added to create an appealing frame. 


Stormy Seas will enhance the look of any room. 

To purchase this pattern, head over to my website, www.quiltingaffection.com, it is on sale right now for $9.50 until January 31st.


Wednesday, January 1, 2020

Happy New Year, Goals for 2020!


Happy New Year and Welcome to 2020!

Yesterday, in my blog, I reflected on my goals of 2019, what I accomplished, and what got neglected. So today, I want to share my 2020 and beyond goals.

My personal goal for this year is to become physically and mentally fit. I will start by continuing my healthy eating program, Isagenix. But I will add in daily exercise to help clear my mind, build strength to help make it through the stressful time of the Quilt Markets. I also want to find some personal development podcasts and audible books for more personal development.  Also, to find more time for myself, schedule time off to go on vacation with my husband, and weekend hikes.

My Business goals will also benefit significantly from my personal goals.

Let’s start with long-term business goals that will take a couple of years to develop: Starting with continuing to build my name as a quilt pattern designer in the quilting world. Next, I will continue to find ways to work with different Fabric Companies. I would also like to continue to build my business into a profitable company.  Lastly, I want to grow my lecture and workshop offerings.


In 2020, I will continue to work on my Social Media, Blog, and Newsletter presents as short-term goals. In doing this, I plan to schedule daily Social Media posts that will feature information on my projects, personal and happenings. Also, work on getting back into Facebook Lives.  In my blog, I plan to develop a weekly blog post. Finally, my newsletters, I would like to include tips and much more to make them both educational and exciting.


Another short-term and ongoing goal is to d
evelop more patterns that use both the Studio 180 Design and Sue Pelland Designs tools that are exciting and eye-catching. These patterns will combine piecing and applique to create fun and exciting designs that will feature just a couple of tools as much as possible. Another goal for these patterns is to design them so they can be teachable quilts for shops.


I plan to accomplish all this with carefully scheduling and planning each week and help from my loving husband that is contributing more and more in the business. I also have an excellent support system from my friends and family. Additionally, I want to thank my Studio 180 Design and Sue Pelland Designs Certified Instructor family for all their support as well.

I want to finish this blog post with a big thank you to all my blog, newsletter, and social media followers, if it weren’t for you, I would not be where I am.


I hope you all have a wonderful and healthy 2020.


Tina
"Designs to Inspire"