


Block 3, also known as Blockbuster #4 - Capital T Variations, is made up of a combination of Flying Geese, Combination and Quarter Square Triangle units. We will be using the Studio 180 Design Wing Clipper® 1 and Tucker Trimmer® 1 which you can purchase from my website.

You will also be using 3 different colors, BG, C1, and C2 to make your units.
Before we start, make sure you Download your Block 3, and Blockbuster Block #4 Instructions, remember both are required to make you block.
Please remember that the pictures used in this tutorial are for the 9" block for the Wallhanging. Be sure to read the Downloaded Block Instructions to get the correct cutting and trimming sizes for the 12" block, which are indicated in (Blue) parenthesis.
Capital T Variations
Unit A - Flying Geese units:

2. On the wrong sides of the small squares, you will need to mark two lines each 1/4" away from the center diagonal, I recommend the Quilter's Magic Wand for this.

3. Position two C2 small squares on the diagonally opposite corners on a C1 Square. Note: Nudge your small squares toward the center just about 3 or 4 threads from the raw edge of the larger square. You may want to also pin these units in place.
4. Stitch on the lines, then cut apart between the lines of stitching. Pressing the seams toward the small triangles.

5. Position the remaining smaller squares on each unit, nudging the smaller squares just like you did before.

6. Stitch on the lines, then cut the units apart between the lines of the stitching on the center diagonal. Press the seam toward the small triangles.
 |
| Right Handed |
 |
| Left Handed |
 |
| Right Handed |
 |
| Left Handed |

9. Repeat using the C1 (small) squares and C2 (Larger) Squares to make the other flying geese units you will need according to your instructions.
Make 4 Unit A1 Flying Geese Units
Make 4 Unit A2 Flying Geese Units
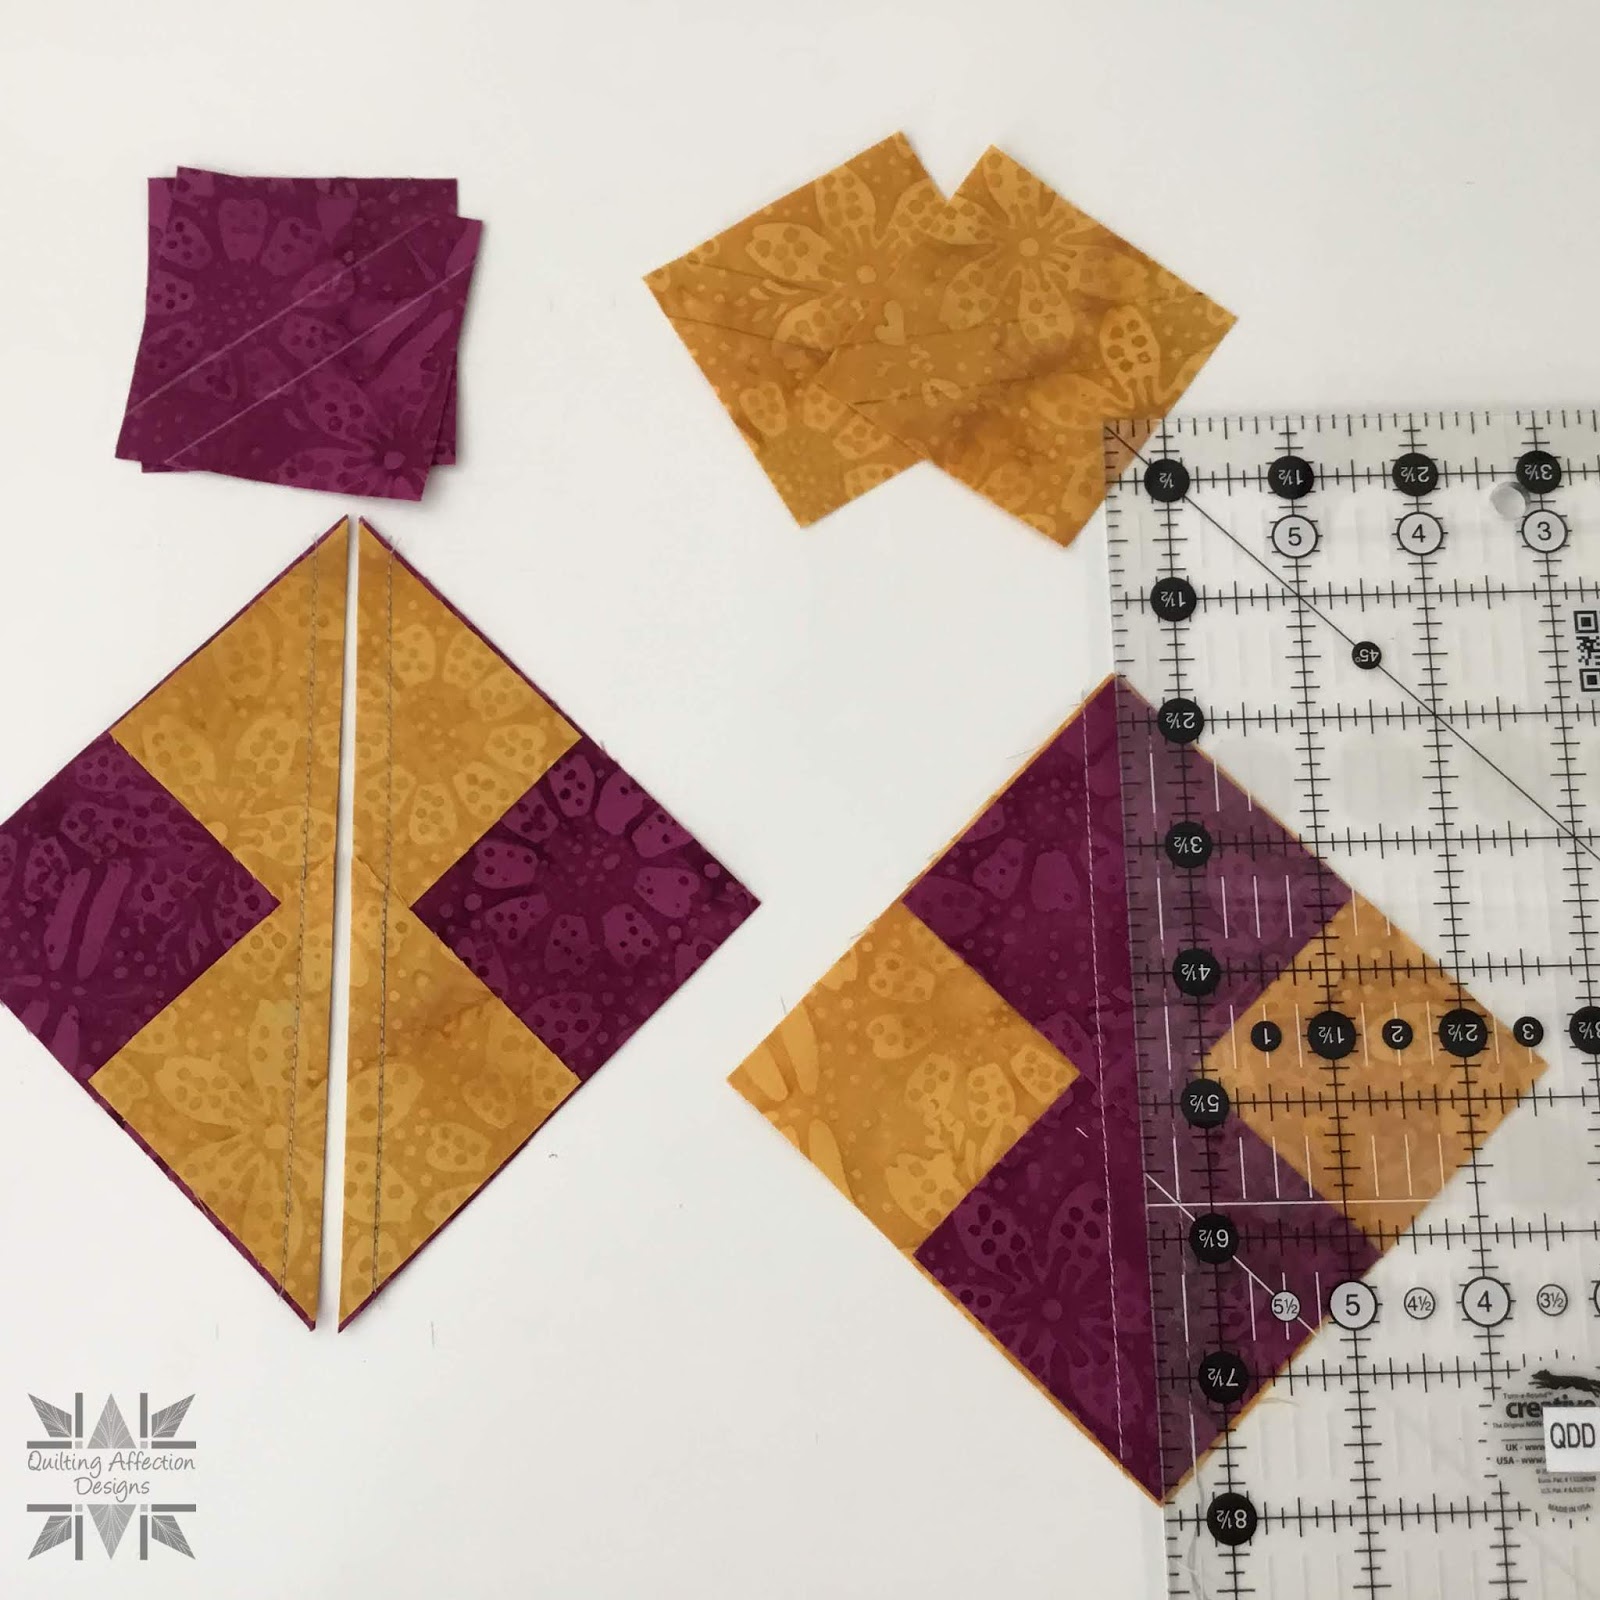
Unit B - Combination Units
1. Gather (2) BG squares, (1) C1 Square and (1) C2 Square.

3. Layer a marked C1 square on top a C2 square. Making sure to line up all the edges and points.

4. Stitch on the lines and cut down the middle and Press according to your instructions. Remember Don't trim these units down to size just yet. We need to finish first.

5. Position your half square unit on top of a BG square with right side together.
6. Mark two stitching lines on either side of the center diagonal line using your Quilter's Magic Wand on the wrong sides of the two half square triangles.
7. Stitch on the drawn lines, and cut down the middle. Pressing according to your block instructions.
 |
| Right Handed |
 |
| Left Handed |
8. Position the Tucker Trimmer over the combination unit, carefully aligning the diagonal sizing line with the stitched seam line of the fabric square. Referring to you block instructions for Trim downsizes for your block. Trim up and across the top. (Note: the trim size used in these pictures are for the 9" block only)
 |
| Right Handed |
 |
| Left Handed |
Make 4 Unit B combination units.
Unit C - Quarter Square Triangle Units
In both Block 1 and 2, we have made
Quarter Square Triangles. So, we should be getting the hang of making the
units. But here is one more quick walkthrough. We will be making
two-color quarter square triangle this time, and we only need one.
1. Gather fabrics and follow the cutting chart on your Download Block Instruction sheet and cut all your squares for Unit C-Quarter Square Triangles.

2. Using your Quilter's Magic Wand, mark two stitching lines on either side of the center diagonal line on the wrong side of the C1 Square.
3. Position the C3 squares on squares on top of the other cut squares, as indicated in your Block 1 instructions. Making sure to line up all the edges and points. You may want to pin the units together in place for you to begin stitching.

4. Cut down the middle and Press according to your instructions. Don't trim these units down to size just yet. We need to finish first.

5. Next, position the two half square triangles unit together assuring the C2 fabric are the opposite of each other.

6. Using your Quilter's Magic Wand Mark two more stitching lines on the back of the one the half square triangles. Stitch and Cut down the middle as we did before with the Half Square Triangles.
7. Press the seams as indicated in the instructions. It is recommended that you spin your Quarter Square seams to make sure they lay flat.
 |
| Right Handed |
 |
| Left Handed |
8. Position the Tucker Trimmer over the Quarter Square Triangle unit, carefully aligning the diagonal sizing line with the stitched seam line of the fabric square. Trim up and across the top. (Note: the trim size used in these pictures are for the 6" block only)
 |
| Right Handed |
 |
| Left Handed |
Make 1 Unit C Quarter Square units.
Block Assembly


To finish your Block 3, follow your Blockbuster page Download to make sure you lay out the units correctly. Be sure to watch your unit placements, especially for the Quarter Square Triangles.
Again, I'm leaving the pressing to your preferences so you can either press your units open or to the side, so they nest together. I have supplied a pressing diagram that is located on the last page of the block 3 instructions.
Again, I'm leaving the pressing to your preferences so you can either press your units open or to the side, so they nest together. I have supplied a pressing diagram that is located on the last page of the block 3 instructions.
Have fun making Block 3-Capital T Variation, and I hope you will share your photos in the comments below or on the Graceful Points Facebook Group.
The next Block will be posted on Friday, March 15th. We will be using the Square Squared® 6" tool. You can purchase them on my website.
Have fun with the block and a great weekend!
Tina
"Designs to Inspire"
No comments:
Post a Comment