

Block Party Block #58—Crossed Patch is a fun and simple quilt block that uses only two units: the Shaded Four Patch and the Four Patch. To create these units, you will need your Tucker Trimmer, the Four Patch Square Up tools, and the Shaded Four Patch Technique Sheet.

This tutorial will guide you through making the units for
this block. It does not replace the tool instructions and technique sheet. I used scraps from Deb Tucker’s Studio 180
Design Bubbles, Curves, and Corner fabric that I have left over. I chose four
different fabrics from the collection and white for the background.
Before we begin, download your free Block Party Block https://bit.ly/BPB58CrossedPatch.
Determine Block and Unit Size
First, decide on the block and unit size you want to create.
Then, refer to your tool and technique sheet along with the cutting charts to
find the starting strip sizes for the units you will be making.
Shaded Four Patch

For this unit, we will use a strip piecing method to make our units two at a time, and then we will trim them down with our Tucker Trimmer. Please cut your strips and rectangles according to the chart on your technique sheet. To clarify their roles in the unit, the Narrow Strip corresponds to the light teal fabric square, the Wide Strip represents the blue triangles, and the Rectangle is made from the white background fabric.


Now that we have our strips, let’s piece the narrow and wide
strips together by stitching them lengthwise. You can create two strip sets or
just one and cut it in half to make two sets. Press toward the wide strip.
 |
| Right-Handed |
 |
| Left-Handed |
Next, place the two-piece strip sets right sides together on
the cutting mat, ensuring the narrow strips are opposite each other. Make
sub-cuts the width of the narrow strip, keeping the paired sub-cuts together.
Each sub-cut will yield two Shaded Four Patch units. Cut as many as you need
according to the pattern.
 |
| Stitch |
 |
| Snip |
Stitch each pair together along the long side. Cut the center of the stitched pairs between the two squares, cutting close to the seam allowance or just beyond it. Press your seams in the opposite direction.

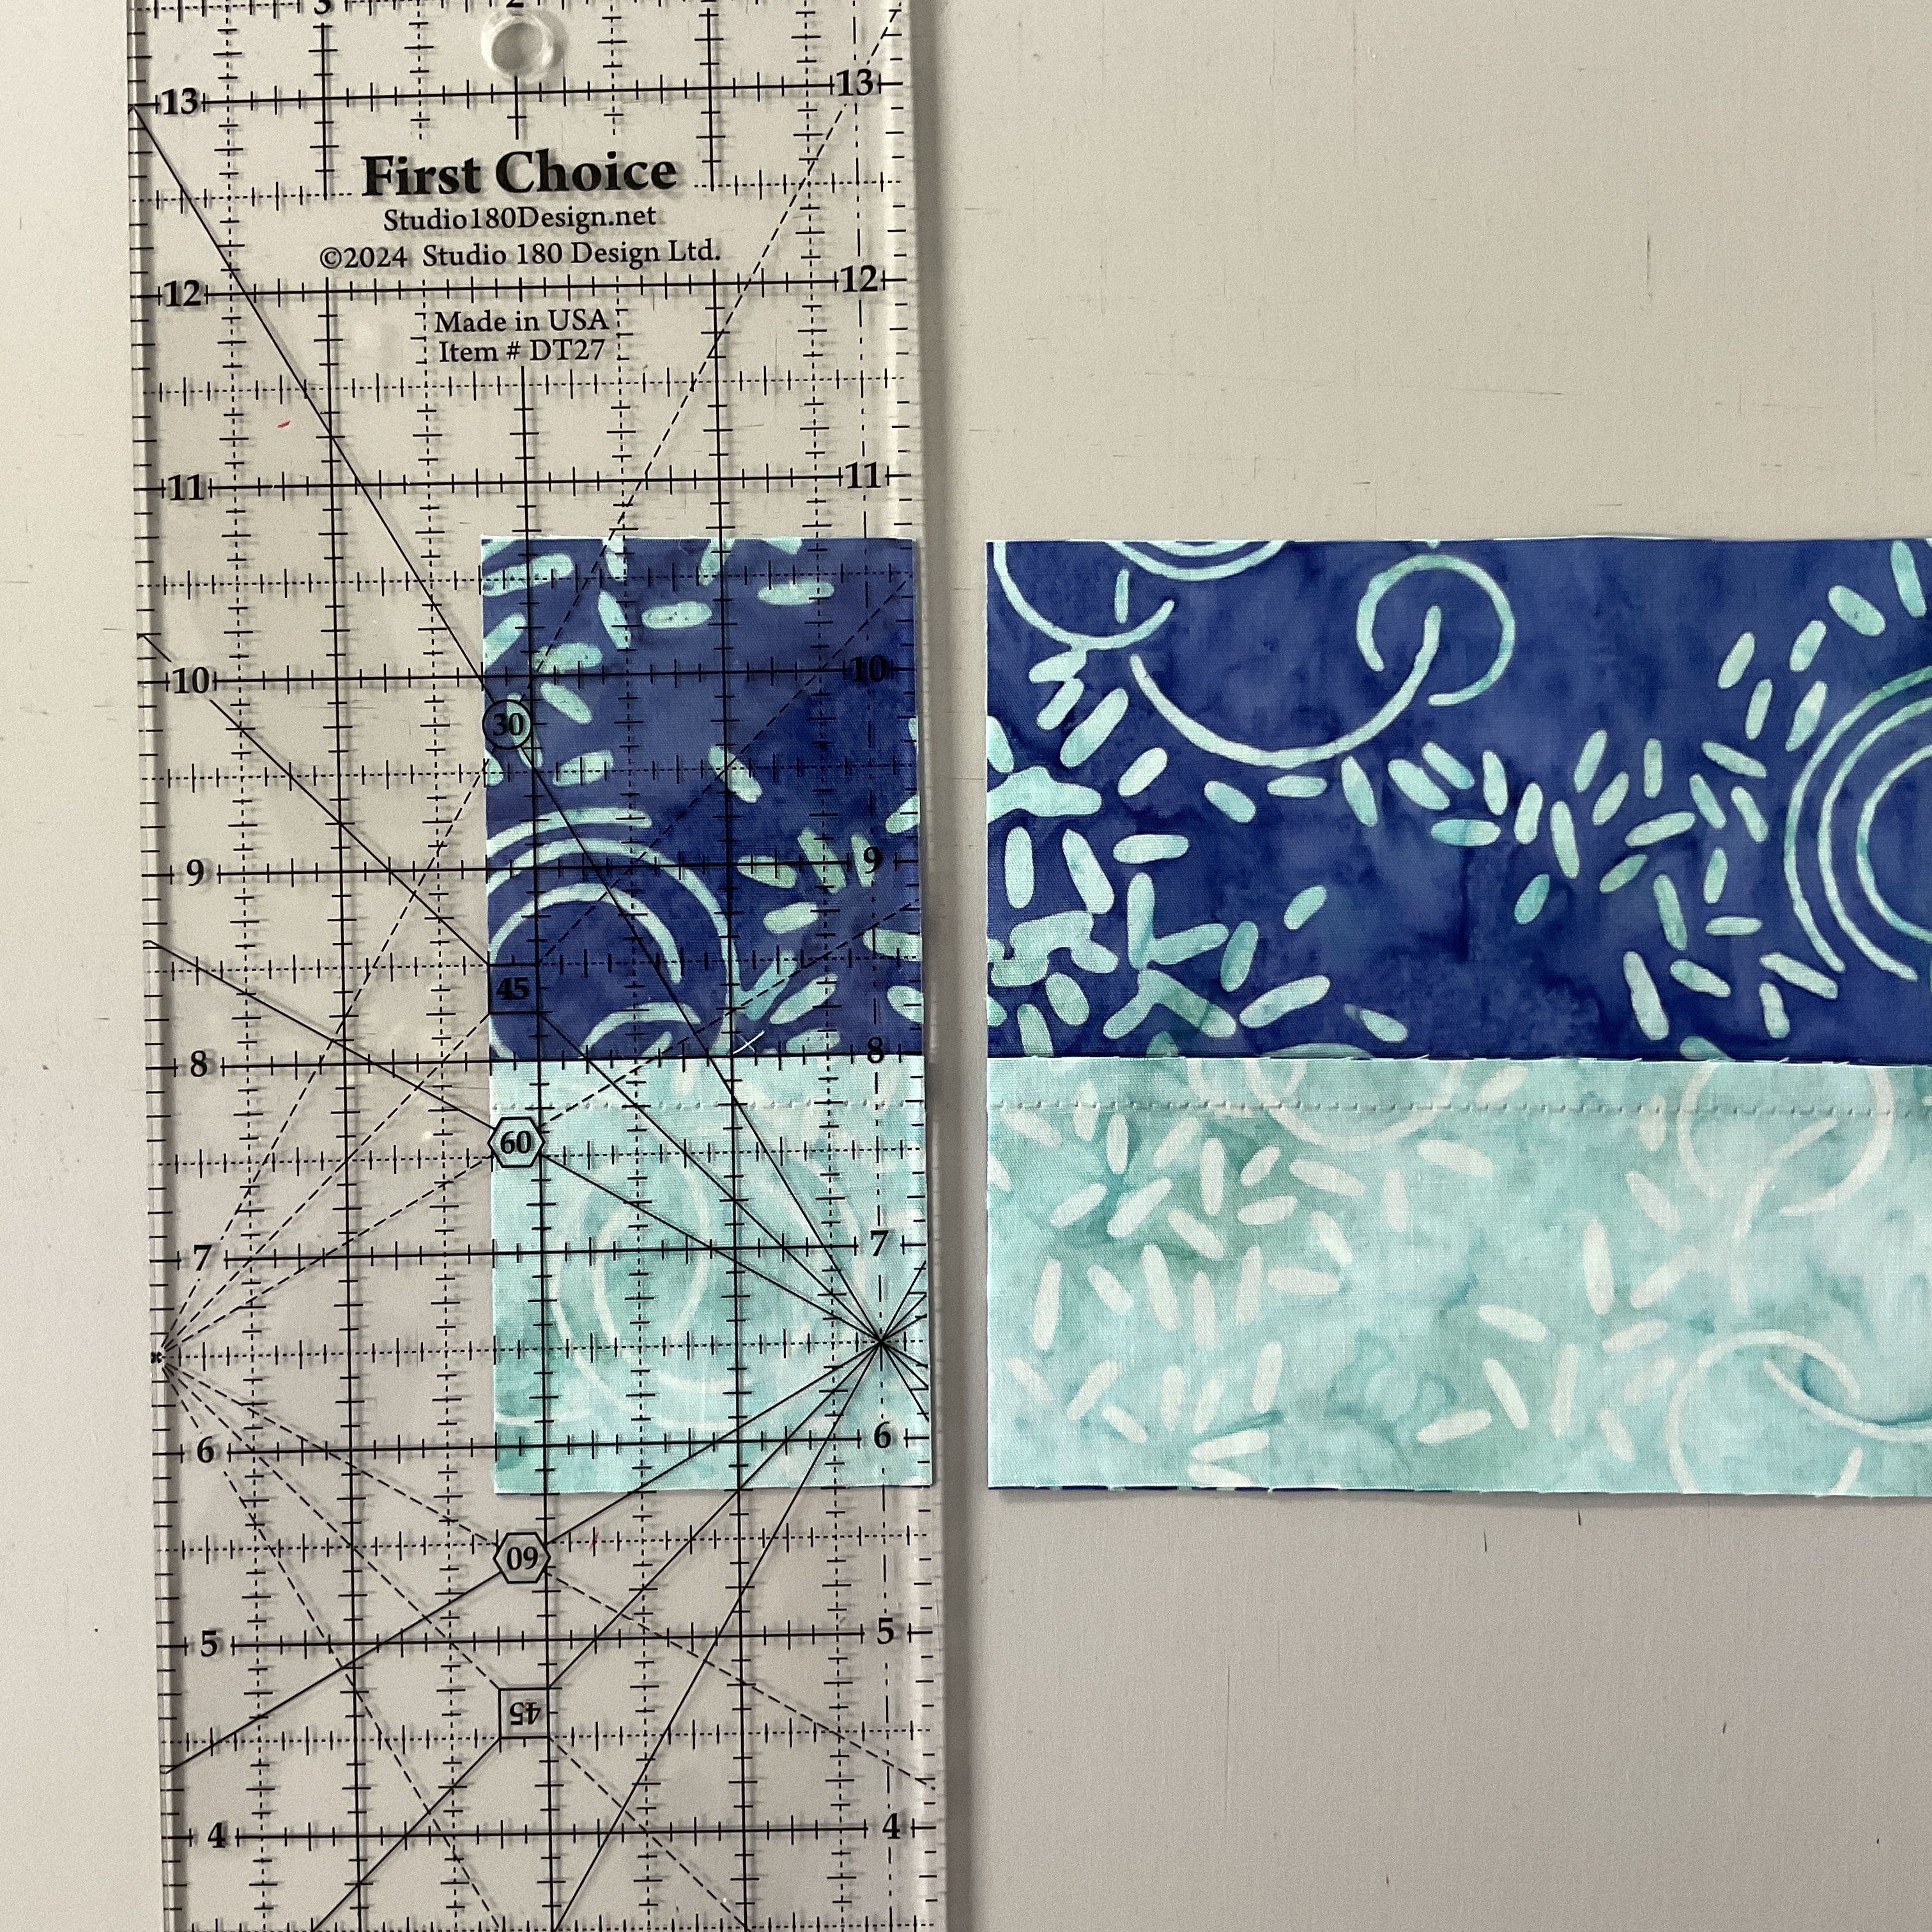
Now, select a ruler with a long 45-degree angle; I suggest using the First Choice Ruler for this part. Find the 45-degree angle dashed line on the ruler used for marking. Place both 45-degree lines on the small square's seam lines, ensuring you align with the corner where the seams meet. Draw a line along the angle. Rotate the unit and repeat on the other side to draw another 45-degree line. Center the large rectangle over the unit with right sides together.

Stitch along both drawn lines. Cut ¼” away from the stitched lines on both sides, and press toward the large triangle.
 |
| Right-Handed |
 |
| Left-Handed |
Using your Tucker Trimmer, align the Sizing Diagonal line with the sewn seam and the common diagonal along the other seam. Trim up and across.
 |
| Right-Handed |
 |
| Left-Handed |
Rotate your unit 180 degrees, replace the Tucker Trimmer, realign the sizing and cleanup lines on the previously trimmed edges, and trim the final two sides of the unit.
You will need to make a total of 8 Shaded Four Patch units.
Four Patch Units

Next, we will create the four patch units using the strip-piecing method. Using the tool instructions and cutting chart, cut your strips based on the unit size you will be making. I recommend using the ¼” increment line, as it allows for slightly more room for trimming and makes it easier to cut 1/4” than 1/8”.


Once you cut your strips, pair your colors together to make two different-colored strip sets. Place the strips right sides together and stitch down the long side. Press the seams to one side or open.

 |
| Right-Handed |
 |
| Left-Handed |
Now, take the two-piece strip sets and place them right sides together on the cutting mat, making sure the colored fabrics are positioned opposite each other and nesting the seams. Sub-cut along the strips, keeping the pairs together.

Stitch the sub-cut pairs together and press your seams to the side or open.
 |
| Right-Handed |
 |
| Left-Handed |
Using your Four Patch Square Up, align the finished-size circle over the seam intersection of the Four Patch unit. Line the dashed lines radiating from the center with your seams, then trim up and across the unit.
 |
| Right-Handed |
 |
| Left-Handed |
Rotate your unit 180 degrees, reposition the Four Patch Square Up, and align the finished-size circle with the center and dashed lines on the seams. Make sure the trimmed edges are aligned with the cut-size clean-up lines. Trim up and across the unit.
You will need to make 8 Four Patch units for this block.
Block Assembly

Layout two Shaded Four Patch and Two Four Patch units as shown in the picture above. Stitch this quarter of the block together, and repeat three more times. Press as desired.

Position and lay out the four block quarters as shown. Stitch them together and press as desired to finish your Crossed Patch Block.


