
You can purchase Block 2 Here. Remember, you have two options for buying the pattern. First, My website is set up for both Printed and Downloadable PDF versions. For my International customers, I have an Etsy website.
Also, Today 7/16, at 3:30 pm, I will be doing a Live Tutorial on the block and discussing how to make each of its elements. Plus answering any questions, my Quilting Affection Design Block of the Month Facebook Group.
Let's get started with Month 2's Tutorial.

Month 2 is now available for purchase. The tools you will need for this month's block are the Tucker Trimmer and Square Squared tools. This block makes into 6" (Wall) and 9" (Queen).
For this month's block, you will be making two different types of Diamond in Square units. Additionally, you will be introduced to the Triangle Pizazz units that use your Tucker Trimmer tools.
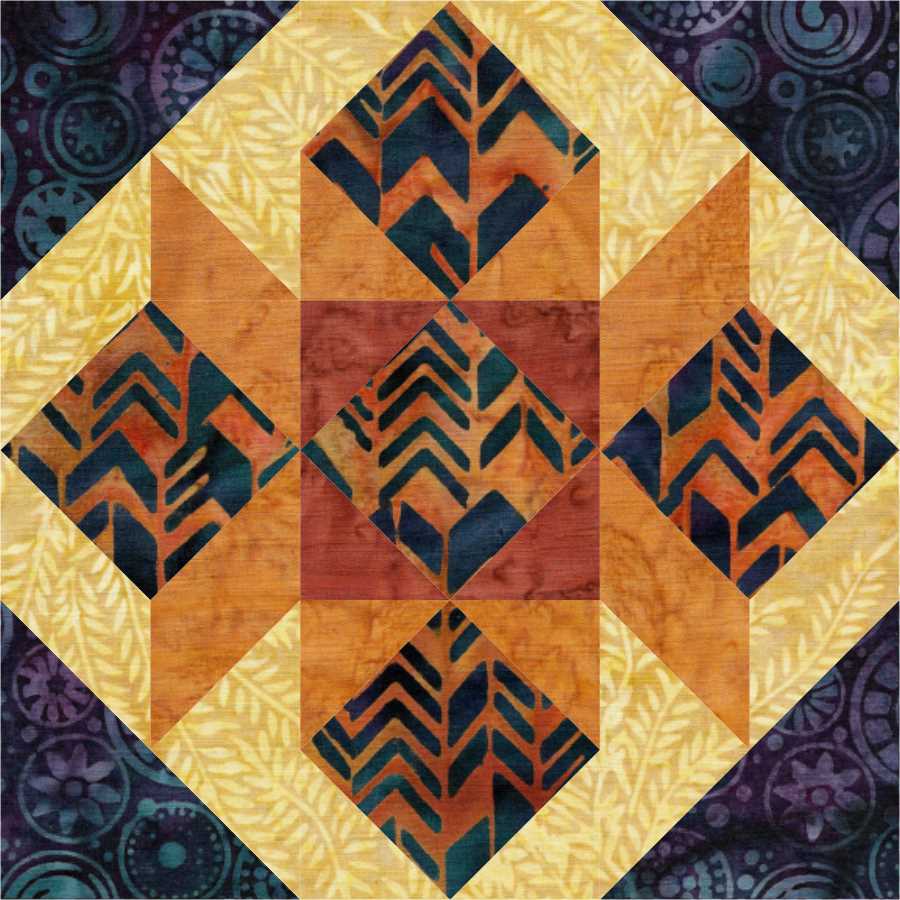
Diamond in a Square

Last month we made Diamond in Square units (read the blog post), this month we will continue to make them, plus we will be making Dual Color Diamond in Square units.
Dual-color Diamond in a Square is made the same exact way that standard Diamond in a Square is made, except we will be using two different colors.

After your center square is cut, you will cut your tan and Gold squares in half diagonally to make triangles. Place a Tan and Gold triangle on opposite sides of each other. Stitch and press away from the center square. Remember to stitch the center square with the triangle on the bottom.

Next, add another Tan and Gold triangle on the opposite side of each other. Then Stitch, Press, and trim just like you would with a regular Diamond in a Square unit.

Triangle Pizazz A units

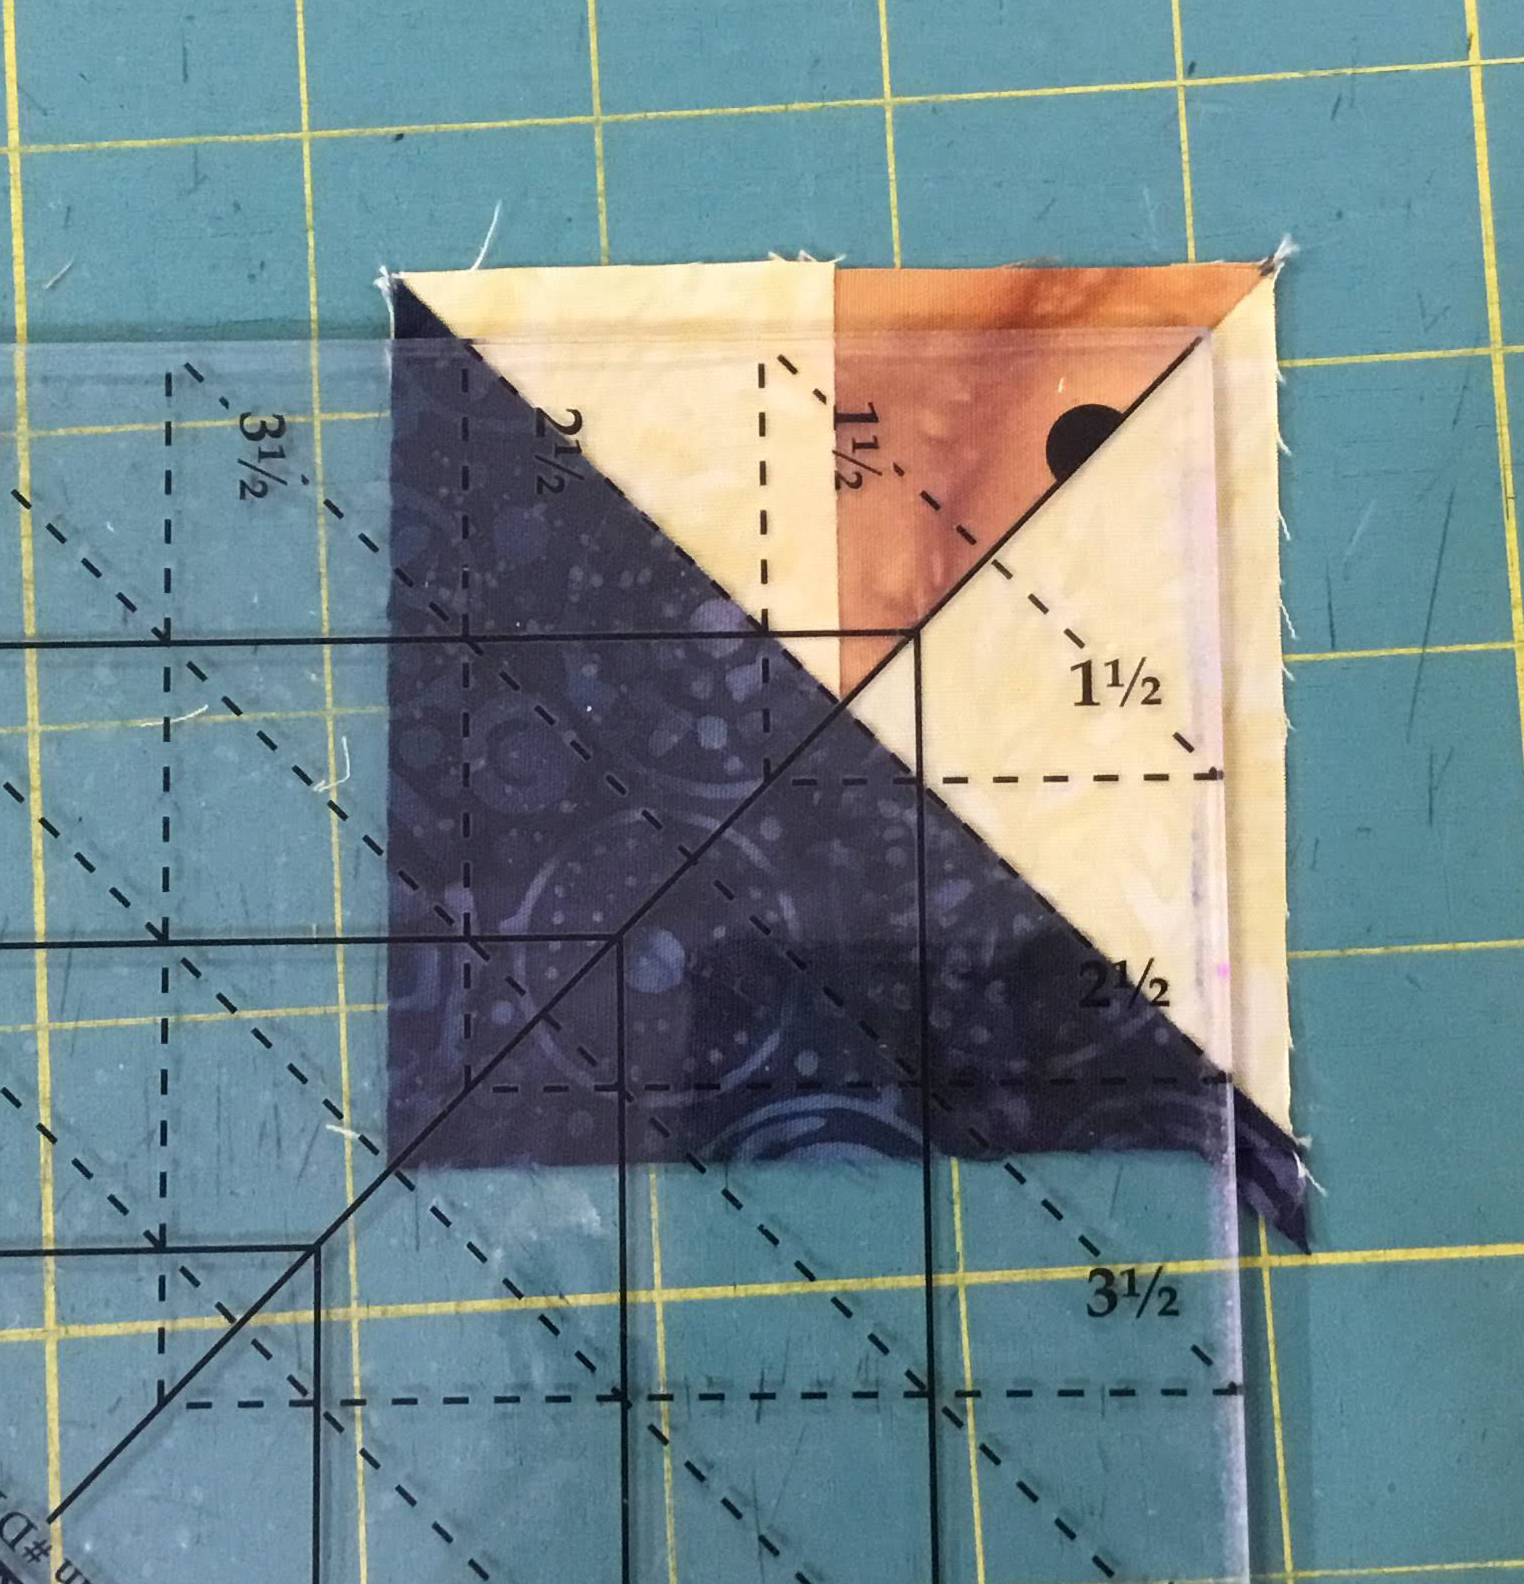
Now we need to introduce the Triangle Pizazz technique. This technique uses the Tucker Trimmer tool and is based on the Triangle Pizazz Technique Sheet. If you like this technique, you can purchase the Technique Sheet on my website.

Start by drawing a diagonal stitching line on a Gold Square. Position the Gold Square on one end of the Tan rectangles with the right side facing each other. The diagonal line should run the top left corner to the right (see above picture). Stitch on the diagonal line, trim the excess 1/4" from the stitching line. Press away from the rectangle.


Position two of the A rectangle units, as shown above, and stitch the pair together along the sides of the rectangles.

Snip the seam allowance at the halfway between the two triangles all the seam allowance. Press the seams in opposite directions away from the triangle.
Using a ruler with a 45° angle mark. Place the 45° line on the edge of the unit and Draw a 45° sewing line on the wrong sides of the unit. Making sure the line runs from top to bottom and goes through the corner of the triangle where the stitching lines meet. Draw a second line on the opposite side of the unit through the other triangle.

Center the unit on a Blue Rectangle, and stitch on the lines.

Cut a 1/4" from the stitch lines on both sides. Press toward the blue larger triangle.
 |
| Right Handed |
 |
| Left Handed |
Position the sizing diagonal of the Tucker Trimmer over the unit, so that is lines up with the unit size diagonal seam line of the Triangle Pizazz and assuring the common diagonal lines up with the triangle at the center. Trim the first two sides.
 |
| Right Handed |
 |
| Left Handed |

The Triangle Pizazz Unit B, it made the same way as Unit A, but the starting small triangles are rotated in the opposite direction.

Draw a diagonal line on the small Gold squares. Place the Gold squares to the diagonal goes from the top right to the bottom left on a tan rectangle: Stitch, trim 1/4" from the seam, and press.

Stitch a pair of units along the sides of the triangle edge. Snip the seams in the middle and press the seams in opposite directions.

Using a ruler mark the 45° lines on the wrong sides of the unit, that run top to bottom and runs through the corner of the triangle unit. Repeating on the opposite corner.

Center the unit over a large blue triangle and stitch on the lines. Trim 1/4" away from each of the stitch lines. Press toward the blue triangle.
 |
| Right Handed |
 |
| Left Handed |
Position the tucker trimmer over the unit, so the lines up line up with the unit size and the diagonal seam line of the Triangle Pizazz unit. Trim the first two sides.
 |
| Right Handed |
 |
| Left Handed |

Assembly

Now comes the easy part of stitching all your units into beautiful blocks, referring to your pattern instructions to complete your 4 blocks.

See you on August 15th for the release of Month 3 and tutorials. Remember, you join our Quilting Affection Designs Block of the Month Facebook Group to share your completed blocks.
No comments:
Post a Comment