One of my long-term goals for my business is to gain a better knowledge and practice on using the Studio 180 Design rulers and become a Studio 180 Design Certified Instructor.
For 2018 I have set-up a fun little challenge for myself to complete all the Studio 180 Design Blockbusters.
What is the Challenge?
The challenge is to complete each of the Studio 180 Design blockbusters series weekly and report my finished block to all of you to see. Each Friday, I will be posting a new block from the Blockbuster Series starting with #1.
What is the BlockBuster Series?
Well Studio 180 Designs, designs unique blocks that can be made from their tools. Each of the blocks works through the fundamentals each of the rulers, as well as the companion Technique Sheets.
Check out BlockBuster Roundup: Series 1 blog post for more information and to see all the blocks.
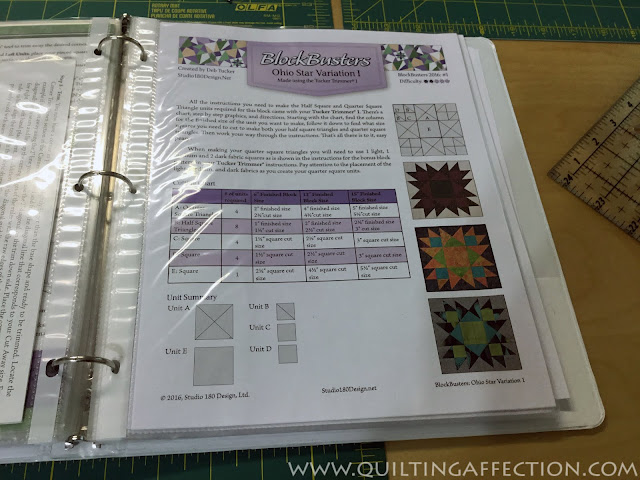
Before I started my first block, I printed all the ruler information and BlockBuster projects and put them in a binder to keep all the Studio 180 design papers together. This is so handy.
Let's begin!!
BlockBuster #1 – Ohio Star Variation 1
BlockBuster #1, the Ohio Star Variation 1 uses the Tucker Trimmer® 1 Ruler. The first step in making any block or quilt is to read the instructions thoroughly.
There are a few tools you will need to complete this block: Tucker Trimmer® 1 Ruler, rotary cutter, Quilter's Magic Wand (optional), marking pencils and cutting mat. You will want to have your ruler instruction nearby. Also, you will be referring to them a lot.
Now that I have my fabric and block size figured out, I then referred to the BlockBuster 1 block sheet to get my unit sizes for each of the five units that make up the Quarter Squares Triangles, Half Square Triangles, and Squares.
Once I figured out my unit sizes I referred to the ruler instructions to get the fabric cutting sizes.
Unit A - Quarter Square Triangles
For Unit A, the quarter square triangles you will need 3 colors of fabric. I have (2) Printed color, (1) White (background) and (1) Yellow fabric all cut at the same size according to the Square size chart in your ruler's instructions.
Next, Flip the square over so that the wrong side of the fabric is facing you and draw two diagonal lines 1/4" on either side of the center diagonal using your marking tool. I love using the Quilter's Magic Wand by Studio 180 designs for getting my accurate 1/4 mark.
Then, layer White fabric square and print fabric square with right sides together, and yellow fabric square and print fabric square together, and stitch on the 1/4" line, one each side of the center.
Then cut down the middle giving you 2 of each half square triangles (Don't trim yet). Press open.
Now turn over one of the half square triangle units and draw two diagonal lines 1/4" on either side of the center diagonal using your marking tool.
Layer this on the orange/print half square triangle and make sure your fabric align your fabric seams.
Stitch on the drawn lines, cutting down the middle and press open. Repeat with the other half square triangles.
Trim the Quarter Square Triangle, using you Tucker Trimmer® 1 ruler.
Make 4 Unit A's.
Unit B - Half Square Triangles
For the Unit B half square triangles, you will make them the same way as done in Unit A.
Unit C, D, and E - Squares
For these remaining units, you will just need to cut the squares to size according to the BlockBuster #1 sheet.
Now we have all the units made let start assembling the block together, starting with the corner units.
Corner Units Assembly
To make the 4 corner units for the block, you will use Unit B, C, and D.
Stitch a white square to each of the half square triangles to make 4 row 1 and repeat with half square triangles and an orange triangle to make 4 row 2. Stitch the rows together to make the 4 corner units.
Now that all the units are sewn together, it’s time to sew the blocks together into rows. Reference the layout above.
Stitch each of the rows together.
Press open, and BlockBuster #1 is now complete.
BlockBuster #1 was fun and easy to make. I hope you will give this block and ruler a try sometime, you will like them a lot.
I can't wait to start BlockBuster #2. See you next Friday.


What a pretty block!
ReplyDeleteI just saw a scrappy version of this block on FB. Glad I found your blog with directions, thank you !
ReplyDelete