Monday, November 25, 2019

Island Batik Ambassador Tool Time


For many of us Island Batik Ambassadors, the theme of November Tool Time.  We were to come up with a particular project that uses a specialty tool, template, or dies.  


As a Sue Pelland Design's Certified Instructor, I'm trying to make quilts using her products for Trunk Shows, plus this gives me a chance to play and practice. So I decided I was going to pick a project from my Hearts and More Book by Sue Pelland Designs. The project I choose was the Drunkards Path Quilt.  

Most of your Drunkards path quilts are traditionally two colors, but I decided to use three different colors from the Island Batik "Graphic Gems" Collection.  I just love the bold colors in this collection.

The drunkard's path in this project was not your standard curve piecing, this version we will be making fast and easy way using the Sue Pelland Designs Hearts and More Template to make applique Drunkard path blocks. 


You start by cutting two different sized squares out. Then take the larger squares to your ironing board and add a piece of Fubile webbing on the reverse side of the square. Sue Pelland recommends, and I have to agree to use MistyFuse Fusible webbing. I love it do to it does not gum up my needle, and plus, your fabrics don't feel stiff after it is applied. It is like there is nothing there.


Once the Fubile webbing is cool, it was time to cut out the perfect circles. Place your fused fabric on your cutting mat. Fold the fabric on the diagonal and finger press in place. Then I placed the Hearts and More Template D on the fold, making sure the centerline was lined up on the fold, and the arrow was pointing toward the center of the fabric. 


Using my 28mm rotary cutting blade, I cut a 5" circle of the fabrics. Making sure to make a clean cut all the way around.


Back at the ironing board, I placed the frame down right side down on the applique pressing sheet.


I placed a smalled square that was cut the same size as the Fusible webbing that was on the back of the framed piece and fused the pieces together.


The fused pieces look great.


Now we are going to take the center circles we cut out of the frame and center them on the larger square. To find the center, I folded the square and circles and finger press line the folds to help with the lineup.


Once, the centered circle was centered on the larger square.  I fused the pieces together.  


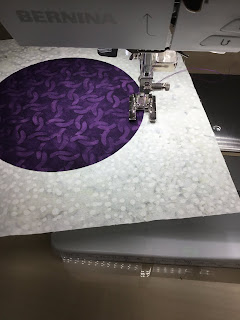
Then, the final touch was to use a blanket stitch and round the circles.  Just remember to take your time, and it will look really lovely.


Once all your circles are stitched down, it was time to square the block.


And cut the square in half.


And in half once more to get four Drunkard Path units.  Fast, easy, and nice-looking blocks every time.


Now it is time to sew them all together.  I laid out the blocks, in a two by two layout first and then stitched them all together to form a four by four grid layout in two different color schemes.  Then finished them off by stitching all the grids together.


Here is my final quilt, now this quilt is finished and ready to go to my longarmer.  If you have not tried out the Sue Pelland Hearts and More Templates, you may want to before you start your next Drunkards Path quilt.  This is a fun and easy way to make your quilt.

Be sure to come back for the Decembers project, to finish off the exciting Island Batik Ambassador year.  


Thursday, November 14, 2019

Island Batik Ambassador: Top it Off


I finally getting caught up from the preparing and excitement at being at the Houston Quilt Market and Festival. 


My first goal once I was recovered was to get my October Island Batik Project finished for you all to see. And today, I have finally finished it.


October's task was to make a Holiday table topper and have some applique worked into the project.  So after I looked through my Island Batik Fabrics, I decided on a few fabrics that would make my project look have a Christmas feel. 

This project was going to be made from some of my favorite tools, the Studio 180 Design Square Squared Tool, and the Sue Pelland Designs Leaves Galore Template


 I started with making some Little House units for this project.


Next, I needed to cut out some leaves for the center of the Little House units. Next, I prepared my leave fabric by applying MistyFuse Fusible Webbing on the back.  Once the MistyFuse had cooled, I used my Sue Pelland Design Leaves Galore "Norme" Template to cut out 3" Leaves using my 28mm Rotary cutter.  With to passes, I had enough 3" leaves for my project.


Then using a straight ruler, I found the bottom middle and the bottom 1/4" mark. These would be my placement lines for the tips of the leaves.


At the ironing board, I placed the tips of the leaves on the placement lines.  Once the leaves are in proper placement, I fused them to the fabric and stitch them in place.


Next, I need to add some "S" And "Z" shapes using the same Leaves Galore Template. With the MistyFuse down on the cutting mat, I start cutting out the "S" Shapes.  For the "Z" Shapes, I would place the Fused side up.


Now I need to mark some 1/4" placement lines in the corners of a square.  These lines will be used for the placement of the "S" and "Z" Shapes.  


At the Ironing Board, place the shapes tips to match up across two corners and inside the 1/4" marks.  Once in place, fuse the shapes in place and then stitch them in place.


Once I had them everything ready, I put the blocks together and stitched all my table runner together. Then it was time to quilt it. For the quilting, I used my Leaves Galore, and Iron off chalk I some quilting lines and began quilting away.


Here is the finished product, I just love this table runner.  What a fun project and love how piecing and applique can work together. The Sue Pelland Designs Leaves Galore templates to make the cutting so much easier.

Stay tuned for the Novembers Island Batik Ambassador project.

Tina 
"Designs to Inspire"