Showing posts with label Month 1. Show all posts

Tuesday, June 16, 2020

Aztec Dance BOM - Month 1 - Part 2


Welcome back to Part two of the Month 1 block for the Aztec Dance BOM.  If you missed Part One you can catch up HERE

Today, we are making the four Diamond in Square units for the center of our blocks.  


Gather your Tan squares and Accent #1 Strip.
Right Handed


Left Handed

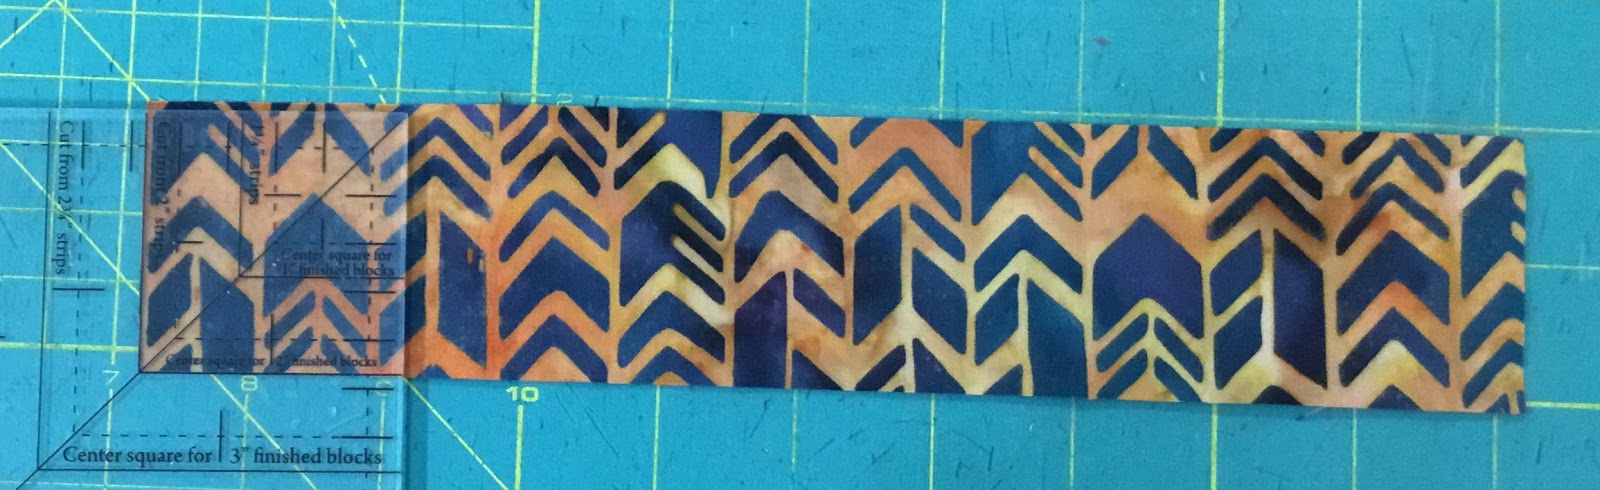
Position the Center Square Section of the Square Squared tool over the Accent #1 strip.  Placing the Square Squared tool on the trimmed edge of the strip, lining up the corner of the strip with the center for the size of the unit. Cut up the side and across the top to get a precise unit. Repeat to make 4 center squares.


Cut the Tan squares on the diagonal once to yield two triangles from each square to Tan triangles.


Position two triangles on opposite sides of the center square. 


Stitch with the square on top of the triangle for best visibility using a 1/4" seam. 


Press seams away from the center square.
Position the remaining two tan triangles on the Accent #1 center square. Stitching two triangles using a 1/4" seam allowance and press seams again away from the center square.


Right Handed

Left Handed
Position the Trim Down Section of the Square Squared tool over the unit. Be sure to refer to your pattern instructions for trim sizes. Focusing the "X" of the finished unit sizes over the sewn seams. Trim up the side and across the top.


Right Handed

Left Handed

Rotate your Diamond in a Square Unit and reposition the Square Squared tool and the two remaining sides. Again, trim up the side and across the top.


Assembly


Now that all your units are now complete it is time to assemble the units into blocks, referring to your pattern instructions to complete your  4 blocks.


See you on July 15th, for the release of Month 2 and tutorials. Remember, you join our Quilting Affection Designs Block of the Month Facebook Group, to share your completed blocks.  



Also, to Join our Quilting Affection Groupies Facebook Group, to receive a Free Block Pattern each month. 

Tina

Monday, June 15, 2020

Aztec Dance BOM - Month 1 - Part 1


Welcome to the Aztec Dance Block of the Month Kick-Off. I'm excited to get this 6-Month Block of Month started.  


Starting today, and every 15th of the month, I will be releasing a new block in the series and posting a tutorial right here in my blog on how to make the specific blocks.  Also, I will be doing Facebook Live tutorials in my Quilting Affection Design Block of the Month Facebook Group.  


You have two options for purchasing the pattern. First, My website is set up for both Printed and Downloadable PDF versions. For my International customers, I have an Etsy website, especially for you, where you can purchase the patterns as a Downloadable PDF only so you don't have to worry about shipping costs. 


On my website, I have set up an exclusive page for the Aztec Dance Block of the Month. This page will provide all the essential information that will get you ready to start this program, such as the General Instructions, possible color combinations, and tutorial links. 


The fabrics I used in my quilt cover are from the Island Batik "Sundance" Collection. If you are interested in other possible color combinations that this Block of the Month will look beautiful in, then check out the Aztec Dance Block of the Month page on my website.


You will have to decide which size of quilt you wish to make, the 56" x 56" (Wall Hanging), 90" x 90" Queen size. What size do you plan to make?


In designing this Block of the Month, I wanted to create something that will help develop your skills in the three fundamental tools of the Studio 180 Design tools. Depending on which size of quilt you have chosen to make. You will need the following: 

  • Wall Hanging 
    • Tucker Trimmer® I
    • Wing Clipper® I
    • Square Squared® 6."

  • Queen Size
    • Tucker Trimmer® III
    • Wing Clipper® I
    • Large Square Squared®


Now let's get started with Month 1's tutorial!


Month 1 is now available for purchase. The tools you will need for this month's block are the Tucker Trimmer and Square Squared tools. This block makes up into 6" (Wall) and 9" (Queen). 

For this month's block, you will be making three different units, Half Square Triangles, Quarter Square, and Diamond in a Square.


When you have your pattern, please read through the instructions thoroughly. Cut out and organize your pieces. I arrange my pieces on paper plates, writing down the unit sizes, and the color and sizes of the pieces needed.


Half Square Triangles

Making Half Square triangles is one of the most fundamental units in quilting, and using the tucker trimmer is so much easier to get quick and accurate units every time.


Start by marking two diagonal lines on the reverse side of your gold fabric squares using your favorite marking tool and Quilter's Magic Wand, these lines are now your stitching lines. Layer them with a Blue fabric square. 


Stitch on the lines, then cut them down the middle. Press according to the instructions.


Right Handed

Left Handed
Once you have them all pressed, take them to your cutting mat and Position the Tucker Trimmer® over the unit, carefully align the common diagonal and sizing diagonal line with the stitch line for the size of the block you are making, refer to your pattern instructions. 
 Trim the sides and across the top first.


Rotate the unit 180° and line up the Tucker Trimmer and trim the remaining sides to measure the cut size for the units you are making, refer to your pattern for exact sizes.


Once the unit is complete, put them back on the paper plates, so they are not lost, and set them aside.  Now it is time to make the Quarter Square Triangles.

Quarter Square Triangles


Quarter Square Triangles start out the same way as you would make Half Square Triangles, except you start out with slightly oversized squares so we can cut and sew them twice. 


Start by marking the two diagonal lines using your Quilter's Magic Wand on the reverse side of the Rust squares.  Layer the Blue and Rust together and repeat with Rust and Tan fabric squares. Stitch on the lines, cut, and press according to your pattern instructions.


Stop, please don't trim these units just yet, we need position a Blue and Rust unit and a Rust and Tan unit with right sides together. Mark two stitching lines using your Quilter's Magic Wand on the wrong sides of the fabric.


 Stitch on the lines, cut apart and press according to your pattern instructions.


Right Hand


Left Handed
Now, we can use our Tucker Trimmer to trim our units. Position the Tucker Trimmer over the unit, size according to your pattern size. Carefully aligning the common diagonal and sizing line with the stitched seam. Trim the sides and across the top first.

Right Handed


Left Handed
Rotate the unit 180° and line up the Tucker Trimmer and trim the remaining sides to measure the cut size for the units you are making, refer to your pattern for exact sizes.


Thank you for joining me today for Part 1 Half Square Triangles and Quarter Square units. Be sure to check in tomorrow for part two on how to make the Diamond in the Square units using the Square Squared 6" Tool.

Saturday, September 14, 2019

Garden Enchantment Block 6, the final block.


Today is a release day for the final block 6 and finishing instructions for the Garden Enchantment BOM.  This Block of the Month has gone really fast when you are as busy as I am right now.  Purchase Block 6/Finishing Instructions HERE!


Block 6 consist of making units that are made from Half Square Triangles, Diamond in a Square and Picket units.


Since we have been making Half Square Triangles and Diamond in a Square unit throughout this quilt, we will be really concentrating on how to make the Picket units in this block post.


Picket units are easy to make.  Let's start with 2 small white squares, Dark Green and Turquoise Rectangles. 

Mark a sewing line corner to corner on the diagonal on the wrong sides of the small squares.   Place the small square on each of the rectangles with right sides together.  Assuring the diagonal for the dark green rectangle starts in the upper left and for the turquoise the diagonal start in the upper right-hand corner. 


Stitch on the drawn lines, trim 1/4" away from the sewn line.


Pressing the Dark Green Picket toward the small triangle, and the Turquoise Picket you will press toward the turquoise.


To trim up the units, position your Wing Clipper® over the unit, aligning one of the long diagonal guidelines on the ruler with a single diagonal seam.  Assuring the appropriate size trim down lines on the tool is inside the oversized unit.  Trim up the first two sides.


Rotate your Picket unit 180° and reposition the Wing Clipper® to align the trimmed raw edge with the unit size and "X" at the top with the sewn seam.  Trim again, up the side and across the top.


For the other Picket unit, position the Wing Clipper®, aligning the "X" at the top with the sewn seam.  Assuring the appropriate size trim down lines on the tool is inside the oversized unit.  Trim the first two sides,  then rotate, align, and trim the second two sides.


See that's how easy the Pickets units are to make. You can now assemble your units together.


To assemble, you will start by sewing the corners and the Pickets together into units.  Once you have units, you need to Layout your block and Stitch the units together.


Your Block is now complete.  You are now ready to assemble your Garden Enchantment Quilt Top together.  Have fun with your assembly as the quilt comes along. 

I look forward to seeing your finished quilt, and I hope you will share your photos on Facebook and Instagram using the #quiltingaffectiondesigns and #gardenenchantmentbom.

Tina
"Designs to Inspire"


Wednesday, August 14, 2019

Garden Enchantment Block 5


Today is the release day for the Garden Enchantment BOM Block 5.  You can now download Block 5 hereOnly 1 more month left in this Block of the Month Program, time just goes by fast.  Can't wait to see everyone's' finished quilts.


Block 5 consists of making 4 blocks that use the following units: Half Square Triangles, Flying Geese, and Diamond in a Square.  


Since we have made all these units in the past months, today's tutorial will be a quick overview.


Half Square Triangles


For this block, we will be making two different colorways, white/green, and white/purple. 


Right Handed


Left Handed

Trim your units to the size indicated in the pattern using your Tucker Trimmer® I tool.  Lining up the diagonal lines on the seam lines and trimming the first two sides.

Right Handed

Left Handed
Rotate the unit 180° and Line up the Tucker Trimmer® I tool once again and trim the remaining sides.

Repeat for the White/Purple Half Square Units.


Flying Geese


For the Flying Geese units, you will need your Wing Clipper® I tool.  We will be making 4 different colorways for this block, White/Dark Purple, White/Purple, Dark Purple/Turquoise, and Purple/Turquoise. 

Right Handed


Left Handed
Remember to when trimming your units to align the diagonal lines of the Wing Clipper® I with the seams of the Flying Geese units. Trim the first two sides.

Right Handed


Left Handed
Follow by rotating your flying geese units 180° and reposition the Wing Clipper® I  to align the previously trimmed raw edges with the finished size and the "X" at the top with the intersection of the seams.  Trimming the two remaining sides.

Repeat for all your units.


Diamond in a Square


Next, and the last unit we will be making in this block is the Diamond in a Square unit.  We will be making one colorway, White/Turquoise and trimming them up with the Square Squared® tool.  


Right Handed


Left Handed

Trim the unit using your Square Squared® tool, by positioning the Trim Down Section of the tool over the unit.  Focusing on aligning the "X" of the finished size unit over the sewn seams.  Trim the first two sides.

Rotate the unit 180° and Reposition the tool lining up the "X's" and then lining up the cleanup lines on the tool with the previously trimmed cut sizes.

Assembly

Corner A Units

Corner B Units
Now that all the units are complete, it is time to assemble the blocks together.  Please remember to pay close attention orientation of your corners A and B Unit placement.  This will help when assembling your block.


This completes Block 5, remember you will need to make 4 blocks. See you on September 15th for Block 6 and Finishing instruction release and tutorials.  


Tina
"Designs to Inspire"