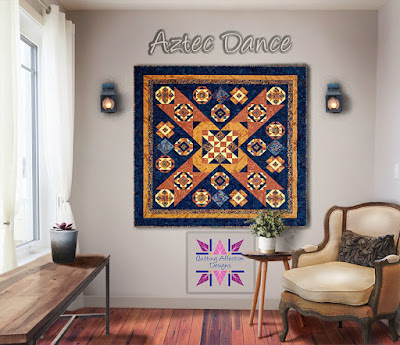
Starting today, and every 15th of the month, I will be releasing a new block in the series and posting a tutorial right here in my blog on how to make the specific blocks. Also, I will be doing Facebook Live tutorials in my Quilting Affection Design Block of the Month Facebook Group.
You have two options for purchasing the pattern. First, My website is set up for both Printed and Downloadable PDF versions. For my International customers, I have an Etsy website, especially for you, where you can purchase the patterns as a Downloadable PDF only so you don't have to worry about shipping costs.
On my website, I have set up an exclusive page for the Aztec Dance Block of the Month. This page will provide all the essential information that will get you ready to start this program, such as the General Instructions, possible color combinations, and tutorial links.
The fabrics I used in my quilt cover are from the Island Batik "Sundance" Collection. If you are interested in other possible color combinations that this Block of the Month will look beautiful in, then check out the Aztec Dance Block of the Month page on my website.
You will have to decide which size of quilt you wish to make, the 56" x 56" (Wall Hanging), 90" x 90" Queen size. What size do you plan to make?
- Wall Hanging
- Tucker Trimmer® I
- Wing Clipper® I
- Square Squared® 6."
- Queen Size
- Tucker Trimmer® III
- Wing Clipper® I
- Large Square Squared®
Now let's get started with Month 1's tutorial!
Month 1 is now available for purchase. The tools you will need for this month's block are the Tucker Trimmer and Square Squared tools. This block makes up into 6" (Wall) and 9" (Queen).
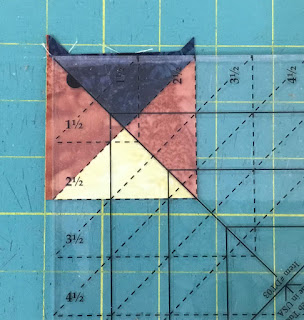
For this month's block, you will be making three different units, Half Square Triangles, Quarter Square, and Diamond in a Square.
When you have your pattern, please read through the instructions thoroughly. Cut out and organize your pieces. I arrange my pieces on paper plates, writing down the unit sizes, and the color and sizes of the pieces needed.
Half Square Triangles
Making Half Square triangles is one of the most fundamental units in quilting, and using the tucker trimmer is so much easier to get quick and accurate units every time.
Stitch on the lines, then cut them down the middle. Press according to the instructions.
 |
| Right Handed |
 |
| Left Handed |
Rotate the unit 180° and line up the Tucker Trimmer and trim the remaining sides to measure the cut size for the units you are making, refer to your pattern for exact sizes.
Once the unit is complete, put them back on the paper plates, so they are not lost, and set them aside. Now it is time to make the Quarter Square Triangles.
Quarter Square Triangles
Quarter Square Triangles start out the same way as you would make Half Square Triangles, except you start out with slightly oversized squares so we can cut and sew them twice.
Start by marking the two diagonal lines using your Quilter's Magic Wand on the reverse side of the Rust squares. Layer the Blue and Rust together and repeat with Rust and Tan fabric squares. Stitch on the lines, cut, and press according to your pattern instructions.
Stop, please don't trim these units just yet, we need position a Blue and Rust unit and a Rust and Tan unit with right sides together. Mark two stitching lines using your Quilter's Magic Wand on the wrong sides of the fabric.
 |
| Right Hand |
 |
| Left Handed |
 |
| Right Handed |
 |
| Left Handed |
Thank you for joining me today for Part 1 Half Square Triangles and Quarter Square units. Be sure to check in tomorrow for part two on how to make the Diamond in the Square units using the Square Squared 6" Tool.


No comments:
Post a Comment