Showing posts with label corner pop II tool. Show all posts

Tuesday, April 22, 2025

Island Batik Ambassador Drunkard’s Path Challenge – Tick Tock


This month's Island Batik Ambassador project theme was Drunkard’s Path! We were tasked with designing quilts that featured the timeless Drunkard’s Path block, which needed to be at least lap size or larger.

Misty Morning

Dark Grey and White Solids

For my project, I used the Island Batik Misty Mornings fat quarter bundle. I also incorporated solid white and dark gray fabrics, with the dark gray being a perfect accent.

Black Accent

Dark Grey Accent

I selected the design I had created a couple of years ago, but had never used. My original design featured 6-inch appliqué units, but since the challenge rules specified that no appliqué could be used, I had to adapt my approach to strictly curved piecing.

Wonder Curve Ruler


Drunkard Path Units

While working on the Starry Nights quilt, I experimented with the Sew Kind of Wonderful Wonder Curve Ruler. I used that pattern's instructions to create my Drunkard’s Path units. The Wonder Curve Ruler allowed me to cut the inner and outer curve pieces quickly and efficiently. Once the units were sewn together, I could easily trim them to size, making the process straightforward.

Corner Popped Drunkards Path units.

Next, I aimed to add a pop of color to the units against a white background. I utilized one of my favorite tools, the Studio 180 DesignCorner Pop II tool. I trimmed away the colored fabric one side at a time and added solid dark gray replacement triangles, pressing toward the replacement triangles. Then, I cut the unit to size before repeating the process on the other side.


Once I had assembled my project, it was time to baste the quilt in preparation for quilting. I used Hobbs Heirloom Natural Cotton Batting and the Kimberbell Clear Blue Titles method to quilt it on my BERNINA 700 embroidery machine. This was my second quilt using this method, but it was my first lap-sized quilt. I really enjoyed using this method.


I finished off the quilt with a multicolored binding.

The following sponsored products were used to create the quilt top:

 - Fabric: Misty Mornings (Kate Colleran Collection) for Summer 2024 from Island Batik in collaboration with Lumin Fabrics.

- Batting: Hobbs Heirloom Natural Cotton.

- Sewing supplies: Aurifil 50 wt cotton thread, Schmetz Microtex needles, and the Oliso M3 Pro Iron.

 I purchased all the other products mentioned in this blog.

List of all of the Island Batik Ambassadors for 2025.

Tuesday, July 12, 2022

Day Two - Tranquility Blog Hop - Asterisk Star


Hello, I'm so excited to welcome you to Deb Tucker's Studio 180 Tranquility Blog Hop. I'm Tina Dillard, a Studio 180 Design Certified Instructor, author, instructor, designer, and owner of Quilting Affections Designs. 
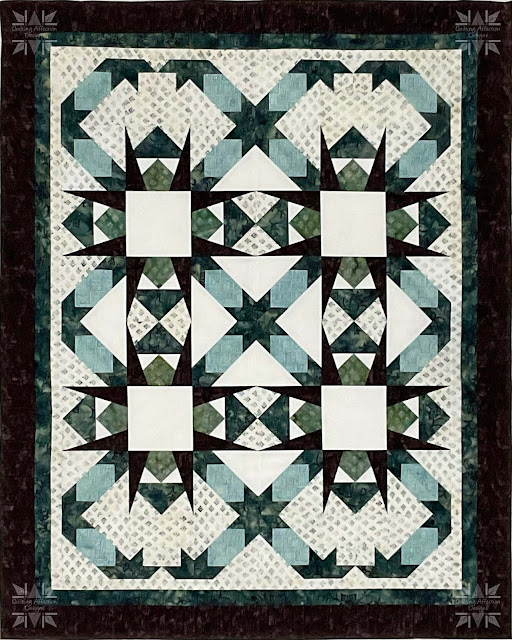
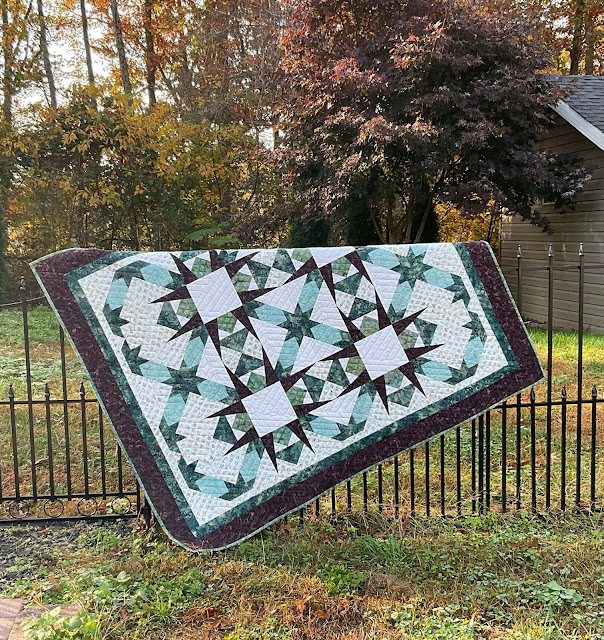
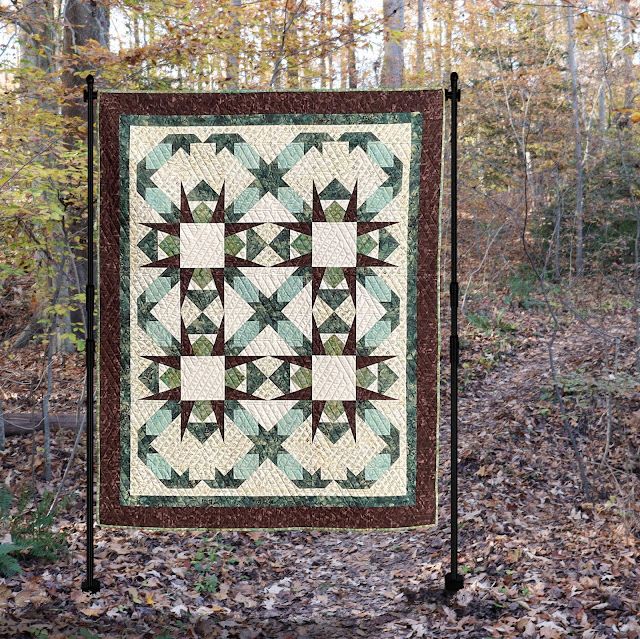
Using Deb Tucker's Studio 180 Design for Island Batik's new fabric line Tranquility, I want to show you a fun and elegant design. These fabrics are starting to arrive in your local shops now, so make sure you check them out. You'll love this new line if you love earth tones. The quilter can choose from a variety of soft browns, tans, and greens. Check out Asterisk Star, a remake of a quilt from my book Poppin' with Wings, for an example of what can be done.

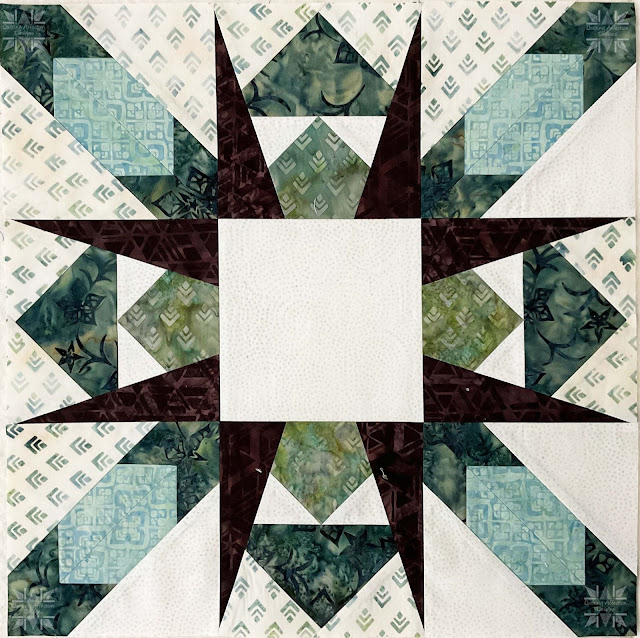
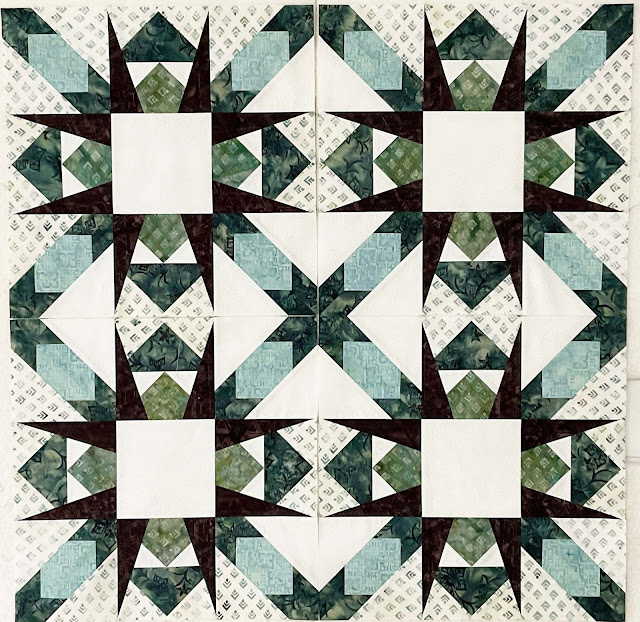
This eye-catching quilt uses the Studio 180 Designs Wing Clipper® I and Corner Pop® II tools. A basic Flying Geese unit with some corners popped to give it an extra kick. Corner Pop® II from Studio 180 Designs gives designers another level of creativity by popping corners twice as tall as they are wide. Combined with the basic Flying Geese unit, it has so many possibilities. Using these tools, I wrote a book showing the possibilities and how to use them.

Let me explain what I mean by popping the corners of a unit. Basically, you're creating a basic unit like flying geese, then cutting off one corner. You can then add another fabric piece to give it a different look once that's done. This is super easy with the Corner Pop Tools from Studio 180 Designs. I show you how to pop corners with the Corner Pop Tools in my book Poppin' with Wings. 

Example of Pattern

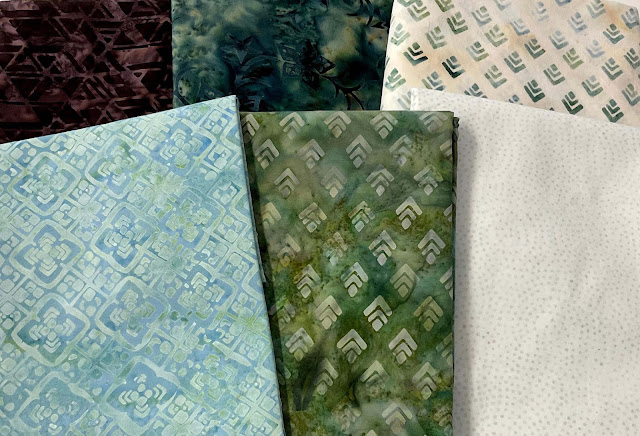
Quilts aren't just about the pattern and the tools. A quilt is just as much about the fabrics and colors as it is about the pattern. Asterisk Star is the perfect match for Deb Tucker's Studio 180 Design's Tranquility fabric line. The brown, tan, and green colors of that line give the pattern a nice woodsy look and would look great in a mountain cabin or even in an apartment. The dark brown background creates a stencil look, which brings out the four colors.

The funny thing is, as I write this, I'm sitting at a campground in North Central Maryland watching the greens and browns of the forest. The Tranquility fabric has these colors right down to the last stitch. The beauty of nature around me inspires me to bring these colors home. If I ever need a break from the stress and anxiety of a busy life, I can look at Asterisk Star and immediately be transported back to a peaceful setting where a gentle breeze moves the green leaves as soft sunlight sprinkles through them.

Next time you're making a quilt, think about what colors bring you peace and harmony. Try working them into the pattern so you'll always have them handy if you need them. If those colors happen to be Earth colors, think of Deb Tucker's Studio 180 Design Tranquility and Poppin' with Wings "Asterisk Star". By doing so, you can bring the outdoors inside.

Make sure to check out my website if you're looking for my Poppin' with Wings book. You can also check out the other fabulous designs in the book. 

Thank you all for stopping by. Check back every day this week to see what other great designers and instructors are up to, you will find the schedule below:

Also, be sure to stop back Friday, July 15th on the Studio 180 Design Blog to enter to win a Fat Quarter Bundle of the Tranquility fabric. 


Friday, December 17, 2021

Block Party Block #20 - Ice Flake


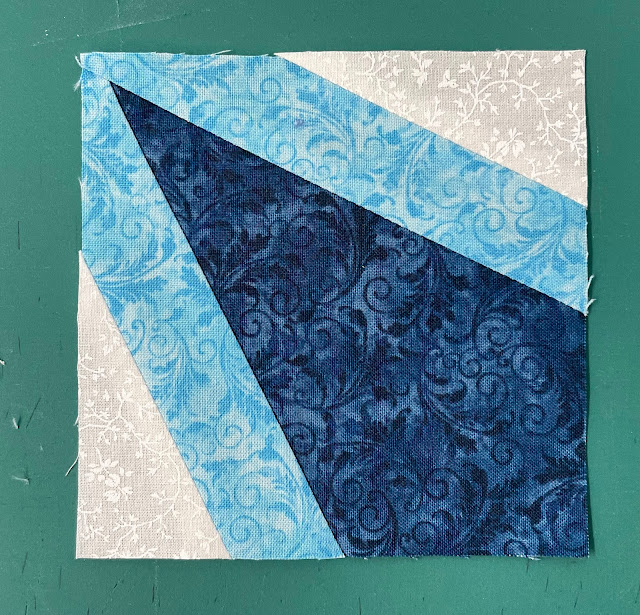
It was release week for another fun and exciting Block Party Block. With this month's block, Ice Flakes, we take the Studio 180 Design V Block and Corner Beam units and combine them with the Corner Pop tools. 

This tutorial will show you how to use the Studio 180 Design Corner Pop II to pop the side triangle corner on Corner Beam units.

If you're popping any corners, you need to trim your units to size first. Be sure to read your tool's instructions before you start.

The first thing you've got to do is cut the corner off the Corner Beam unit. To begin with, you'll need to determine which size to remove. This example uses a 2" finished cutaway.  


You will need to find the Cut Away Corner section on the tool, locate the label "Cut Away Corners." Each number represents the finished height of the cutaway line, so we are planning to use the 2" cutaway lines for this tutorial.  

We will begin with a Type 1 cutaway, which is a slant to the left. In Type 1, the units are put on the cutting mat right side up and trimmed down with their wrong sides up.

Now, let's place our Corner Beam unit with the right sides up on your cutting mat. Using the bottom left corner of the Corner Beam unit, align the 2" lines along the sides. Once you have the lines aligned, make a slanted cut. The slant cut will give the seam a proper 1/4" allowance.

Using the cutting chart in the tool instructions, we can find the replacement triangle strip width for a 2" finished unit, which is a 3" strip. To get replacement triangle pairs, fold your strip in half and place it on the cutting mat. Then trim the ends.  

Locate the Replacement Triangle Cut Line. It will be a bold line next to the Cut Away Corners. You will need to place the 3" line at the bottom of your strip as well as the Bold line at the trimmed end. You will need to trim up along the slant to make the first pair of triangles on each side.

Using the top edge of the tool, you will make the next cut for the replacement triangles. Position this top edge of the strip on top of the strip. The first 1/2" dashed line will align with the point of the slant side of the strip. Cut across to the top of the tool. Repeat until you have all the pairs of triangles. 


Placing the slanted left replacement triangle on the left side of the Corner Beam unit is the next step. To do this, flip the triangle over, center it, and stitch it. Then press the seams open.


Reposition the pressed unit on the cutting mat, and place the replacement triangle in the upper right-hand corner. Corner Trim Down Section: Position the corner trim down section and locate the 2" cutting line on the seam of the replacement triangle. Check that the unit is square by using the dashed lines on the tool, then cut the two sides. Leave the unit on the mat.


It is now time to create Type 2 which will slant to the right. The unit will be placed on the cutting mat with the wrong sides up, and the trim will be placed right side up.

Now that the unit is wrong sides up, we have to find the 2" cutaway line again, align the lines on the bottom left corner, and remove the corner. 

Place a slanting right replacement triangle on the side of the unit that you just cut off. Flip the replacement triangle over, right sides together. Then flip the unit and triangle so that the replacement is on the bottom and sew it together. Then press the seam open.


Put the unit down on the cutting mat one more time, right-side up, with the replacement triangle in the upper right-hand corner. Using the same technique as the opposite corner, align the 2" Corner Trim Down line on the seam line. Align the dashed lines to square up the unit. Make the final two cuts.


When you are finished, you will have a beautiful corner popped Corner Beam unit. Try out Studio 180 Design Corner Pop II and III, you will get addicted as I did. Download this pattern for free HERE. Additionally, you can sign up for my email newsletter to receive the Block Party Block every month on the 15th. 


Friday, November 12, 2021

Day 5 - Deb Tucker Studio 180 Design Bellingham Bay Blog Hop


Greetings, and Welcome to the Final Day of the Bellingham Bay Blog Hop! I am Tina Dillard, a Certified Instructor, Author, and Quilt Pattern Designer under Quilting Affection Designs. In addition, I have founded Precision Block Academy, where you can learn and achieve Perfect Points every time with Studio 180 Design tools.

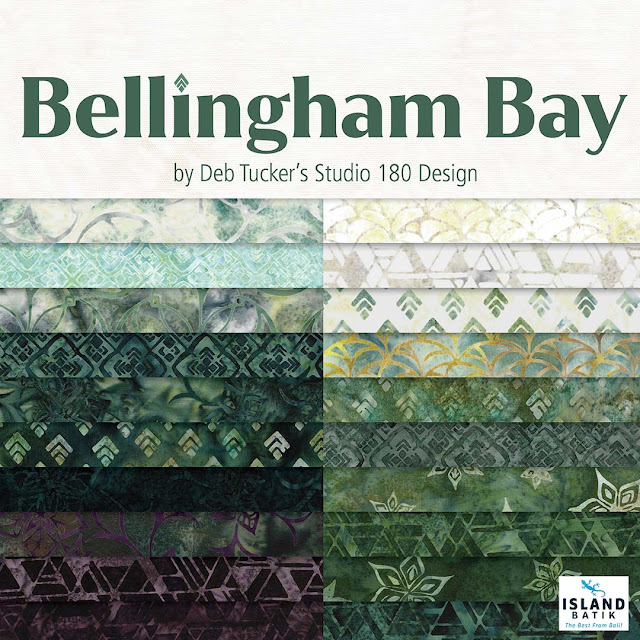
I hope you've enjoyed the Studio 180 Design "Bellingham Bay" Blog Hop. "Bellingham Bay" is Deb Tucker Studio 180 Design's first Original Fabric Collection with Island Batik. This collection is arriving this month at your local quilt shop, so check with your favorite shop. If your shop doesn't have it, request it. Three other Certified Instructors and I are showcasing these beautiful, earth-tone fabrics in quilts. These quilts also feature the Rapid Fire Hunter Star Tool and Studio 180 Design Fundamental tools.

Click on the links below to see and read more about these fantastic quilts.

Day 1 - Studio 180 Design

Day 2 - Terri Welch of Quilter's Journey

Day 3 - Gail Renna of Quilt Haven Threads 

Day 4 - Beth Sidley of Tucker University

Day 5 - Tina Dillard of Quilting Affection Designs


Today, I'm excited to wrap up this blog hop with my quilt. Several elements combine to create this gorgeous quilt. If you are not familiar with my designs, I love to play with the Corner Pop II and III Tools. We were challenged to design a quilt around the Rapid Fire Hunter Star tool and add the fundamental tools. I knew I wanted to add them to my design.

The Bellingham Bay collection is perfect for the Hunter Star Blocks with all the beautiful earth tones in the collection.

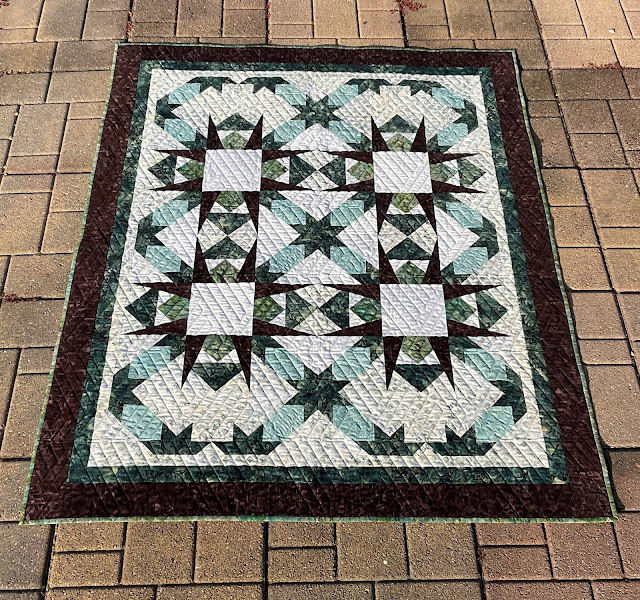
Let me introduce you to my quilt, Hunters Point, which is currently under development. This quilt uses several of the Bellingham Bay fabrics to make it stand out. We have a Background, Light, two medium fabrics, and two dark fabrics. 


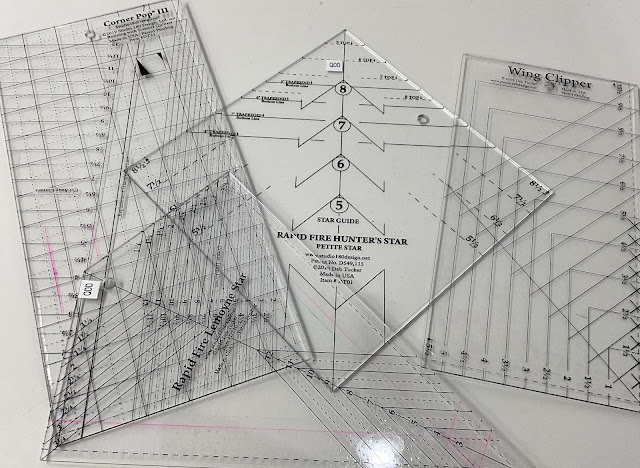
Many of you will look at this quilt and say that it seems way too complicated to make. This blog will break down each element in the quilt to show that it's not so difficult. Hunters Point uses Studio 180 Design tools: Rapid Fire Petite Hunter Star®, Wing Clipper®, Corner Pop® III, and the Rapid Fire Lemoyne Star®.


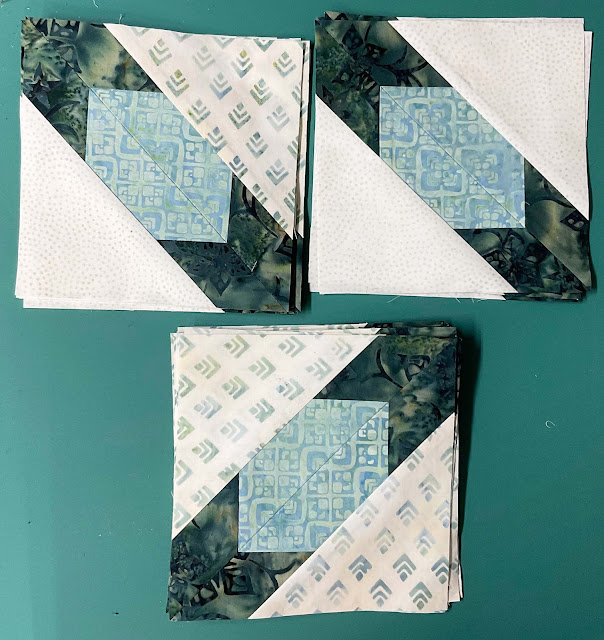
Let's Start with the Rapid Fire Petite Hunter Star® tool. For the Hunter Star units, I made up three different color combinations. Each of the units used the same color trapezoids and the star points. What makes each of the Hunter Stars different is the Half Square Triangles. One used just the light fabric, background fabric, and the last units combined the two fabrics.


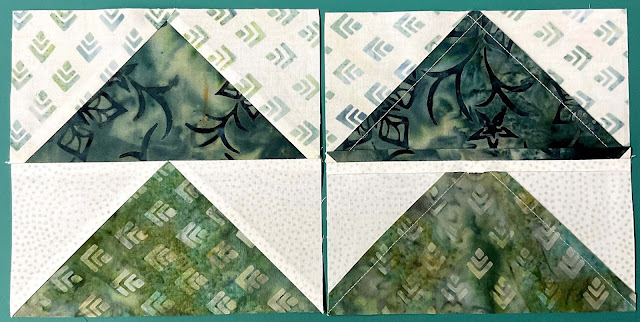
The next thing I want to show you are the Popped Flying Geese units. These units will bring in some of the Spikey Points to the center of the quilt. These units start by making the Non-Waste Method Flying Geese and trimming them with the Studio 180 Design Wing Clipper®. Then combine the two different units with the points heading north.

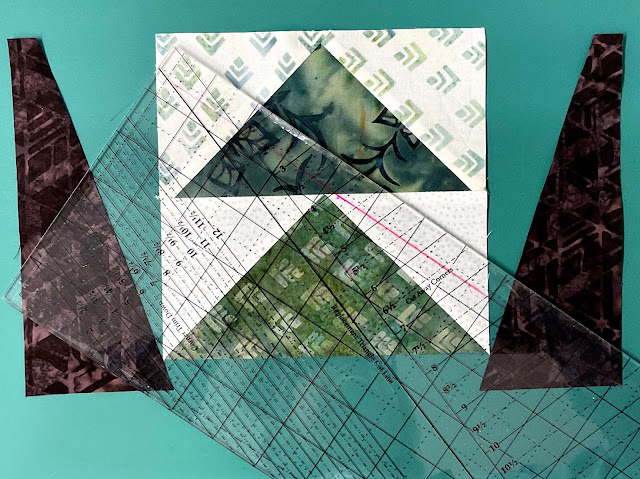
Then, I used the Studio 180 Design Corner Pop® III tool and removed the bottom left and right corners. Next, the corners were replaced with a new replacement triangle, dark fabric. After the Replacement triangle was stitched and pressed, I trimmed the replacement triangles with the Corner Pop® III tool. 


Once these units were made, I combined the Hunter Stars and the Popped Flying Geese Units to make the main blocks of the quilt top center.


Once I made four blocks, I needed to add a top and bottom row to finish the quilt.


Now I need to finish the top and bottom with some Lemoyne Star quarter units that I made with the Rapid Fire Lemoyne Star Tool. These units were put in between two Hunter Star blocks. The Lemoyne Star Quarter units allow the point to extend the quilt in different directions.  


The final touches to this quilt were adding the borders to the quilt top. Hunter's Point is now complete.


My longarmer, "The Quilted Ginger," quilted the top with the "60 Degree Triangles by Sweet Dreams using Isacord 5664 thread.


I'm glad you're here today, and I hope you liked the Studio 180 Design Bellingham Bay Blog Hop. I had a blast designing and featuring these original fabrics. You can purchase Hunters Point in the near future. Click here to sign up for my newsletter if you'd like to be notified when the pattern becomes available. Additionally, if you would like to see more of my patterns and my book, "Poppin With Wings," visit my website, www.quiltingaffection.com. Finally, check out my Precision Block Academy to learn how to use Studio 180 Design tools and so much more.

Friday, November 6, 2020

Pre Order My new book: Poppin With Wings

I am really excited and proud to announce my first book Poppin' With Wings. Choose from 8 different quilt designs, take your ordinary flying geese units, and raise them to a whole new level.

Pre-Order Book

Every quilt in the book has been designed around the high precision Studio 180 Design Wing Clipper® I, Corner Pop® II, and Corner Pop® III to bring you 8 stunning projects. Then combined with easy-to-follow project instructions, you can convert the basic flying geese units into some exciting and stunning in the end, plus build your confidence level to a whole new level. 


The book features:

  • 125 Full Colored Pages, including images and cutting charts
  •  Total of 8 projects, 4 using the Corner Pop II and Corner Pop III tools
  •  Companion for the Studio 180 Design Wing Clipper I, Corner Pop II, and Corner Pop III
  •  Easy to follow Step by Step instructions on how to use the Studio I80 Design Tools.
  •  Each project has been thoroughly tested by the author and several Studio 180 Design Certified Instructor.
  • Contemporary to Modern quilts that range from wall-hanging to lap size
  • Right and Left-Handed cutting Instructions

Pre-Order today through November 13th from me directly, and you will receive 20% off your book. Book ships December 1st, just in time for Christmas. 

Don't forget to check to see if you have the tools?  If you need the companion tools, you can order from my website, Studio 180 Designs, or your local Quilt Shop. 

I will be hosting a book launch on my Facebook pages at 7 pm on Friday, November 6th. During the launch, I will highlight the great features of this book, plus give a tour to show you these stunning quilts that are sure to inspire.  So if you're not already following my Facebook page, now is the time. You do not want to miss the exciting launch.