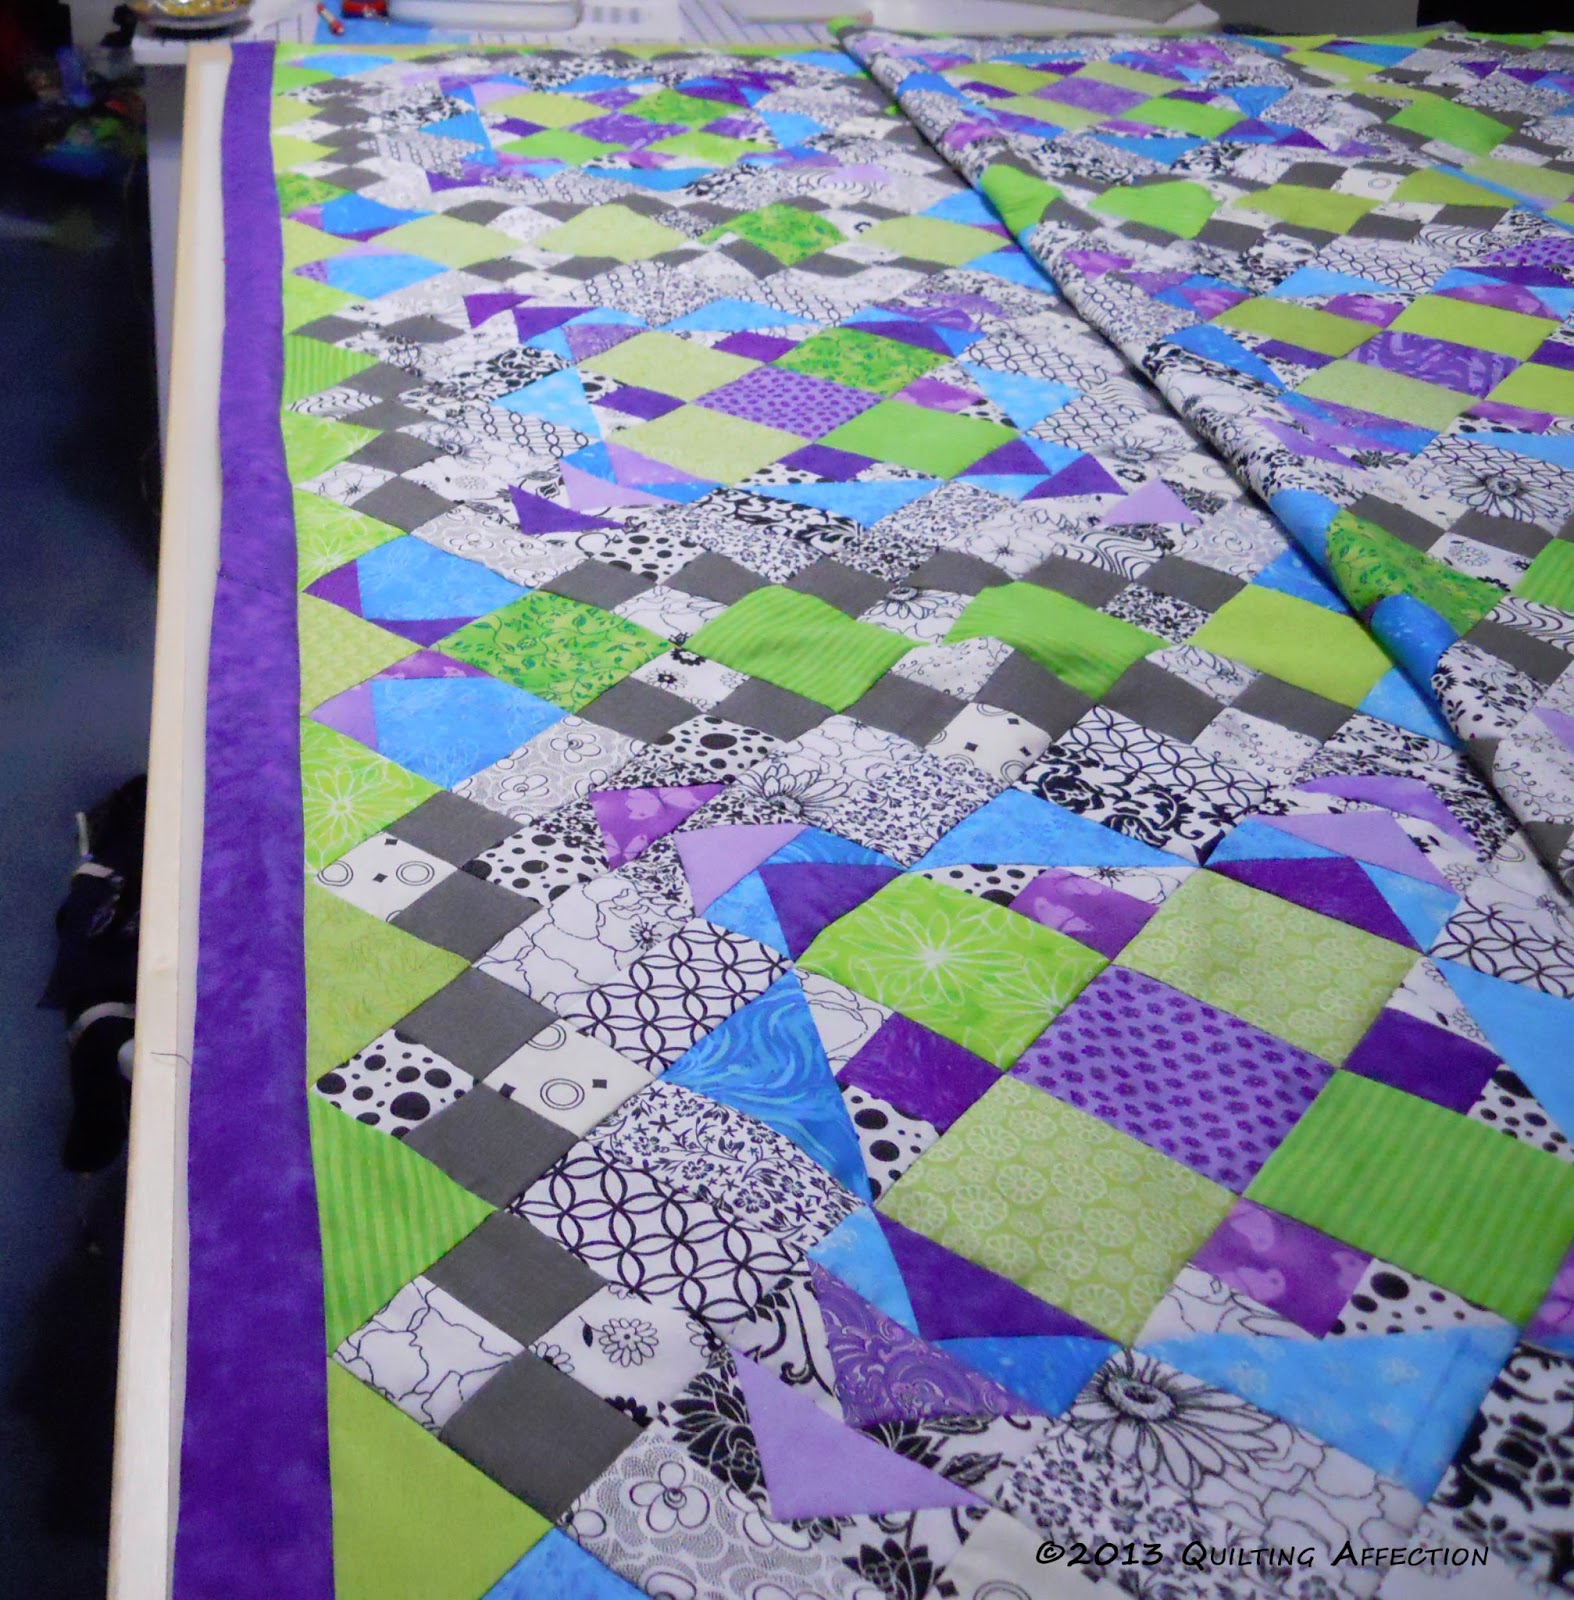
This morning after many evening hours of quilting, "Easy Street" is now quilted and off the longarm. I trimmed the sides, and sewed the binding on the front of the quilt. So, now I am ready to start sewing the back of the binding for the quilt in the evenings while watching TV. Once the binding is completely done I will show it off to you all.
 Now I have started a quick project for a gift for a friend's little girl. I'm making a lap size quilt from a layer cake collection from Moda called "Meadow Friends". I'm basically just sewing 5 cakes together into 5 rows with 1" strips in between. Since I'm almost done with the main part I now need to get fabric for the borders and backing for it. Tomorrow, hoping to get another quilt on the longarm. I have a few things to in the morning, but the rest of the day will be my time for quilting. Tina
This morning after many evening hours of quilting, "Easy Street" is now quilted and off the longarm. I trimmed the sides, and sewed the binding on the front of the quilt. So, now I am ready to start sewing the back of the binding for the quilt in the evenings while watching TV. Once the binding is completely done I will show it off to you all.
Now I have started a quick project for a gift for a friend's little girl. I'm making a lap size quilt from a layer cake collection from Moda called "Meadow Friends". I'm basically just sewing 5 cakes together into 5 rows with 1" strips in between. Since I'm almost done with the main part I now need to get fabric for the borders and backing for it.
Tomorrow, hoping to get another quilt on the longarm. I have a few things to in the morning, but the rest of the day will be my time for quilting.
Tina
Today, I spent the most of the day working on getting Easy Street on the Longarm. This is the biggest quilt I have worked with yet, and it was not easy. As usual the backing was easy to get lined up and I just took my time rolling it on the front bar. After the backing was on it was time for the quilt top, which was not as easy to put on. It was tricky to keep it straight and I was trying not to stretch the quilt out any further that needed due to the many bias pieces in the quilt. After a couple of try's I finally got it on the frame.
 Then started quilting, I'm doing an edge to edge panto on this one. Will post an pictures when I get the top finished.
This evening I also prepared the tulip applique quilt top and back to put on the longarm next. This will be my first quilt top for custom quilting practice.
Well back to work tomorrow, hope everyone has a great week.Tina
Today, I spent the most of the day working on getting Easy Street on the Longarm. This is the biggest quilt I have worked with yet, and it was not easy.
As usual the backing was easy to get lined up and I just took my time rolling it on the front bar. After the backing was on it was time for the quilt top, which was not as easy to put on. It was tricky to keep it straight and I was trying not to stretch the quilt out any further that needed due to the many bias pieces in the quilt. After a couple of try's I finally got it on the frame.
Then started quilting, I'm doing an edge to edge panto on this one. Will post an pictures when I get the top finished.
This evening I also prepared the tulip applique quilt top and back to put on the longarm next. This will be my first quilt top for custom quilting practice.
Well back to work tomorrow, hope everyone has a great week.
Tina
Last night my mind and body were not in the sewing mood, after a long day of work and good work out. So tonight, while we are under a Tornado and Thunderstorm warnings, I decide it was a good time for Easy Street to get borders. I finished sewing on the smaller purple borders, and then it was just sewing on the turquoise borders to finish. Now I need to get the material for the backing and it will be ready to be quilted, oh YEAH, I cant wait!! Tonight was a good night for me receiving mail . First, I received the borders and backing fabric for my Nancy's Fancy quilt top. The quilt top is going to have three borders, the two browns are for the outer borders. Once the lilac fabric comes I can get the borders on the top. I also received the backing for this quilt, I want to get a wide fabric for this quilt top, so I choose this moda fabric.I also got another package in the mail, my first longarm rulers came. I have been investigating on the internet, and was very interested in using these templates from DeLoa Jones website. So I choose 3 different ones, the boomerang, rope a dopes, and appliquide. I can't wait to start playing now.Overall it was a good evening in the quilting world for me.
Tina
Last night my mind and body were not in the sewing mood, after a long day of work and good work out. So tonight, while we are under a Tornado and Thunderstorm warnings, I decide it was a good time for Easy Street to get borders. I finished sewing on the smaller purple borders, and then it was just sewing on the turquoise borders to finish. Now I need to get the material for the backing and it will be ready to be quilted, oh YEAH, I cant wait!!
Tonight was a good night for me receiving mail . First, I received the borders and backing fabric for my Nancy's Fancy quilt top. The quilt top is going to have three borders, the two browns are for the outer borders. Once the lilac fabric comes I can get the borders on the top. I also received the backing for this quilt, I want to get a wide fabric for this quilt top, so I choose this moda fabric.
I also got another package in the mail, my first longarm rulers came. I have been investigating on the internet, and was very interested in using these templates from DeLoa Jones website. So I choose 3 different ones, the boomerang, rope a dopes, and appliquide. I can't wait to start playing now.
Overall it was a good evening in the quilting world for me.
Tina
Since I was able to work from the home today due to weather, and I had a hour before I could start working, I decide to head out to the studio and start cutting the borders for Easy Street.
I was able to get all the borders cut, 9 - 2 1/2" and 9 - 5" strips. By that time I was done cutting all of them, it was time to start work.
Then this evening, after my workout I started sewing the smaller purple borders. I only got two sides on this evening.
Hoping to get out in the studio, to finish the other two sides and possible start the outer tomorrow night. I would like to have it ready to put the backing on this weekend.Tina
Since I was able to work from the home today due to weather, and I had a hour before I could start working, I decide to head out to the studio and start cutting the borders for Easy Street.
I was able to get all the borders cut, 9 - 2 1/2" and 9 - 5" strips. By that time I was done cutting all of them, it was time to start work.
Then this evening, after my workout I started sewing the smaller purple borders. I only got two sides on this evening.
Hoping to get out in the studio, to finish the other two sides and possible start the outer tomorrow night. I would like to have it ready to put the backing on this weekend.
Tina
Today, the weather was foggy all day, so it was a great day to get in the sewing room and work on finishing up Easy Street Part 8. Yesterday, I completed Block A, so today I only had 9 blocks of Block B to complete.Started the with center like I did with Block A, but these blocks were much easier to put together.
Then I worked on building the all the sides of the blocks and sewing them on. The right and left sides we similar to the ones in the Block A, but the middle used a flying geese unit with the white on black brick.
The top and bottom used the solid green block on the ends of the three block units that are used on the sides. Making sure when putting the side block units on that the purple flying geese are on the outside.
So after I added these blocks to the empty spots on the design wall, it was feeling like I was close to finishing. So, I then started sewing on the longest row on point, and then worked outward from there. The rows sewed up straight in all direction. When finished I feel in love with it.
Now, I need to get the borders, and backing for the quilt, so I can finish this one completely. Another project ready for the longarm. I guess I need to start working on that aspect, along with finishing the designing of my next project.
Tina
Today, the weather was foggy all day, so it was a great day to get in the sewing room and work on finishing up Easy Street Part 8. Yesterday, I completed Block A, so today I only had 9 blocks of Block B to complete.
Started the with center like I did with Block A, but these blocks were much easier to put together.
Then I worked on building the all the sides of the blocks and sewing them on. The right and left sides we similar to the ones in the Block A, but the middle used a flying geese unit with the white on black brick.
The top and bottom used the solid green block on the ends of the three block units that are used on the sides. Making sure when putting the side block units on that the purple flying geese are on the outside.
So after I added these blocks to the empty spots on the design wall, it was feeling like I was close to finishing. So, I then started sewing on the longest row on point, and then worked outward from there. The rows sewed up straight in all direction. When finished I feel in love with it.
Now, I need to get the borders, and backing for the quilt, so I can finish this one completely. Another project ready for the longarm. I guess I need to start working on that aspect, along with finishing the designing of my next project.
Tina
Friday afternoon and most of today I spent working on Easy Street, Part 8 Block A. You need to make 18 of these 15-1/2" blocks.
I started with combining the greens, purples, and 4 patch triangle from Part 3 into a 9 patch blocks.Then combining the bricks you made in Part 6 and the double flying geese to make the side borders for the 9 patch blocks, you need to make 32; 16 for each side. Then sew them on the sides of the 9 patch inner blocks. Making sure the White and Black flying geese is on the outside. Press open.
Then, you need to make the bottom and top border blocks, combining all five block into one long unit need to make sure the end 4-patches are lined up correctly. Making 32 units, dividing them between the top and bottom.
Once those are done you can sew the bottom unit to the middle unit and then sew the top to the top of the unit to make a full 15-1/2" block.
Then I put them on my design board, with the corner units to see what it looks like so far. All I can say is WOW, Cool! My design board could not hold the bottom 4 blocks, But you do get the idea what this is going to look like.
Tomorrow, I will get the 9 Block B made, and carefully start combining the blocks to the full quilt top.
Almost done, Remember to please go for my "Coquette Tulip" on Quilt Gallery's Show and Tell contest. Thank you to everyone that has voted for me.
Tina
Friday afternoon and most of today I spent working on Easy Street, Part 8 Block A. You need to make 18 of these 15-1/2" blocks.
I started with combining the greens, purples, and 4 patch triangle from Part 3 into a 9 patch blocks.
Then combining the bricks you made in Part 6 and the double flying geese to make the side borders for the 9 patch blocks, you need to make 32; 16 for each side. Then sew them on the sides of the 9 patch inner blocks. Making sure the White and Black flying geese is on the outside. Press open.
Then, you need to make the bottom and top border blocks, combining all five block into one long unit need to make sure the end 4-patches are lined up correctly. Making 32 units, dividing them between the top and bottom.
Once those are done you can sew the bottom unit to the middle unit and then sew the top to the top of the unit to make a full 15-1/2" block.
Then I put them on my design board, with the corner units to see what it looks like so far. All I can say is WOW, Cool! My design board could not hold the bottom 4 blocks, But you do get the idea what this is going to look like.
Tomorrow, I will get the 9 Block B made, and carefully start combining the blocks to the full quilt top.
Almost done,
Remember to please go for my "Coquette Tulip" on Quilt Gallery's Show and Tell contest. Thank you to everyone that has voted for me.
Tina
Monday, I had the day off since our flight from San Antonio, came in late and we didn't get home until 1:30am. So I spent the day doing some chores and catching up on Easy Street.
 Part 6 was done New Years Weekend. I started Part 6 by sewing the White on Black fabric and cut the 2-1/2" strips then sewed them together. After that I cut them into 128 3-1/2" blocks. Part 6 also includes cutting 19 5-1/2" squares and then cutting them diagonally twice to get 64 quarter triangles, but the problem I had was I did not have any more green fabric. So on New Years Eve, I went to Joannes and picked up what I needed to finish the project. Had that done on New Years Eve, I also started the layout of Part 7.
Part 7, starts with taking the flying geese and 64 rectangles we cut in Part 2. Positioning the so that points, point to the rectangles as you combine them to make 2" X 3-1/2" bricks. That was the easy part. Next you are going to make 4 pieced triangles, from some of the blocks we have made over the last 6 weeks. These triangles are the smaller ones. When combining these remember to cut off the dog ears from the triangles, makes it easier to sew the rows together.
After you get these done, you are going to make 12 larger sets of triangles, the trick is making sure that everything lines up.
They turned out really nice triangle blocks. Now, I need to print out the final steps of Easy Street that came out on New Years Day as I was traveling. It starting to come together and I cant wait to get this all done to see what my quilt is going to look like. Tina

 This morning after many evening hours of quilting, "Easy Street" is now quilted and off the longarm. I trimmed the sides, and sewed the binding on the front of the quilt. So, now I am ready to start sewing the back of the binding for the quilt in the evenings while watching TV. Once the binding is completely done I will show it off to you all.
 Now I have started a quick project for a gift for a friend's little girl. I'm making a lap size quilt from a layer cake collection from Moda called "Meadow Friends". I'm basically just sewing 5 cakes together into 5 rows with 1" strips in between. Since I'm almost done with the main part I now need to get fabric for the borders and backing for it.