Welcome back to Block 3 of the Garden Enchantment Block of the Month.
 |
| Block 1 |
 |
| Month 2 |
To recap Block 1, we used our V-Block, Square Squared, and Tucker Trimmer to make the following SideKick & High/Lows, Diamond in a Square, and Half Square Triangles units. Block 2, we introduced the Wing Clipper tool to make Flying Geese units. If you missed the first two blocks and would like to catch up, you can do so by clicking HERE and don't forget to purchase your pattern also.
 |
| Month 3 |
Month 3
Month 3 is now available for purchase. You will also need the following Studio 180 Design tools to make this month blocks; Tucker Trimmer® I, and Wing Clipper® I.
This block will consist of the following, Half Square Triangles, and Flying Geese units.
This month we are going to make 4 blocks that will measure 9" square finished, so gather your fabrics and tools and let's get started making this fast and easy block.
Half Square Triangles
We are going to start with making our Half Square Triangle units. Since these units were discussed in Block 1 part 1, I will be only doing a quick overview of the process in this blog post. If you would like to review to process in full detail, please read Block1 part 1 blog post.
Layer your squares with the coordinating color you are making, ensure the right sides are together. Stitch on the drawn lines.
Cut down the middle between the stitched lines and press to the dark.
Trim the units to the size indicated in your pattern using the Tucker Trimmer® I.
Repeat to make all your Half Square Triangle unit variations needed to make your blocks.
Flying Geese
Now we are going to on to make Flying Geese units. I will be only doing a quick overview of the process since we just went over them in last month's blog post in block 2. If you would like to review to process in full detail, please read Block 2.
Start off by gathering your large squares and small squares. On the back of your smaller squares mark two diagonal each 1/4" from the center diagonal using your Quilter's Magic Wand or your ruler. These diagonal lines will become your stitching lines.
Position 2 green squares diagonally in opposite corners on the large square. Making sure to nudge the small squares toward the center about 3 or 4 thread from the raw edge of the larger square.
Stitch on the drawn lines, then cut them apart between the lines of the stitching on the center diagonal. Press toward the outside to make two wings.
Position one small square on each unit and Nudge 3 or 4 thread from the raw edge of the larger triangle section.
Stitch on the drawn lines, then cut apart between the lines of stitching. Pressing to the outside again.
Trim your oversized unit with your Wing Clipper® I to the size indicated in your pattern.
Repeat to make all the units combination indicated in the pattern.
Dual Color Flying Geese
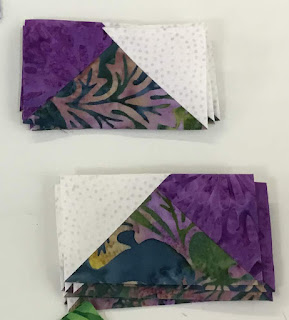
Now I want to show how to make Dual Color Flying Geese. Start off with one large square and four small squares, broke up into two different colors (For Example we will be using two white and two purple squares.) Mark your two stitching lines as you do in making regular flying geese units.
Position the first two of the same color small squares on your large square. Remembering to nudge your small squares 3 to 4 thread toward the center and stitch on your lines. Cut apart down the center and press toward the outside.

Now with the position the other color squares on each of the units. Again remember to nudge the small squares 3 to 4 threads toward the center and stitch on your lines. Cut apart down the center and press toward the outside.
Trim your oversize unit using your Tucker Trimmer® I tool. Like you did in the regular Flying Geese units.
This completes Block 3, remember you will need to make 4 blocks. See you on July 15th for Block 4 release and tutorials.
Tina
"Designs to Inspire"


No comments:
Post a Comment