Showing posts with label Split Orange Peel. Show all posts

Thursday, April 18, 2013

Split End Orange Peel Quilt Top Finished!

I spent all day yesterday working on the decorative stitching around all the melons on the quilt top.  By the end of the day I was able to trim up the excess background fabric. So today I was able to sew on the borders.

I started with the inner border which is 1 1/2" pieces cut from the background fabric.  I sewed on the width pieces first and then sewed on the length pieces.  This makes it looked finished, but  I still have one more set of borders to make.


The next set of borders, takes the set of    2 1/2" strips that I aside from the preparation process.  I cut 4- 2 1/2" x 10" bricks and with the rest of them                2 1/2" x  6 1/2" blocks then I sewed the bricks together.  To do this, I first made 2 sets of four and sewed them end to end. Once those were completed, I added the    4 - 2 1/2" x 10" brick at each of the ends.  Pressed the seams to either side.  Then I then needed to make 2 more sets, but this time sets of 8.

Once I had the borders sewn on the set of 8 borders, with the seams centered with the seams of the melons as much as possible.  Once I had them sewn on, I press the side borders open.  Then I centered the borders on the top and bottom of the quilt top and I pressed the final seams open.  I finally completed the quilt top and I love it!  


After completing the quilt top this afternoon, I made a trip to Material Girls Quilt Shop and picked up the backing and binding for the it. For the binding I will be using the background fabric and for the backing I will be using the fabric that inspired all these Batik colors. 


Overall, this was a great pattern, I have made several notes on what to remember for the next time. I would love to do this patten again, in a different color scheme this time.  Tomorrow, I will finish getting the backing ready for the long-arm.

Tina

Split End Orange Peel Quilt Top Finished!

I spent all day yesterday working on the decorative stitching around all the melons on the quilt top.  By the end of the day I was able to trim up the excess background fabric. So today I was able to sew on the borders.

I started with the inner border which is 1 1/2" pieces cut from the background fabric.  I sewed on the width pieces first and then sewed on the length pieces.  This makes it looked finished, but  I still have one more set of borders to make.


The next set of borders, takes the set of    2 1/2" strips that I aside from the preparation process.  I cut 4- 2 1/2" x 10" bricks and with the rest of them                2 1/2" x  6 1/2" blocks then I sewed the bricks together.  To do this, I first made 2 sets of four and sewed them end to end. Once those were completed, I added the    4 - 2 1/2" x 10" brick at each of the ends.  Pressed the seams to either side.  Then I then needed to make 2 more sets, but this time sets of 8.

Once I had the borders sewn on the set of 8 borders, with the seams centered with the seams of the melons as much as possible.  Once I had them sewn on, I press the side borders open.  Then I centered the borders on the top and bottom of the quilt top and I pressed the final seams open.  I finally completed the quilt top and I love it!  


After completing the quilt top this afternoon, I made a trip to Material Girls Quilt Shop and picked up the backing and binding for the it. For the binding I will be using the background fabric and for the backing I will be using the fabric that inspired all these Batik colors. 


Overall, this was a great pattern, I have made several notes on what to remember for the next time. I would love to do this patten again, in a different color scheme this time.  Tomorrow, I will finish getting the backing ready for the long-arm.

Tina

Friday, April 12, 2013

Split Orange Peel Day 2!

Day two of the Split Orange Peel quilt top, started with finishing cutting out the row sets into melon shapes. After cutting all the melons out,  I cut the half melon shape out from the row sets.  Then counted to make sure I had enough melons and realized that I was short on both the full and half melon shapes.  Then decided to make another four row set and cut them out, and it gave me a few more to work with for the layout.

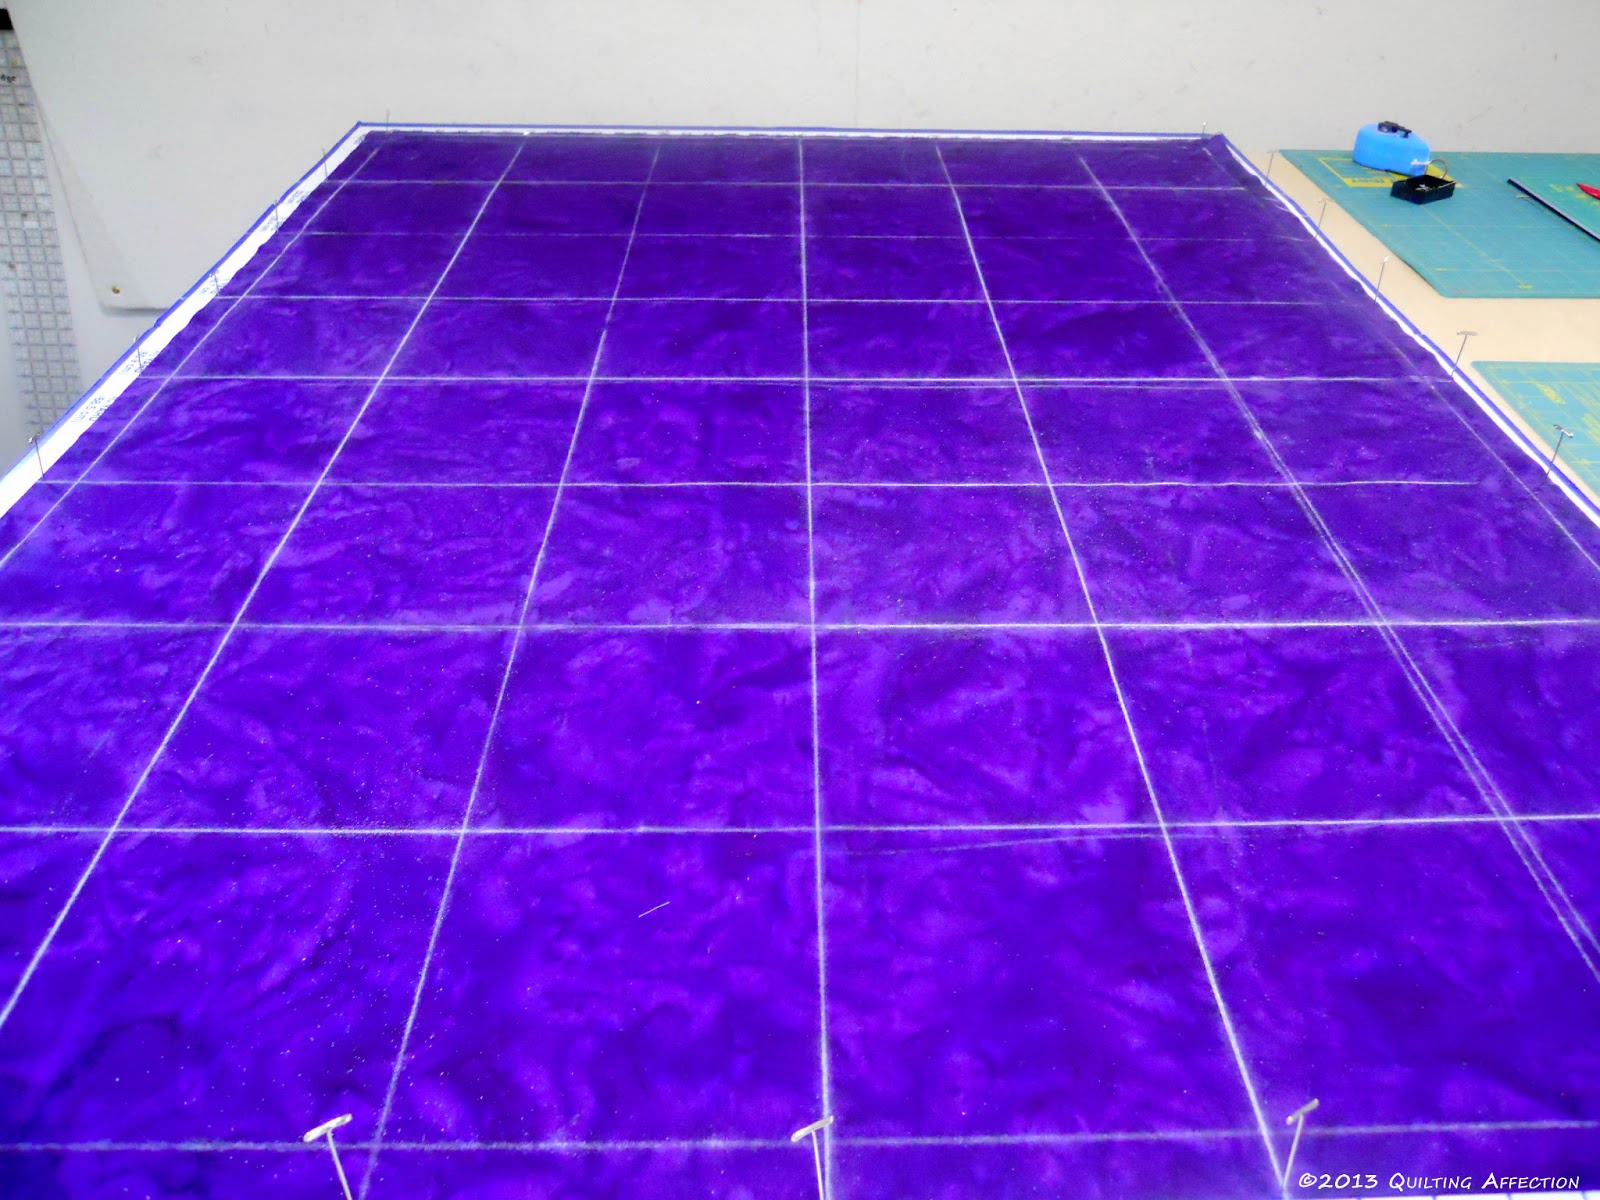
I put all the melons to a side and set up the pattern board with the background fabric to add the grid on the fabric. To set up the grid I laid the background fabric on the pattern board using the grid lines marking the 1" by sticking T-pins in the pattern board, then marking with T-pins every 6" between the the 1" markers.  Once I place all the T-pins I used a quilters chalk line and snap lines making 6 x 8 grid on the fabric.

After I had all the grid lines in place I laid out all the melons on the grid lines, leaving the half melon shapes until all the center melons placed on the top.  Once I had all the full melons in placed I placed all the half melon shapes on the outer line with the flat part hanging over 1/4" the line for the seam allowance.


After I placed all the melons I press them down with a small iron to make sure everything was fused correctly to the background fabric.

My next step will be to sew all the melons to the background with a decorative stitch, and sew on the borders, but probably won't happen until next week, due to there is yard work to be done this weekend.

Tina


Split Orange Peel Day 2!

Day two of the Split Orange Peel quilt top, started with finishing cutting out the row sets into melon shapes. After cutting all the melons out,  I cut the half melon shape out from the row sets.  Then counted to make sure I had enough melons and realized that I was short on both the full and half melon shapes.  Then decided to make another four row set and cut them out, and it gave me a few more to work with for the layout.

I put all the melons to a side and set up the pattern board with the background fabric to add the grid on the fabric. To set up the grid I laid the background fabric on the pattern board using the grid lines marking the 1" by sticking T-pins in the pattern board, then marking with T-pins every 6" between the the 1" markers.  Once I place all the T-pins I used a quilters chalk line and snap lines making 6 x 8 grid on the fabric.

After I had all the grid lines in place I laid out all the melons on the grid lines, leaving the half melon shapes until all the center melons placed on the top.  Once I had all the full melons in placed I placed all the half melon shapes on the outer line with the flat part hanging over 1/4" the line for the seam allowance.


After I placed all the melons I press them down with a small iron to make sure everything was fused correctly to the background fabric.

My next step will be to sew all the melons to the background with a decorative stitch, and sew on the borders, but probably won't happen until next week, due to there is yard work to be done this weekend.

Tina


Thursday, April 11, 2013

New Project Started!

After a little bit of cleaning in the house and in the sewing room. I started a new project that I have been wanting to make for a while, The Split Orange Peel quilt.  When we were at the Virginia Quilt Show in February I watched a demonstration, by Sue Pelland on her rotary cut applique leaves. Really liked the rulers and could use them a lot in my quilts, so I picked up the rulers and the book.  The book has some nice patterns, so I'm trying The Split Orange Peel pattern.


The pattern uses 9 fat quarters and 1 1/2 yds of background fabric.  Today was a lot of cutting of fabric into 2 1/2" and 3" strips out of the fat quarters and then sewing the 3" strips into rows to make 8 strips in a unit.
 
Once you have all the rows sets sewn together you need to press all the seams open and add fusible.  I used what they recommend in the book, which is Mistyfuse.  You press it on the back of the press rows using a applique pressing sheet.  After you get the fusible on you need to let it cool for about 15 minutes before cutting.


After I let the rows cool, I started cutting one set of the rows into melon shapes, moving around the curves of the rules is a little bit tricky, but I'm taking it slow and easy with a 28 mm rotary cutter.

Tomorrow, planning to cut the rest of the melons out and layout the quilt top. So far this has been a fairly easy project.

Tina

New Project Started!

After a little bit of cleaning in the house and in the sewing room. I started a new project that I have been wanting to make for a while, The Split Orange Peel quilt.  When we were at the Virginia Quilt Show in February I watched a demonstration, by Sue Pelland on her rotary cut applique leaves. Really liked the rulers and could use them a lot in my quilts, so I picked up the rulers and the book.  The book has some nice patterns, so I'm trying The Split Orange Peel pattern.


The pattern uses 9 fat quarters and 1 1/2 yds of background fabric.  Today was a lot of cutting of fabric into 2 1/2" and 3" strips out of the fat quarters and then sewing the 3" strips into rows to make 8 strips in a unit.
 
Once you have all the rows sets sewn together you need to press all the seams open and add fusible.  I used what they recommend in the book, which is Mistyfuse.  You press it on the back of the press rows using a applique pressing sheet.  After you get the fusible on you need to let it cool for about 15 minutes before cutting.


After I let the rows cool, I started cutting one set of the rows into melon shapes, moving around the curves of the rules is a little bit tricky, but I'm taking it slow and easy with a 28 mm rotary cutter.

Tomorrow, planning to cut the rest of the melons out and layout the quilt top. So far this has been a fairly easy project.

Tina