Showing posts with label Sliver Units. Show all posts

Sunday, September 15, 2019

Steam Engine Whistle Stop Tour Blog Stop


Welcome to my stop on the Steam Engine Whistle Stop Tour.  This week, my fellow Studio 180 Design Certified Instructors and I are having the pleasure of showing off the Deb Tucker's  Island Batik "Steam Engine" Fabric collection.

If you have not been to my page before, let me introduce myself, my name is Tina Dillard, the proud owner of Quilting Affections Designs. I specialize in Block of the Month as well as individual patterns that expand the use of your favorite Deb Tucker Studio 180 tools with fresh innovated designs.  I also love teaching Studio 180 Design tools.  Additionally, I am a Sue Pelland Design certified Instructor.  I have some exciting new patterns coming soon that will combine the raw edge applique and piecing together using the tools.  You can view my patterns HERE.


Union Station
That enough about me, let's talk about this Whistle Stop Tour.  I hope you have been following this blog hop and downloading the free pattern on each of the Certified Instructor's blog pages.  If you are just starting out, let's get you caught up with the following list of participating Certified Instructors, and the link stops so you can make your "Union Station" quilt. 


Tina Dillard – Quilting Affection Design - Your Here


Sarah Furrer - Studio 180 Design
- Finishing Instructions

If you are looking for the "Steam Engine" Fabric Collection, you can find it at the following shops owned by Certified Instructors.  But check with your local Quilt Shop to see if they are getting it in as well.
Whistle Stop Tour - Hidden Blooms


Hidden Blooms is BlockBuster #35.  Hidden Blooms is a Technique based block that uses the Sliver (Corner Beam®), and Shaded Four Patch (Tucker Trimmer®) to make this 12" finished block. 

One thing I love about the Studio 180 Design Technique Sheets is that they expand your use of the Corner Beam® and Tucker Trimmer® tools.

Now it's time to Download "Hidden Blooms," gather our fabrics and tools.  Start by cutting out all your pieces and laying them out on paper plates to get organized.


Cutting Tip:  


When sub cutting your strips into squares, I use my Tucker Trimmer® I and II.  Tucker Trimmer® II will give you the 1/4" increments you need for your patterns. 


Ok, its time to have some fun! Ready, Set, Sew!

Sliver Units. 

For this block, we will be making both (4) Left and (4) Right Slivers units.


No matter type Slant you want in your unit "Slant Left" or "Slant Right," we start by making an oversized Half Square Triangles.  Using your Quilter's Magic Wand draw two diagonal lines on the reverse side of the white fabric. 

Next layer one white and one darker fabric right sides facing, stitch on the drawn lines and cut down the middle between the stitched lines.  Did you know that most of the Studio 180 Design tools have 1/4" dashed lines around the edge of the tool?  In the picture above, I used my Corner Beam® tool trimming down this center of the Half Square Triangles.


I recommend pressed away from the fabric I was slivering since we will be slivering the darker value fabrics we will press toward the white.  We will not be trimming our units at this time.


Are you making a Slant Left unit? Then you will want to place your HST unit on your cutting mat facing right Side up. (Left image)

Slant Right unit? Place your HST with the wrong side facing up.

For removing the slanted corner, you will want to place your Corner Beam® lining up the guidelines for the finished size line along the bottom and the Dashed line labeled "Center Beam Trim #1" on the side of the of section and the bottom of the unit on the Half Square Triangle unit. Note there will be a small gap between the edge of the ruler and the sewn seam. Trim along the slant.  Your unit finish size is 3".


The cutting of the Side Triangles is cut from strips in the same manner as we would for cutting for Side Triangles for Corner Beam units.


Trim the units to 3 1/2" cut size using your Corner Beam® tool. You will need to make sure to align one of the “Seam Line Placement” guidelines with the sewn seam between the sliver and added side triangle, ensuring the crosshairs are at the seam intersection, and the  “V” for your finished size units are on the other sewn seam. Trim the first sides of your pieced unit.  


Rotate the unit 180° and trim the remaining side of the unit. Make sure that you align up the 3 1/2″ guidelines and making sure the seam intersection nestles in the 3″ “V” and the corner to corner diagonal seams falls right along with the points of the “V”s.


Make 4 Slanted Left and 4 - Slanted Right Units.


Shaded Four Patch

For this block, we will be making 3 different color units that will measure 3" finished, 3 1/2" unfinished.


Remember to press toward the Wide Strip.  


Sub-cut the pieced strip the width of the narrow strip 2 1/4".  You will need two sub-cut per unit.  Pair the cut pieces assuring the narrow end facing the opposite direction from one another.  Stitch along the long side.  Snip the seam allowance at the center between the two squares all the way to the seam.  Press each half seams way from the square.  

Layer the pressed unit over a large rectangle.  

Using your Tucker Trimmer align the Common Diagonal Line long a side of the unit and draw a 45° sewing line, ensuring this line goes through the corner of the square.  Repeat on the opposite side. 

Stitch on each of the marked lines and cut them apart 1/4" from each of the stitched lines. Press toward the large triangles.


Now you are ready to trim the units, to 3 1/2" size using your Tucker Trimmer® tool.


Time to gather all your pieces, and stitched them together.


Following the Block Layout Instructions on Page 2 of the Hidden Blooms pattern.  Making sure your press according to the directions to nest the seam together.
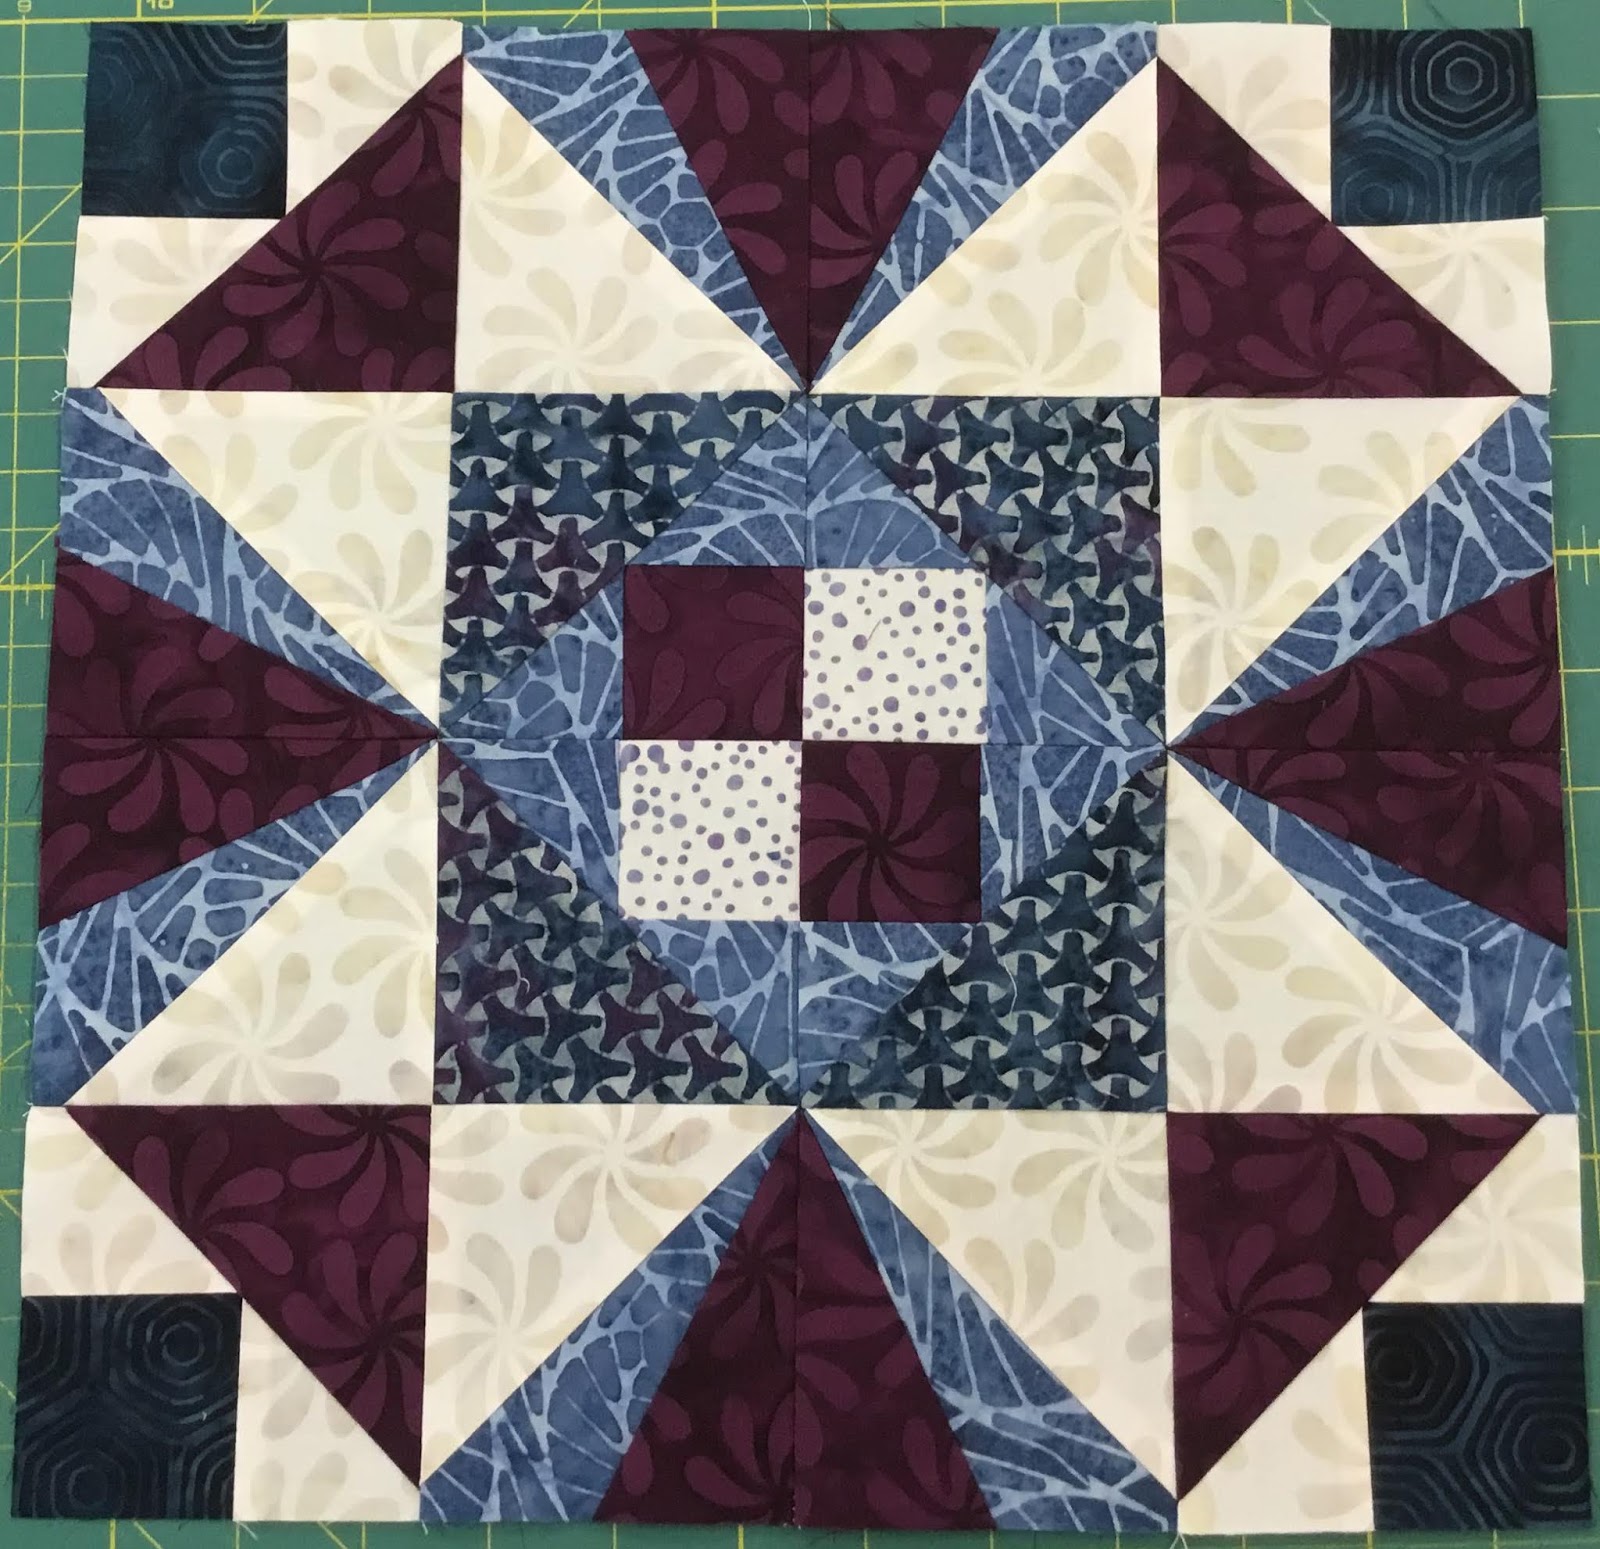

Your "Hidden Blooms" Block is now complete and ready to add to your "Union Station" quilt.

Thank you for stopping by the station stop.  I hope you enjoyed yourselves and I hope you will stop by again. 

I sure hope you will sign up for my monthly newsletter and blog post, to get the latest information about upcoming pattern releases and events.  Sign Up Here!

Also, Make Sure you follow me on the following Social Media Channels:


Have fun quilting,

Tina
"Designing to Inspire"

Saturday, April 7, 2018

April Showers Mystery Quilt: Week 1 Umbrella

Welcome to the month of April, and it supposes to be officially Spring, but I think mother nature has other plans right now for many of us in the United States.  

To help you all get ready for Spring, I'm teaming up with Kari Schell, the on-point quilter.  Kari Schell is an Electric Quilt educator and pattern designer.  She specializes in teaching quilters Electric Quilt the Easy Peasy way through online instruction.  You can learn more about her at www.onpointquilter.com.

Kari has developed a mystery project called April Showers. Every Saturday, in the month of April we will introduce you to a new block.


During the next couple weeks, Kari will show you how to design the blocks in Electic Quilt. Check out her blog here.  I am taking her design and developing it into a pattern for you using the amazing Studio 180 Design tools.  Additionally, I will be providing you with step-by-step videos that will show you how to make the blocks using the Studio 180 Design Tools. 


For the Fabric Requirements and list of Studio 180 Design Tools you will need for this Mystery Quilt, please Click (Here). You can pick any color you want to use, this quilt is a good way to use some of your Fabric stash.


Week 1, consists of making the Umbrella Blocks, and handles. The blocks consist of three units. You will need to use the Studio 180 Design Corner Beam® tool and the Sliver Technique Sheet.  If you don't have these you can purchase them at your local Quilting Store or on the Studio 180 Design Website.  

Note: this pattern is for more intermediate quilters.

The tutorial videos for Week 1 are split up into Part 1 and 2.
  
So let's get started with Part 1:


Part 2:


Here is the link to the Free Downloadable pattern.  

Have a Great Week! Don't forget to sign up for my newsletter and blog here, when you sign up you will get a Free Pattern.


Friday, March 30, 2018

2018 Master the Rulers: Studio 180 Design Blockbuster 12


Week 12 in my master the ruler's challenge I learned a new technique.

Blockbuster #12 Double Trek, was made with the Studio 180 Design Corner Beam® tool which worked within blockbuster #11.  I was also introduced to the Sliver Technique, which can be complicated if you don't read the directions on the sheet.

So, Let's start the Double Trek block with making the Unit A, the Corner Beam® Units, first.  I started out by cutting out the Side Triangles pieces, using white Island Batik Fabric, then I cut out a square using a yellow and purple fabric according to the size block I was making and the chart in my Corner Beam® Tool instructions that came with it.


From the yellow fabric, I began cutting out the center beam piece, I needed.  Using my Corner Beam® tool, I laid it on one side of the yellow square, lining up the tool on the Center Beam Trim #1 line and made my first cut.


Now that the first cut was done, I then placed the Corner Beam® tool back down on the fabric and lined up the Center Beam Trim #2 line on the trim edge that was made from the first cut.  Once everything was lined up I then made my second trim cut.


Now that my side triangles and my center beam were cut, it was time to lay them out for stitching.  Lining up the narrow end at the top of the center beam piece and assuring that the angle sides were next to the beam also.  


I then flipped the first side triangle over and stitched them together.  Once that was complete it was time to press toward the side triangles.  I then repeated on the other side.  


I then trimmed them to the size of units I needed for the Double Trek block.  I repeated the process over to make a purple beam unit as well.

Sliver Units were up next.  With the Silver Technique Sheet in hand, after reading the sheet very carefully, I learned it is very important to pay attention to the color placements and the trimming off in the second step.

 I began by making oversized half square triangles.  White/Yellow and White/Purple half square triangle units.

Now, I need decide how my units needed to slant. I need to make two units that Slanted to the left and two that Slanted to the Right.  


Once you know that you can start trimming your slants. I start off with making the Slant left, trimming away from the dark side.  Placing the Corner Beam® tool on the dark side of the half square triangle, I lined the Center Beam Trim #1 line on edge of the Half Square Triangle and trimmed to the size needed.


Next, I need to cut out the side triangles, that would replace the piece, that was trimmed off and stitched.


After all the side pieces were press to the side, it was time to trim the unit to size. 


The completed Slant left and right units with the purple sliver middle.


The yellow sliver units were also made for this unit.


  It was now time to cut out the last squares for assembling the blocks together.  


Now, that all my units were ready it was to lay them out to prepare for assembly of the block. Starting by stitching the rows first.


Then, by stitching all the rows together to finish off the block.


My Double Trek block is now complete.  It was a fun and challenging block to make. I definitely need more practice in making the sliver units. 

Series 1 of the Blockbusters are near the end, I now have 3 more blocks to finish to complete the series.  Next Week, will be fun with #13, using the Split Rects® tool.

Talk to you next week, and remember if you have missed the first 10 Blockbuster blocks you can catch up HERE.

Have a great weekend of Creating!

Tina
"Designing to Inspire"