Showing posts with label Blockbuster. Show all posts

Wednesday, October 18, 2023

Chromatic Blog Hop

I am so glad you are joining us for the Deb Tucker Studio 180 Design Chromatic Blog Hop. I and several other Studio 180 Design Certified Instructors made projects this week using the Chromatic Fabric Collection by Deb Tucker of Studio 180 Design.  You can find this week's Chromatic Blog Hop schedule below. I hope you will check out all the posts this week.

Monday, October 16th - Amy Costabile of Amy's Quilt Room

Tuesday, October 17th - Diana Mann of Murgaboo Quilts

Wednesday, October 18th - Tina Dillard of Quilting Affection Designs

Thursday, October 19th - Nicole Merriam of Heart of a Quilter

Friday, October 20th - Phyllis Fay of Tucker University

Saturday, October 21st - Studio 180 Design Wrap Up 


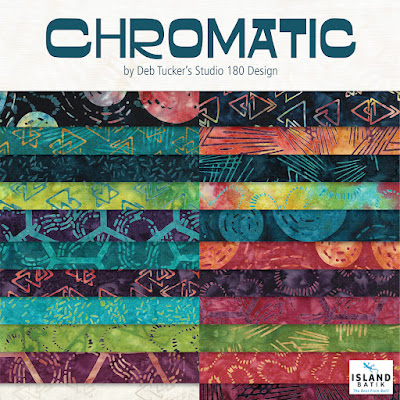
If you love bold colors, then you will love this fabric collection designed by Deb for Island Batik. The collection features colors such as oranges, reds, teals, blues, and purples. The first time I saw these fabrics, I was smitten with the colors. I even designed a quilt for the Island Batik catalog.  Later in this post, I'll show you more about this new pattern. First, let me introduce you to my Blockbuster project.


Choosing which Blockbuster to use was not easy. There were over 80 different blocks in the collection to choose from. In case you're unfamiliar with the Blockbusters, they're a set of free blocks where you can practice your quilting skills with the marvelous tools from Studio 180 Design. They are available on the Studio 180 Design website on the free downloads page. The latest ones are on their Facebook page.

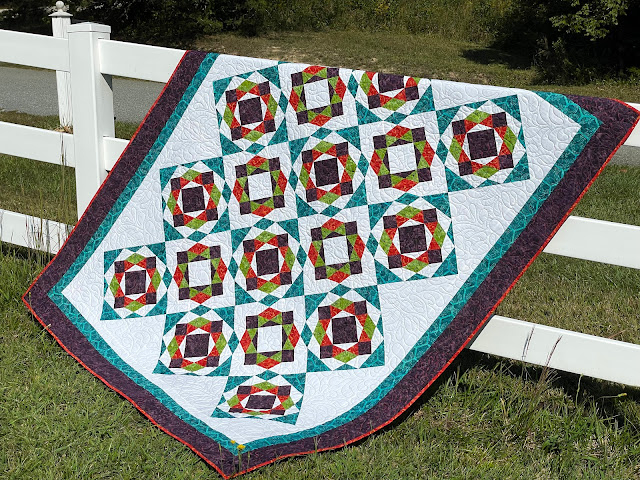
My project was created using Blockbuster #52 Sparkler. The Tucker Trimmer and Corner Pop tools are used to make this block. I really enjoy playing with the Corner Pop tools.   


To complete my project, I decided to make a table runner out of the blocks. Blockbusters come in three sizes, and for this project, I chose a 9" block and an Island Batik basic white background to help the blocks stand out. Next, I needed to choose the Chromatic fabrics. In order to make the Sparklers really stand out, I chose a variety of colors.


In this BlockBuster, you start by making your popped corner units. With your Corner Pop tool, you can make these units quickly and easily. If you want to make this block, make sure you use your tool instructions. The chart tells you what size to cut your replacement triangles. 


With your Corner Pop tool, you will cut off the corners of a basic square and replace them with new oversized triangles. Using the Corner Pop tool, trim down the oversized triangles to create the perfect block each time.


The last thing you need to do is make the center pinwheels for each block. In order to achieve this, I made several oversized half-square triangles and trimmed them with the Tucker Trimmer.


To create a spinning effect in the table runner, I decided to make two different blocks and alternate their placement.  To give the table runner a whole new look, I placed all my blocks on point as I laid them out. I added two borders to complete the project.


My table runner turned out so beautiful, I just love it.


Now let me introduce to you my newest quilt pattern created with the Chromatic collection. Gears in Motion is a dynamic quilt that uses the Tucker Trimmer and the Split Rects tool. In order to make the quilt flow, one block is made in two different color schemes. Gears in Motion is available to purchase from my website.

Tomorrow Nicole Merriam of Heart of a Quilter will have another beautiful Chromatic project. Thank you so much for joining me today on the blog hop.

Friday, December 10, 2021

Blockbuster 65 Twilight Zone and Geese of a Feather Technique!

Recently, Studio 180 Design released Twilight Zone, its newest blockbuster. This color play block is made with the Wing Clipper® and Square Squared® tools. The only thing else you'll need is the new Geese of a Feather Technique sheet, depending on how you place the flying geese units.  


As I was working on my Twilight Zone block, I decided to write a tutorial on how to make Geese of the Feather.

What is the Geese of a Feather technique

Have you ever wanted four flying geese with all one color on one side and all the other colors on the other side? Well, Deb Tucker has come up with an exciting way to make these flying geese, and it's easy to do. 

Making these units won't be a problem if you know Studio 180 Design's Non-Waste method. Starting with one large square and two small squares of one color and two small squares of color two. The Geese of the Feather Technique Sheet will give you the cut size for these units. Due to the small square sizes being slightly larger than the ones specified in the Wing Clipper® instructions. With them being a bit larger you don't have to worry about them nudging toward the center. 


As soon as you have your squares cut and ready, mark quarter-inch lines on each side of the center diagonal on each small square. Next, you'll cut down the middle of the center diagonal of the lines to make four triangles.


Place your large square right side up on your cutting mat or table. After that, you just need to pick what color you want on the left side of your flying geese. You'll label the left side Color 1 and the right side Color 2. 

Once you decide on your Color 1 and Color 2, we'll put them on the large square. You should start by placing a Color 1 triangle on the top right side with the long edge of the triangle. Next, add Color 2 on the opposite side to make it look like a square. Repeat the process on the bottom half of the square, but this time reverse your colors. Color 2 goes on the right, and Color 1 goes on the left. Once the triangles are lined up, pin them.

Stitch on the lines, cut down the middle, and press toward the small triangles.


Position your unit on the cutting mat or table again. Arrange the rest of the triangles. Pay attention to the colors on the left and right sides. If Color 1 is on your left, put Color 2 on your left. After that, put Color 1 on the left. Repeating the process for the other unit. 
Pin in place.


Then stitch on the lines and cut in the middle. Press towards the small triangles.


You have four flying goose units with all colors on one side. 


Trim the units with a Wing Clipper® tool, according to the instructions. Set up the unit so the point is facing you if you're right-handed, and to your right if you're left-handed. Make sure you line up the diagonal lines on the triangle seams. You should have plenty of space all around. Then trim the first two sides.


Turn the unit 180 degrees and align the previously trimmed edges of the cleaning guidelines and the "X" with the intersection of the seams. Trim the last two sides. You'll have 4 flying geese. You'll need 6 units to make this block.


You'll also need six Square Squared® units to complete this block. I had a lot of fun playing with the colors and how they should be positioned. Try it out and see what you can do with it.  

Also if you wish to learn more about Studio 180 Design, please check out my online classes, called the Precision Block Academy. The next set of classes will start on February 1st. If you sign up for the Waitlist you get priority registration.  

Friday, December 7, 2018

Graceful Points Quilt Along coming February, 2019

Have you ever wanted to make a quilt using the Studio 180 Design Blockbuster blocks?  Or are you one of those Deb Tucker Studio 180 Design fans that love the tools and want to expand your skills.  Well, you’re in luck, I will be hosting the first of many Quilt Along in 2019, where I have designed a quilt around the blockbuster blocks.


Some of you may be wondering, what is a Blockbuster? Starting back in 2016, the Deb Tucker Studio 180 design team began developing a Free PDF download program called “Blockbusters” to encourage Deb Tucker Studio 180 Fans to play with their tools and work on their skill sets. The Quilt Along will take these Blockbuster Blocks and make a quilt out of them.

Wall
King
The first Quilt Along “Graceful Points” will start Friday, February 1st, 2019.  Graceful Points uses 15 of the Blockbuster Blocks (one Blockbuster will be repeated three times to make a total of 17 blocks), to complete your quilt.  You can have your choice of making two different sizes.
  • ·     Wall Hanging (62” x 62”) – which was design around the 6”, 9”, and 12” block sizes.
  • ·     King (110” x 110”) – which will use the 12” and 18” block sizes.
You can Download the detail for this Quilt Along below.

Details:
How will this Quilt Along will work? Starting February 1st, 2019 I will be posting the first of the blockbusters blocks that will be used in this quilt. Then every two weeks, I will post the next block through my Newsletter and Blog, and it should finish around September 13th, 2019.  The last couple of weeks will be for finishing your quilt and making the additional blocks to add to your quilt.

Sign up for my Newsletter and Blog Here

Fabric:
You will need to purchase the following for your quilt. You will need to have 4 different high-contrasting colors and one background color, such as White, Black, Grey, or Tan, it’s your choice.  Again, I will leave your color decisions up to you and your tastes in fabric.
My versions of the quilts will be the following from the Fabric Collection Island Batik “Birds and Bees” collection, I will be using (4) different contrasting fabrics from the collection and for the background a Cream color from the Island Batik Neutral Collection.

I have provided the yardage below for the quilt.  These are the basic yardage estimates, and I have done my best to make sure you have enough fabric to make your quilt.  

Also, I have provided links to some the color pages for both sizes of the quilts so you can add your own touch to the project. Download Here

Yardage: Based on 42” width of fabric
The first chart only includes the fabric to finish your quilt and does not include the border fabric.  The border fabric is listed in the second chart below. Again these are estimates.


Color 1 (C1)
Color 2 (C2)
Color 3 (C3)
Color 4 (C4)
Background (BG)
Wall
3/4 yard
3/4 yard
3/8 yard
1/2 yard
3 1/4 yards
King
1 1/4 yards
1 1/2 yards
1 yard
3/4 yard
4 3/4 yards

 Wall Borders and Finishing:

Border 1
Border 2
Border 3
Border 4
Binding
Backing
Wall
1/3 yard
1/4 yard
1/4 yard
3/4 yard
1/2 yard
4 yards
King
7/8 yard
5/8 yard
3/4 yard
2 yards
1 yard
10 yards

Note: In the image above, I used the Background for Border 1 and 3.

Below is a link to the Graceful Points QAL Facebook Group to share your fabric selections, completed blocks, etc.  Please feel free to join, if you plan on participating.  This group is for participates only, not for spectators.  Join Graceful Points Quilt Along Facebook Group.