Showing posts with label Star 60 Tool. Show all posts

Monday, August 4, 2025

Island Batik Ambassador August Hot Stuff Challenge


The Island Batik Ambassadors have a new challenge this month. At the start of the year, each ambassador received an Oliso M3 Pro iron along with a small carrying bag for their irons, provided by our sponsor, Oliso. For August, our challenge is to decorate these small iron carrying bags. We can use various techniques, including quilting, embroidery, appliqué, paint, and more.


The Oliso iron carrying bag is constructed from strong, durable polyester felt, designed to protect the irons. Initially, I had difficulty figuring out how to decorate this carrying bag. However, during my visit to the Road to Virginia quilt show, I stopped by Oliso's booth and spoke with Michele Muska, the Director of Content and Community. She shared several beautifully decorated bags from the show, which served as great inspiration for my own design ideas.


I knew I wanted to work with leftovers from Jackie Kunkel's Canton Village Quilt Works Cosmic Fabric Collection by Island Batik Lumin Fabrics, which were part of my February challenge. I initially thought about adding just Flying Geese units to the bag, but the main question was what size units to create. I started by experimenting with the smallest size I could make using one of my Studio 180 Design Wing Clipper Tools. After some trial and error, I decided on a finished size.


I used six bold and vibrant colors for the body of my Flying Geese and black for the wings. I created Flying Geese units that measure 5/8” x 1/4” finished size, trimming them down to perfection with my Eighth Inch Wing Clipper. It was quite enjoyable to make these small Flying Geese units!


For the center of the bag, I sewed two sets of six units together to create a long section of Flying Geese. Then, I added black strip pieces to the top and bottom to allow for a clean finish when folded under. I did the same on the sides as well.

Looking at the sides of the bag, I decided to incorporate a smaller set of Flying Geese units. I added two long pieces to the top and bottom of the geese for another fitting. Once I placed them on the bag, it looked good, but I felt it needed something more.


I decided to use my Studio 180 Design Star 60 tool to create a variety of units that finish at 1 ½ inches. 

After making and trimming them to the correct size, I sewed them together in a long row to achieve a diamond effect.

To finish the sides, I placed a long, narrow strip between the Flying Geese row and the Star 60 row. I also added a strip at the bottom beneath the Star 60 row, which will be folded under to complete the bottom edge of the sides. For the top, I planned a long, wide strip that will help finish the upper edge of the bag's side and will be shaped later. 


I repeated this process for the other side as well.


To finish the sides and center of the bag, I used freezer paper templates to accurately shape the edges of the pieces. 


Next, I applied Hobbs Heirloom fusible batting to these shaped pieces using my Oliso M3 Pro iron. 


Finally, I quilted the pieces together with Aurifil thread using my Bernina 790 Pro sewing machine.


Next, I used my Bernina 700 to embroider my logo on the bottom of the bag as a finishing touch.

I then decided to hand-stitch the center and side pieces, as well as the bottom logo, onto the bag. Although it was challenging to stitch through the felt, after several evenings of hand stitching, I finally completed it.


I loved the result, and it was such a fun project!


Tuesday, March 28, 2023

Day Two - Exuberance Blog Hop


It's my pleasure to have you on my blog today for day two of the Deb Tucker Studio 180 Design Exuberance Blog Hop. For those of you who haven't visited my site before, let me introduce myself. Hi! I'm Tina Dillard, the owner of Quilting Affection Designs and a Studio 180 Design Certified Instructor. I have recently joined forces with my friend, fellow Certified Instructor Diana Mann of Muragboo Quilts. I'm bringing you an improved Precision Block Academy, which I created in 2021.

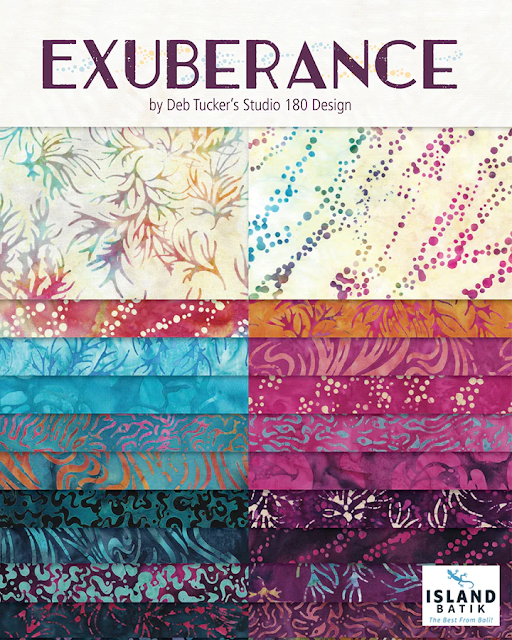
Throughout this Blog Hop, a few of my fellow Certified Instructors are sharing projects they have done with precuts from the recently released Deb Tucker Studio 180 Design's Exuberance Fabric Collection Line for Island Batik Fabrics. Landing in your local quilt shops now.  

Here is the Blog Hop Schedule:

When the Studio 180 Design team named this new collection, they got it right. The colors are full of energy, excitement, and cheerfulness, which is what Exuberance means. They have really brought it together in this collection with the bold and rich colors that pop in any project you bring them into. 

For my project, I decided to do an original quilt that uses 10" squares to show off the colors. This is the first Star 60 project I have designed, and it utilizes one of the new Star 60 Technique Sheets, Power Strip 60. I'm in love with this creative technique that allows you to make multiple Star 60 units or Shaded 60 units. In this original project, I chose to make the Shaded 60 units using 10" squares and some Island Batik white fabric for my background.

I started off with this project by selecting a variety of 14 different 10" squares; half of the 14 would be for the diamond tips of the unit, and the other half for the companion triangle. I also cut background strips for the side triangles and more companion triangles. 


When making Shaded 60 units, they are very similar to Shaded Four Patches. However, you use the Star 60 tool for making 60-degree shapes and trimming. Using strip sets with bright, Exuberance colors for the diamonds and background fabric for the side triangles, a pieced Star 60 unit is created using these strip sets. Pieced Star 60 units can be added to a parallelogram unit cut from Exuberance and Background fabrics. On the pieced section, you can also mark stitching lines through the point diamonds. On the marked line, stitch a parallelogram right sides together with a pieced section. Press the seams toward the companion triangle and cut them apart 1/4" from the stitched lines. You now have some newly pieced diamonds ready to assemble.

It's time to add side triangles to those diamonds. Before I do that, I need to trim the sides that will have side triangles attached. Once I had the first trim done on the diamonds, it was time to add those side triangles.


Having assembled the units, I wanted to play with the quilt layout before trimming it down. I found the final layout to be the most challenging part of the whole process. Once I was happy with the layout, I did the final trim on the units. When I put the quilt together, I stitched the units into rows. At each row's end, I added half rectangle triangles to make the quilt square. Then I stitched all the rows together to finish the quilt top.

Once the quilt top was assembled, I added borders to each side to finish it.

This project was super fast and easy, thanks to the Power Strip 60 Technique. The bright, bold colors of the Exuberance fabric collection really make the pinwheel effect stand out. In the future, I'll make this a pattern. However, I'd like to tweak a few things to make it even easier for you if you want to try it out.

We're glad you're here for Day Two of the Studio 180 Design Exuberance Blog Hop. Please visit your local quilt shop and ask about the beautiful Exuberance Fabric Collection. This will bring energy and excitement to any quilt project you plan to make, just like it did for this project. I have more quilt patterns in this Exuberance collection in the works, so stay tuned for them.

Also, if you're interested in learning more about the Power Strip 60 technique or any of the Studio 180 Design Star 60 tools, check out Precision Block Academy. Registration opens in May.