Pages

Tuesday, December 31, 2019

2019 Reflections!!


Wow! It is hard to believe that this year is almost over, and so is the decade.  Today, I want to look back at what I did and didn’t get accomplished in 2019.
 
When I look back on my January 2019 post on my goals for 2019, I feel that I finished many of them, but fell behind in some of my goals I wanted to get done.  Let’s start with my long-term goals first; I started working on getting my name out as a pattern designer, which is a long hard process; therefore, it is on my long-term goal list. I did get another one of my long-term goals completed, which was to get picked up with by distributors.  I signed with Checker this last year, I hope I can gain more as time goes on.


One of the short-term goals that I accomplished this year was to have a booth at Quilt Market. I had two Quilt Market booths, Spring (Kansas City) and Fall (Houston). I feel having booths at the quilt markets greatly benefited me as a person and my business.  The Spring Market was difficult, not knowing what I was getting into, plus I ran the booth by myself.  The Fall Market was far better due to my good friend, and my Longarmer Januari Rhode, aka The Quilted Ginger, went with me. I learned so much from her on pushing myself a little further, and getting my name out there and getting over those fears. 

Another goal that was on my list was to find time for myself and take a few classes. This year I attended a couple of Deb Tucker class during the AQS Lancaster Quilt show. That was great, just to get away and spend time learning from the best. Another way to find time for myself was to sell my longarm. This was a tough decision, but not doing the quilting on my patterns, freed up more time so I could produce more exciting designs and get to take a break here and there as well.


Another goal was to continue to grow my social media, blog, and newsletter followers. This year I did fall behind in my newsletter and social media posts. However, I had a great Quilt-Along that was fun, called Graceful Points, which combined the Studio 180 Design Blockbusters into one learning process to make either a wall or queen size quilt.


I did continue to design fun and exciting quilts over the past year. I released four new patterns, Getaway, Garden Enchantment Block of the Month, Stormy Seas, and Whimsical Dance, with more coming shortly in 2020.


One accomplishment that was not on my set of goals, but I’m so glad that I didn’t pass up the opportunity was to become a Sue Pelland Designs Certified Instructor.  She has opened the door for me in the designing world.  Stay tuned as the first of these designs will come out in 2020, you may glimpse some of these projects on my social media posts.

There was so much more I want to get done but got neglected this past year, such as grow my lecture and workshops, design more patterns using various fabric companies. However, I will add these to my long-term goals and work on them over the next couple of years.

This was a fun reflection on 2019, tomorrow I will have my new goals for 2020 ready to go for you. It will be an exciting year coming up, and I look forward to sharing the adventure with you.


Tina
"Designs to Inspire"


Monday, December 23, 2019

Island Batik Ambassador Final Post!

Today, Is my very last Island Batik Ambassador post. It's hard to say goodbye to a good thing, now that it is time for me to step aside and let others have a chance to enjoy the pleasures I had over the last couple of years. 

When I started out as an Island Batik Brand Ambassador in 2016, I was just trying to figure out the pattern design business and get my name out there. Over the last several years, the hard and fulfilling work I put into being an Island Batik Ambassador has paid off. Oh, don't worry, I plan to continue designing with Island Batik Fabrics. 

There have been so many highlights over the last 4 years of being an Island Batik Ambassador. Starting off with the biggest highlight, which is the opening of the First and Second box of the gorgeous, yummy, and fun goodies.  Some other highlights are planning your project every month with all the fun and exciting fabrics, learning new tools and techniques that you have not tried before. 

Over the years, several projects that I developed for Island Batik became a published pattern. Such as Beneath the Waves, Welcome Home Pooch, Keeping Watch, Getaway, and Mountain Snowfall.  Check out my website for more information about these patterns.


Let me show you some of the projects I have completed over the last couple of years.

2016


2017


2018


2019


Before I leave, I would like to give Island Batik a huge thank you!  It was a pleasure to serve as one of your Ambassadors. I would like to thank the following Sponsors for the great products they provided us over the years.


I hope you all continue to follow me as a designer and watch as the 2020 Island Batik Ambassadors give us all new and exciting projects.

Tina
"Designs to Inspire"

Sunday, December 15, 2019

Island Batik Ambassador: 3D Challenge


The December project for the 2019 Island Batik Ambassadors was to do a 3D project.  I was not sure what I really wanted to make with this project, but my husband came up with a fun idea that just used two different Studio 180 Design tools and techniques.


His concept was to make 56 total blocks that consisted of Half Square Triangles using the Tucker Trimmer I tool. The other tool we used in this project was the Square Squared tool to make Little Houses (which is a Technique Sheet). 


The Island Batik fabrics I decided to use in this project were the Geared Up Collection (Fat Quarter Bundle), and I also used my Black Solid yardage for the background.  These fabrics can be found in your favorite local quilt store now. 


Once I had all the different Half Square Triangles, and the Little houses made, it was time to lay out the pieces and start assembling it together.  


The first couple blocks are now together, and you can see the dimension coming through.


Here is the final quilt top before the borders were added.  Wow, can you see the dimension to this quilt now?


The completed quilt is now finished, and it is time to take it to the Quilted Ginger, my longarmer to complete and I can't wait to see what she does.


Monday, November 25, 2019

Island Batik Ambassador Tool Time


For many of us Island Batik Ambassadors, the theme of November Tool Time.  We were to come up with a particular project that uses a specialty tool, template, or dies.  


As a Sue Pelland Design's Certified Instructor, I'm trying to make quilts using her products for Trunk Shows, plus this gives me a chance to play and practice. So I decided I was going to pick a project from my Hearts and More Book by Sue Pelland Designs. The project I choose was the Drunkards Path Quilt.  

Most of your Drunkards path quilts are traditionally two colors, but I decided to use three different colors from the Island Batik "Graphic Gems" Collection.  I just love the bold colors in this collection.

The drunkard's path in this project was not your standard curve piecing, this version we will be making fast and easy way using the Sue Pelland Designs Hearts and More Template to make applique Drunkard path blocks. 


You start by cutting two different sized squares out. Then take the larger squares to your ironing board and add a piece of Fubile webbing on the reverse side of the square. Sue Pelland recommends, and I have to agree to use MistyFuse Fusible webbing. I love it do to it does not gum up my needle, and plus, your fabrics don't feel stiff after it is applied. It is like there is nothing there.


Once the Fubile webbing is cool, it was time to cut out the perfect circles. Place your fused fabric on your cutting mat. Fold the fabric on the diagonal and finger press in place. Then I placed the Hearts and More Template D on the fold, making sure the centerline was lined up on the fold, and the arrow was pointing toward the center of the fabric. 


Using my 28mm rotary cutting blade, I cut a 5" circle of the fabrics. Making sure to make a clean cut all the way around.


Back at the ironing board, I placed the frame down right side down on the applique pressing sheet.


I placed a smalled square that was cut the same size as the Fusible webbing that was on the back of the framed piece and fused the pieces together.


The fused pieces look great.


Now we are going to take the center circles we cut out of the frame and center them on the larger square. To find the center, I folded the square and circles and finger press line the folds to help with the lineup.


Once, the centered circle was centered on the larger square.  I fused the pieces together.  


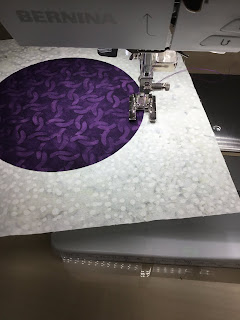
Then, the final touch was to use a blanket stitch and round the circles.  Just remember to take your time, and it will look really lovely.


Once all your circles are stitched down, it was time to square the block.


And cut the square in half.


And in half once more to get four Drunkard Path units.  Fast, easy, and nice-looking blocks every time.


Now it is time to sew them all together.  I laid out the blocks, in a two by two layout first and then stitched them all together to form a four by four grid layout in two different color schemes.  Then finished them off by stitching all the grids together.


Here is my final quilt, now this quilt is finished and ready to go to my longarmer.  If you have not tried out the Sue Pelland Hearts and More Templates, you may want to before you start your next Drunkards Path quilt.  This is a fun and easy way to make your quilt.

Be sure to come back for the Decembers project, to finish off the exciting Island Batik Ambassador year.  


Thursday, November 14, 2019

Island Batik Ambassador: Top it Off


I finally getting caught up from the preparing and excitement at being at the Houston Quilt Market and Festival. 


My first goal once I was recovered was to get my October Island Batik Project finished for you all to see. And today, I have finally finished it.


October's task was to make a Holiday table topper and have some applique worked into the project.  So after I looked through my Island Batik Fabrics, I decided on a few fabrics that would make my project look have a Christmas feel. 

This project was going to be made from some of my favorite tools, the Studio 180 Design Square Squared Tool, and the Sue Pelland Designs Leaves Galore Template


 I started with making some Little House units for this project.


Next, I needed to cut out some leaves for the center of the Little House units. Next, I prepared my leave fabric by applying MistyFuse Fusible Webbing on the back.  Once the MistyFuse had cooled, I used my Sue Pelland Design Leaves Galore "Norme" Template to cut out 3" Leaves using my 28mm Rotary cutter.  With to passes, I had enough 3" leaves for my project.


Then using a straight ruler, I found the bottom middle and the bottom 1/4" mark. These would be my placement lines for the tips of the leaves.


At the ironing board, I placed the tips of the leaves on the placement lines.  Once the leaves are in proper placement, I fused them to the fabric and stitch them in place.


Next, I need to add some "S" And "Z" shapes using the same Leaves Galore Template. With the MistyFuse down on the cutting mat, I start cutting out the "S" Shapes.  For the "Z" Shapes, I would place the Fused side up.


Now I need to mark some 1/4" placement lines in the corners of a square.  These lines will be used for the placement of the "S" and "Z" Shapes.  


At the Ironing Board, place the shapes tips to match up across two corners and inside the 1/4" marks.  Once in place, fuse the shapes in place and then stitch them in place.


Once I had them everything ready, I put the blocks together and stitched all my table runner together. Then it was time to quilt it. For the quilting, I used my Leaves Galore, and Iron off chalk I some quilting lines and began quilting away.


Here is the finished product, I just love this table runner.  What a fun project and love how piecing and applique can work together. The Sue Pelland Designs Leaves Galore templates to make the cutting so much easier.

Stay tuned for the Novembers Island Batik Ambassador project.

Tina 
"Designs to Inspire"