Pages

Friday, January 21, 2022

Precision Block Academy Open Registration


I hope everyone is enjoying the new year so far. It's my pleasure to announce Precision Block Academy (PBA) is open for new students. Just what is PBA? Precision Block Academy (PBA) teaches quilters how to make better blocks so they can make better quilts with less stress and frustration.


PBA is built around Studio 180 Design tools that let you design slightly oversized units, then trim them down to the perfect size. So if you have some Studio 180 Tools lying around collecting dust or want tools that will make creating your blocks easier, these are the ones for you. If so, Precision Block Academy is the place to learn how to use them correctly. The goal is to teach you how to make a precision quilt and build your quilting confidence.

There's a lot more to the PBA than a typical class. Through the Academy, you can connect with other quilters, share ideas, ask questions, and learn from the comfort of your own home. There's no need to lug your sewing machine down to the quilt shop and then put it back up when you're done. Everything can be done at home. Plus, it's a work at your own pace program. This means you don't have to stick to a schedule or number of hours. You can sew and learn whenever you want. Video recordings are available for anyone in the community to watch as often as they want. Even live events are recorded so you can watch them later.


Every month, you'll get a block covering one of the Studio 180 Design tools. You'll get 12 different lessons that cover Studio 180 design tools. You'll get a block pattern, a video tutorial on using Studio 180's Design Tool, and instructions on assembling the block. Additionally, you'll receive a Sampler Quilt pattern for your finished blocks, plus fabric requirements.


Getting access to a private Facebook group. You can ask questions, share blocks, and get advice in this group.

You should check out the live sessions. During one session, you'll break down existing quilt patterns into their individual blocks. Then you'll learn how to make them using Studio 180. In the other Zoom meeting, I'll answer your questions as your instructor. Here's your chance to ask any questions you have or get any help you need.


Join now and start learning. There are only a few days left for this opportunity, so act fast.

Join Now!

Saturday, January 15, 2022

Block Party Block #21 - Flying Darts Tutorial

It's the first Block Party Block of 2022. Block Party Block #21 "Flying Darts" reminds me of playing lawn darts on camping trips or in the backyard. The Studio 180 Design Corner Beam®, Tucker Trimmer®, and Corner Pop® tools are used for this block. You can download your block, Here!

This tutorial is about making Popped Half Square Triangles for the Flying Darts Block Party Block.


Start by choosing your fabrics and deciding the size of your block. Then cut your squares out according to your size. See the Tucker Trimmer® tool instructions for how to make half-square triangles. Once you've made your Half Square Triangles, I recommend pressing the seams to open so the unit lays flat and won't bulk up when you put the block together. 

Right Handed Trim

Left Handed Trim

After that, you'll trim your units to size. Trimming must be done before popping the corner so that the unit is as straight as it can be. Place your unit on a cutting mat. Position the Tucker Trimmer over the unit, aligning the diagonal guidelines on the seam for the desired size. Trim the first two edges.

Right Handed Trim


Left Handed

Turn the unit 180 and position the clean-up lines on the unit edges that you trimmed and do the same with the diagonal lines on the seam. Now make the final cuts. 


Now that we've got our units trimmed and square, we want to use our Corner Pop® tool to trim off those dark corners. 

Replacement

Using the tool's cutting chart, we can figure out what the Replacement Triangle Square size needs to be based on the size of the Finished/Cut Away corners. To make your replacement triangles, cut your squares to size, then sub-cut them diagonally. 

Right Handed

Left Handed

Let's find the Cut Away lines size for the replacement triangle. Make sure the Cut Away lines are aligned in the dark corner of the Half Square Triangle. Cut across the diagonal.


Position the newly trimmed half-square triangle and the long diagonal edge of the triangle replacement with right sides together. Stitch in place with a 1/4" seam allowance, then press the seams open.

Right Handed


Left Handed

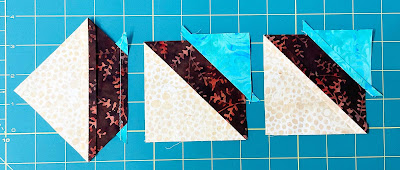
If you're right-handed, position the newly popped corner in your upper right-hand corner and if you're left-handed, place it in your upper left-hand corner. Lay the Finished Size Corner Trim Down line on the seam of the new corner. Keeping your unit straight is easy if you align it with the grid lines on the tool. Just trim the two sides. Do this for all 12 Half Square Triangles. 


It's really easy to make these units. All you have to do now is make 20 Corner Beams and assemble the block.

Block Assembly


It's best to make all four corners first and press the sections together.


Assembling the middle sections, again press your seams open.


Then stitch all the sections together into rows. Lastly, stitch all the rows together to finish the block. Make sure all seams are open. Have fun.

What to Learn more about the Studio 180 Design tools?


Do you wanna learn how to use these and the other Studio 180 Design tools? My Precision Block Academy will open next week for a short time. Starting next Thursday, the 20th, through midnight on the 23rd you can register for the next set of classes starting February 1st. Using the Studio 180 Design tool and Techniques from the comfort of your own home, you can expand your quilting knowledge. To learn more, check out the Precision Block Academy. I'll write more about the academy next week.