Pages

Friday, October 29, 2021

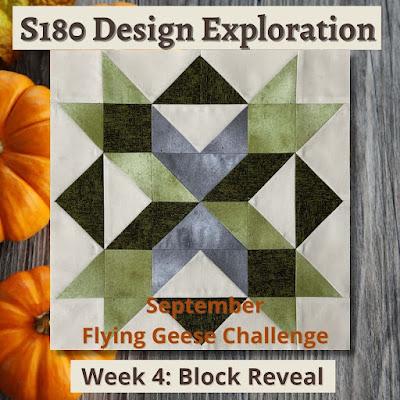
Octobers Studio 180 Design Block Reveal


This month the talented Studio 180 Design Certified Instructors Block Exploration Challenge focused on different Flying Geese. It was fun to design blocks that just use those units. 

I usually use either EQ8 (Electric Quilt 8) or Adobe Illustrator when I design my patterns.  For most of my blocks, I love to use EQ8.  You will see my mockup for this block that I develop in EQ8.  This block was so much fun; due to how coloring was done, you get a 3D look in the block center.  


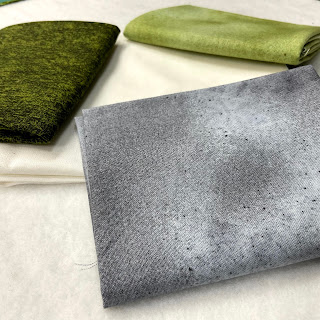
Sometimes after I color my designs in EQ, I dig into my stash and look for something similar to my mockup.  I pretty much keep with the same colors in this block but added a grey instead of the tan color. My choice of fabrics where a random set of fat quarters and white background fabrics. The Darkest Green is BENARTEX Cotton Shot, and the light green and gray are from the P&B Fabrics New Suede 7.

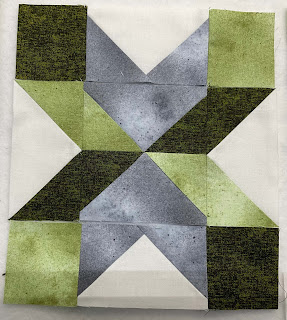
This block uses three different colorations of flying geese, one color and partial color geese, along with small squares. If you would like a tutorial on how to make these units, check out last week's blog post, Non-Waste Flying Geese. Once I had all my flying geese made, I laid out the geese and squares a block to figure out the construction.  


I started the construction of the center of the block first, pressing all my seams open to make certain points laid flat. 

Then I added the outer borders to the side and top to get my block to look like this fantastic quilt.  I think I will name "Deep Dive."

I hope you enjoyed this block in the Studio 180 Design Certified Block Exploration Challenge. 

Friday, October 22, 2021

Non Waste Method Flying Geese - Wing Clipper Tool


Last week, I showed you how to make the Quickets in my Block Party Block #18, "Pointed Square."  This week, I want to continue with the Wing Clipper tool showing you how to make Flying Geese. 

The Wing Clipper tool is one of the Studio 180 Design fundamental tools that I talked about in my blog post, "What Studio 180 Design Tools Should I start with?."  This tool was created to make traditional Flying Geese units.  

The construction method of these units uses the Non-Waste Method, which uses one large and four small squares to make four flying geese at one time.  With the Studio 180 Design method, we will make these units slightly oversized and trim them down with the Wing Clipper tool. As a result, your units will be made quickly and accurately every time, no matter if you are making a 1/2" x 1" to 5"x 10" finished flying geese unit.

So let's walk through the steps to making these fast units. 


Step 1.  You will need to determine the finished size of your units.  Then you will refer to the cutting chart in your tool instructions, find your finished size in the chart, and follow the chart over to find the Large Square and Small Square sizes you need to cut.  Remember you will need one large and 4 small squares per 4 flying geese units.


Step 2. Position two small squares diagonally on opposite corners on top of the larger squares with right sides down. Nudge them toward the center 3-4 threads.  Mark two diagonal lines, each 1/4" away from the center diagonal. If you have the Quilter's Magic Wand, it makes it really easy to mark your lines.


Step 3. Stitch on both of the drawn lines. I like to stitch on a thread inside the drawn line to give me a little more fabric to work within the trimming process. 


Step 4. Trim between the stitched lines on the center diagonal. I like to use my Wing Clipper for this process, using the 1/4" line on the tool. 


Step 5. Press your seams toward the small triangles.  I like to use a sewing clapper to help continue the pressing process to make sure the small triangles lay as flat as possible.


Step 6.  Position the remaining small squares right sides down on the previously pieced units. Remember to nudge squares like you did before. 

Step 7. Mark two stitching lines 1/4" away from the center diagonal line.

Step 8. Stitch on both drawn lines, trim between the stitched lines, and Press to the small triangle.


Step 9.  Position your oversized units horizontally on your cutting mat with the center point facing you. Align the diagonal lines down the seam lines of the size you are making. Trim up the first two sides.


Step 10.  Rotate the flying geese unit 180°, and reposition the Wing Clipper to align the unit cut size clean-up guidelines with the previously trimmed raw edges and the "X" at the top with the intersection of the seams. Trim up the final two sides.


See how easy these units are to make. These particular units are being used in my latest Studion 180 Design Block Exploration Challenge Block.  If you want to see the final block, please come back next week for my block reveal. Also, don't forget to sign up for my blog post to go to your email box each week; Click here to sign up and if you would like to learn more about the Studio 180 Design tools, check out my Precision Block Academy, "Learning to make Precision Quilts the Studio 180 Design Way."

Friday, October 15, 2021

Block Party Block #18 "Pointed Square" Quickets Tutorial

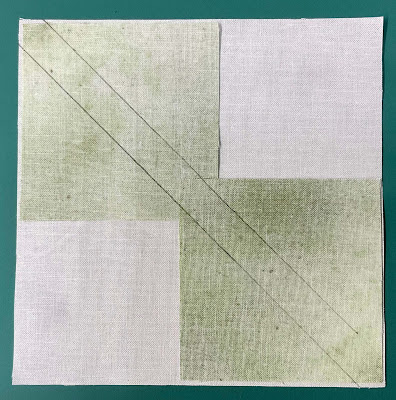
It’s fun to look at different blocks and see different shapes and dimensions. This month's Block Party Block #18, "Pointed Square," does just that; you will find that it looks like it is two blocks, but it really is one block. 

Did you know that starting this month you can have these blocks delivered to your email box?  All you have to do is to sign up for my newsletter and on the 15th of the month, you will receive an email with the Free Block inside.  


You only need the Studio 180 Design Wing Clipper® I and the Square Squared® tools to make this block.  The Square Squared® will make the Diamond Square unit that is in the center of the block.  


The Wing Clipper® I will make the flying geese using the No Waste Method.  The No Waste Method makes flying geese fast and easy, creating 4 geese at one time with just 5 squares pieces. I will be covering these units in next week's blog post. The funny thing is that we are also working on these units in the current Module in the Precision Blocks Academy and in the Studio 180 Design Certified Instructor Block Exploration on Instagram. So you can follow us on Instagram to see the weekly Thursday Sneek Peaks.  


In this tutorial, I want to cover how to make the Quickets in this block.  The Quickets are part of the Pickets and Quickets Technique Sheet that uses the Wing Clipper® tools to trim these oversized units.  

Pickets

Pickets are also called Picket Fence units. They use slightly oversized rectangles and stitching a slightly oversized square on one of the ends to make a folded corner and Trimming them down using the Wing Clipper tools.  This method only makes one at a time.

Quickets, you will use the piecing method similar to making fast flying geese that will end up with slightly oversized units that will mirror image units simultaneously. 

Let me show you how to make these fast and easy units.  I recommend purchasing the Pickets and Quickets Technique Sheet for this, so you can follow the directions each time.


The first thing you need to do is determine the finished size of the units you wish to make.  Then you will need to refer to your Wing Clipper® Tool instructions to find the size of the squares you need to cut based on the finished size. 

Once you have determined your square sizes, you will need to cut one small and one large square to make two mirrored Picket Fences units.  Then on the reverse side of the small square, you will mark two stitching lined a 1/4" from the center diagonal.


Position the small square on top of the larger square in a corner and nudging toward the center 3-4 thread between the raw edges.  Then carefully stitch on the stitching lines you created. Finally, cut down the center diagonal of both fabric squares.  


Press toward the small triangle.  Now we can trim the units. Please remember these are mirrored image units, so you will be aligning on one diagonal one unit and the other diagonal on the other unit. 


Position the Wing Clipper over your unit.  Aligning the diagonal ruler guides on the diagonal seams. Make sure that your ruler trim down lines is contained within the raw edges. Trim the first two sides.


Rotate the unit so that the trim downs are facing you.  Align the trim down ruler lines on the trimmed raw edges.  The X on the ruler should also align with the sewn seam.  Trim the final two sides.

 
Once you have your Quickets, Flying Geese, and Diamond Square units ready, it is time to assemble this unit.  Start with assembling the center of the block first.  I recommend pressing all your seams open to reduce the bulk on this block.


Now, assemble the top and bottom, and sides pieces.  Then finish your block by sewing the side pieces onto the center block first, then adding the top and bottoms to complete your block.


What a fun block and a great way to practice with your Studio 180 Design tools.  Give it a try. You can download this block and other Block Party Blocks right here


Friday, October 8, 2021

Do you know that Studio 180 Design has Free Downables?

This week, I want to cover something that many people don’t know about the Studio 180 Design Website. 

It has a Free Downloadable page.  This page is a great resource, so I thought I would share it with you today.

To reach the Free Downloads page, just click on this link. If you are already on the Studio 180 Design website, click on the menu tab labeled “Free Downloads” under the Studio 180 Design header.

Once you are on the page, you will find many goodies to help you on your quilting journey.

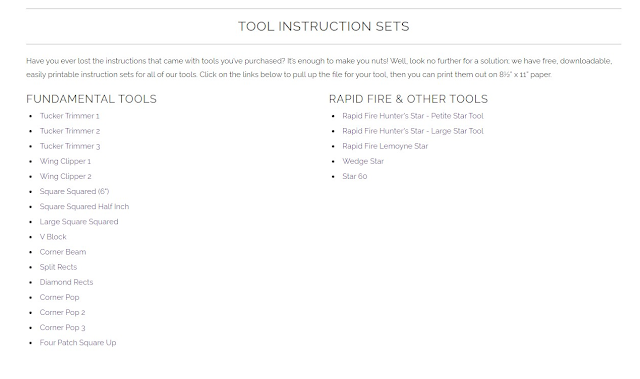
Tool Instructions Section

Starting with the Tools Instruction Sets. If you have lost our tool instructions or want to have PDF Versions of the Tools Instructions, this is the place to find a PDF version of each of the Studio 180 Design tools. I recommend saving each of the tool instructions on my computer, printing a copy, and placing them in protections sheets in a special binder for personal reference. This binder is excellent if you travel or heading to a retreat.

BlockBuster

As we move down the page, you will find archives of the BlockBuster blocks. Not familiar with the blockbuster blocks. In that case, they are Free downloadable block patterns that allow you to practice tools and techniques. These blocks are fun to collect and challenge yourself in the making. They are so much fun, so give them a try.  You can also find many of the newer released Blockbuster Blocks on the Studio 180 Design Facebook Page.

Free Downloadable Patterns

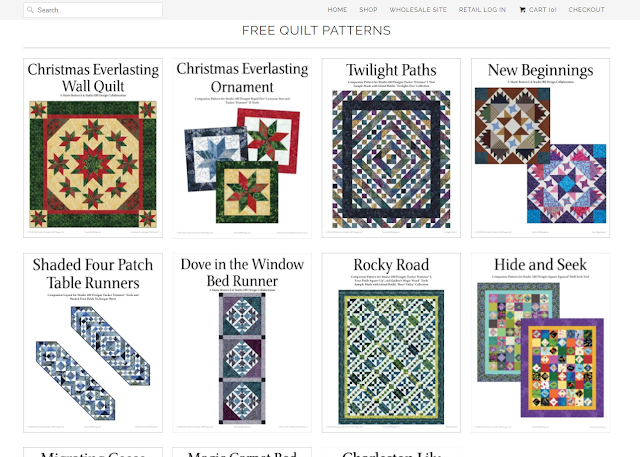
You will also find some Free Patterns you can download.  These patterns are fast, easy and range from Tablerunners to Lap Size quilts. They use a variety of tools and techniques.

Left Handed Technique Sheet Diagrams

Like me, are you Left-Handed and wondered why no Left-Handed are cutting and trimming diagrams on the Technique Sheets?  There is just not enough room to fit both illustrations. So they have put the Left-Handed diagrams on another sheet that is free to download and can be found under the Free Patterns sections.  This is another resource you can put in your binder if you are Left Handed.

Assorted Downloads

Finally, at the end of the page, you will find an Assortment of Downloads. These downloads are handy resources that will help you with your projects.  The two most helpful downloads in this section are the Studio 180 Design Unit Guide and the Have It, Want It Product Checklist.  The Studio 180 Design Unit Guide is a fun guide that breaks down each of the Studio 180 Design tools and shows you each tool's basic units and techniques.  I love this guide and use it in my Precision Block Academy when learning about being a Block detective.  The Have It, and Want It Product Checklist is an excellent checklist of all the Studio 180 Design products; they update it a couple times a year.  This is a perfect way to keep track of all the Studio 180 Design products you may want to buy at the next quilt show or from your next visit to the Studio 180 Design website.

If you have done so all ready, I encourage you to check out this Free Download page. This is a great way to learn the tools along with the Studio 180 Design YouTube Page.  If you are looking for more free blocks, check out my free Download Page on my website.  Plus, my Precision Block Academy is a great way to learn a new tool a month, so sign up for my waitlist today, 

Friday, October 1, 2021

What Studio 180 Design Tools Should I start with?


As a Studio 180 Design Certified Instructor, I am asked many questions about the Studio 180 Design tools.  The number one question I’m asked is What Studio 180 Design Tools should I start with?

My response to this question is you should start with the essential tools. These tools are the Tucker Trimmer I, Wing Clipper I, and Square Squared tool.  The three tools will get you started with basic units that you will see in many quilt patterns and start most quilt projects.

Each tool is multisized with fine lines for accuracy. The tools come with detailed step-by-step instructions with illustrations that cover both Right and Left-Handed cutting and trimming. Additionally, there are cutting charts for all the units they make, so you need a specific finished size. This allows you to refer to the cutting chart to get the size of squares or strips you will need to make each unit.
Let me introduce you to these tools, starting with the Tucker Trimmer. 


The Tucker Trimmer, I feel, is one of the universal tools in the Studio 180 Design toolbox. This tool allows you to make precision Half Square Triangles, Combination Units, and Quarter Square units. There are three different Tucker Trimmers to choose from that will enable you to create various units. 

The Tucker Trimmer I can trim 11 different size units from 1” to 6 1/2”. This is great for making units under 6 1/2” in size.

Tucker Trimmer III trims 22 different unit sizes from 1” to 12 1/2”.  Recommend for anything over 6 1/2” in size.  I love using this tool for squaring up blocks and working with the larger Lemoyne Star blocks.

Now, if you have some oddball sizes, you may want to try the Tucker Trimmer II trims with ten different unit sizes from 3/4” to 5 3/4”; this is great for those special projects.

Now, not only can you trim your units with the Tucker Trimmer, you can use the Tucker Trimmer for Sub cutting units as well. Again, the thin lines and marking on the tools make it easy. 

The next tool I would recommend would be the Wing Clipper I tool.  This tool was designed to create traditional Flying Geese.  When constructing the Flying Geese, you will use the No-Waste Method.  The No-Waste Method allows you to make four geese at one time using just 5 squares. One large square becomes your large triangle (body), and four small squares become the eight side triangles (wings).  Once the Flying Geese are sewn, you will use the Wing Clipper tool to trim each to its exact size, with the seams going directly into the corners. Thus, each unit will be made quickly and accurately every time.

There are two different Wing Clipper tools Wing Clipper I and II.

Wing Clipper I trims ten units’ sizes from ½” x 1” to 5” x 10” finished size units, and the heights increase in half-inch increments.

Wing Clipper II is an in-between tool. Trimming down 9 additional sizes not covered in the Wing Clipper I.  Size Options ¾” x 1 ½” finished size units to 4 ¾” x 9 1/2" finished size units.


The final tool I consider an essential tool is the SquareSquared tool.  This tool was designed to simplify the construction process of the Diamond Square unit without using the paper piecing method.  We all know that the Diamond Square unit can be tricky to be accurate. But using the Square Squared tool, making each of the units oversized, and then trimming them down, you will have a perfect unit every time.  The Square Squared tool is an all-in-one tool that allows you to trim down those center squares to the ideal size, so you don’t have to do all the complex math.

The Square Squared 6” tool is precise for 6-unit sizes from 1” to 6” finished units.

The Square Squared tool is also available in the two other sizes.

Square Squared Half Inch is a new addition to the Square Squared Family. Provides you eight different size units from 1 1/2” to 8 ½” finished units in 1” increments finished diamond square units.

Large Square Squared has 12 different sized units, from 1” to 12” finished units.

These tools will give you proper grain lines on Unit Edges, with Minimal Waste in the Trash Can.


So, if you are just starting out with the Studio 180 Design tools, or even a beginning quilter, I recommend starting with one or all of these three tools first. The TuckerTrimmer, Wing Clipper, and Square Squared tools will get you started on the right track in your quilting perfection. 

If you are looking for more information on these tools, please check out the Studio 180 Design YouTube Channel for a Demonstration. I also teach these tools in my Precision Block Academy, an On-demand Video Course that will teach you how to use the Studio 180 Design tools.