

Over the last 23 weeks, I have been doing a Facebook Live Series called "Quilt Talk Tuesday." The show airs on the Quilting Affection Designs Facebook Page every Tuesdays at 2:30 pm. In the last 13 episodes, I have been discussing Quilting Basics 101, starting from the beginning on terminology, pattern reading, seam allowances and we are coming to the end with making strip binding. You can catch up on all the episodes, Here.
This week talked about Continues Binding. In the video, I demonstrated how easy it is to make the Continues Binding for your quilt.
The first step in making binding is to measure out your quilt. Once you have the measurements, you can then use math, by adding the measurements of all four sides of your quilt top and adding 12" for seams, corners, and finishing. After you have the total measurements, divide by 42" to determine the number of strips you will need.

Or you can use a fantastic Free tool called the Quilter’s Calculator, There are two ways you can access the Quilter’s Calculator. This handy tool helps you figure out your backing, batting, binding yardages and so much more. I absolutely love this app and use it all the time.
First, through the Quilters Paradise Quilters calculator found Here, which you can access through your web browser.
If you prefer to have handy access like I do you can get the App through a download from the Apple Store, Google Play, or Amazon App Store. You can get more information by clicking Here.
I use the Quilter’s Calculator to help me determine how much yardage and how many strips of 2 1/2" strips of fabric I need for my binding.

Once you have all your strips prepared it’s time to get ready to stitch them together.

Place one strip with the right
sides facing up and then place another strip with the right side facing down,
putting it on the other strip that is on the mat so they will make an
"L" shape. On the mat. You may want to overlap them about
1/4".
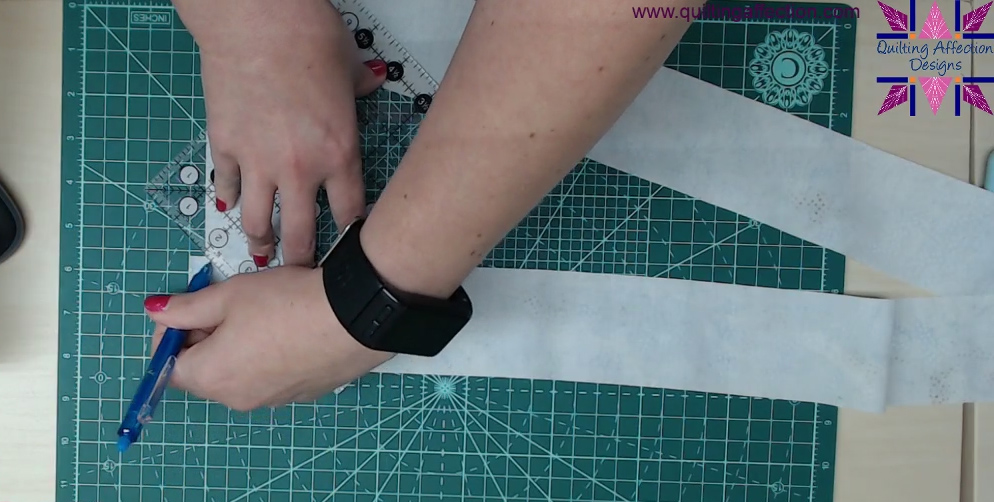
Taking a marking pencil and a
ruler, you will want to draw a diagonal line. To do this place the ruler
on the strips, align the ruler so that it will match the points where the
strips intersect, once the ruler is placed draw a diagonal line with your
marking pencil.

Next, you will pin your intersection together, for sewing.
You will continue this process
until you have all the strips pined together. Then take your pinned
strips to your sewing machine and stitch on the diagonal lines that you have
drawn on your strips.

Next, lay one of your now stitched
strips on your cutting mat and trim the excess fabric, leaving 1/4" seam
allowance.

Remember to trim the dog ears also.

Now, you will need to press all the
seam allowances open.

Finally, starting at the end of
your binding you will fold it in half long ways and press until you get to the
other end.

You have now completed your binding, and it is ready to be sewn on your quilted quilt top, which we will be covering next week.
Tina
"Designing to Inspire"
"Designing to Inspire"
 |
| Get Your Rainbow Serenade Pattern and tools at www.quiltingaffection.com |
No comments:
Post a Comment