Pages

Wednesday, July 24, 2019

Island Batik Ambassador Artsy Fartsy Project


The Island Batik Ambassadors were tasked for July to make an Artsy Project.  This project must use at least three different weights of Auriful Thread.


I took a slightly different route for my project this month from my other Island Batik Ambassadors. I decided since I will be attending Sue Pelland Certified Instructor training next week, I thought it would be fun to do a useful project using her Hearts and More Templates.  My idea was to make a sampler of all the different Curved-Edge Heart that were listed in the Appendix of her Hearts and More Rotary Cut Applique Book.


In this project, along with using varies scraps of Island Batik fabrics.  I used 4 different weights of Aurifil threads that were provided to me from the company itself.  The color I'm using is 5006, and the weights I used are 12wt, 28wt, 40wt, and 50wt Cotton threads.


I started my project off with pre-quilting my fabrics so my fusible project and decorative stitching would show on both sides.  The fabric I chose for the project is called "Rice" from the Island Batik Foundation Neutral Collections. 


So, using the walking foot on my Bernina 580B and Auriful thread 50wt match thread I began quilting squares into my fabric.


Once I had the fabric quilted.  I used MistyFuse Fusible on back of my Island Batik Fabric from past projects and cut and fused the hearts to my quilted fabric.  Each color represented a different template and size.  I used Blue tape to temporary mark which template and the marking I used in the project.


Time to start stitching.  My idea was to use a different weight on each of the various templates I used.


I started off working with Cotton 50wt Thread.  I usually use this weight of thread for my piecing and Marching applique fabrics.  I used an 80/12 Microtex Schmetz needle in my machine.  The bobbin was also the 50wt thread.


28wt Cotton thread was next in my decorative stitches. It is recommended to use a 50wt thread in the bobbin and a 90/14 needle.  I used a Schmetz Microtex 90/14 needle.  The stitches were different sizes of blanket stitches.


Next, up was the 40wt Cotton thread, where I used some decorative stitches that I had not tried before.  Using a Schmetz Microtec 80/12 needle and 50wt in the bobbin once again.  


The final thread I used was 12wt cotton.  I love the feel of this thread, it is very similar to floss and worked great for the decorative stitches I chose to use on these hearts. This weight works great for hand embroidery and cross-stitching as well.  I used a Schmetz 90/14 microtex needle and 40wt in the bobbin.  


I found that all these Aurifil threads work great for machine applique decorative stitching.  I recommend that you refer to the Aurifil Product Guide to find the correct weight of thread and needle size for your project.


I finished up by binding my sampler using 50wt thread. And using a Pigma Micron Pen to write all the necessary templates and sizes in the Curved-Edge Heart. 


Now I have a great visual reference of the different hearts that can be made using the Sue Pelland  Hearts and More Templates, which will be a wonderful aid for some of my future quilt pattern designs.

See you in August for the Beat the Heat Blog Hop. Also, be sure to check out the other Island Batik Ambassador blogs list below. 

Carolina Asmussen ~Carolina Asmussen
Gene Black ~ Gene Black
Pamela Boatright ~ PamelaQuilts
Connie K Campbell ~ Freemotion by the River
Anja Clyke ~ Anja Quilts
Becca Fenstermaker ~Pretty Piney
Jennifer Fulton ~ Inquiring Quilter
Barbara Gaddy ~ Bejeweled Quilts by Barb
Dione Gardner-Stephen ~ Clever Chameleon
Sarah Goer ~ Sarah Goer Quilts
Vasudha Govindan ~ Storied Quilts
Lori Haase ~ Dakota City Quilter II
Joanne Hart ~ Unicornharts
Mania (Magdalini) Hatziioannidi ~ Mania for Quilts
Carla Henton ~ Creatin in the Sticks
Stephanie Jacobson ~ Steph Jacobson Designs
Connie Kauffman ~ Kauffman Designs
Joan Kawano ~ Moosestash Quilting
Kim Lapacek ~ Persimon Dreams
Emily Leachman ~ The Darling Dogwood
Leanne Parsons ~ Devoted Quilter
Bea Lee ~ BeaQuilter
Toby Lischko ~ Gateway Quilts & Stuff
Bill Locke ~ Studio Bill Locke
Denise Looney ~ For the Love of Geese
Leah Malasky ~ Quilted Delights
Sally Manke ~ Sally Manke
Maryellen McAuliffe ~ Mary Mack's Blog
Kathleen McCormick ~ Kathleen McMusing
Carol Moellers ~ Carol Moellers Designs
Karen Neary ~ Sew Karen-ly Created
Jackie O’Brien ~ If These Threads Could Talk
Laura Piland ~ Slice of Pi Quilts
Michelle Roberts ~ Creative Blonde
Vicki Schlimmer ~ Vicki's Crafts and Quilting
Gail Sheppard ~ Quilting Gail
Sherry Shish ~ Powered by Quilting
Anita Skjellanger ~ Quilt in a not-Shell
Laticia "Tish" Stemple ~ Tish's Adventures in Wonderland
Jennifer Strauser ~ Dizzy Quilter
Jennifer Thomas ~ Curlicue Creations
Terri Vanden Bosch ~ Lizard Creek Quilts
Alison Vermilya ~ Little Bunny Quilts
Sandra Walker ~ mmm! quilts
(Debora) Anne Wiens ~ Seams like a Plan
Geraldine Wilkins ~ Living Water Quilter
Janet Yamamoto ~  Whispers of Yore


See you next month,

Tina

"Designs to Inspire"

Friday, July 19, 2019

Graceful Points QAL Block 13


Today, we are introducing Block 13 - Blockbuster #22 - Square Dance in the Graceful Points QAL, which means we have only 2 blocks left before we finish.   


The above image shows all the blocks we have completed so far.  Which means that we have most of the blocks around the center done. We just have a couple of fill blocks to complete before we tackle the last block.


For this block we will be making Flying Geese (Wing Clipper), Square Squared and square units to complete this block.  We will be using the BG, C2, and C4 fabrics, so please refer to your color chart found in your general instructions


Make sure you download both of the Block 13 and Blockbuster #22- Square Dance" Instructions, which are required to make your blocks.


Please remember that the pictures used in this tutorial are for the 6" block for the Wallhanging.  Be sure to read the Downloaded Block Instructions to get the correct cutting and trimming sizes for the 12" block, which are indicated in (Blue) parenthesis.


Flying Geese


We are going to start off with making the Flying Geese. We have not made Flying Geese in a while, so let's do a quick review. 


Start off by gathering your small and large squares for your flying geese units.  Please remember 4-small squares and 1-large square will equal 4 flying geese units.  Then by using your Quilter's Magic Wand, mark two stitching lines that are 1/4" from the center diagonal on the wrong sides of the small squares.  Hint: use a thin pencil lead or pen.


Position two small squares diagonally in opposite corners on a large square.  

Hint: Please remember to nudge each small square toward the center about 3 or 4 threads from the raw edge of the large square.

Stitch on the drawn lines, then cut apart between the stitching on the center diagonal. Press the small triangles away from the large triangles.


Position one small square to each triangle unit.  Again please remember to nudge in 3 to 4 threads from the raw edge of the larger triangle section.


Stitch on the drawn lines, then cut apart between the lines of the stitching on the center diagonal and Press the seams toward the outside.


Right Handed


Left Handed
Align the diagonal guidelines of the Wing Clipper® I with the seams of the Flying Geese unit.  Centering the tool over the size specified in your directions. Trim the side and across the top.

Right Handed


Left Handed

Rotate your flying geese unit 180° and reposition the Wing Clipper® I to align the previously trimmed raw edge size and "X" at the top with the intersections of the seams.  Trim the remaining sides again.


Make all the Flying Geese in your Block 13 instructions.


Square Squared Units


Now we are going to make the Square Squared units.  Please remember to refer back to your pattern instructions and gather your squares.

Right Handed

Left Handed

Using your Center Square Section of the Square Squared® tool over the strip.  Place your tool on the trimmed edge of the strip, lining up the corner of the strip with the center to the correct finished size. Trim up the side and across the top of the strip.


Take your BG and C2 squares and cut them on the diagonal once to yield two triangles per square.

Position 2 BG  triangles on opposite sides of the trimmed center square. Stitch the two triangles with the square on top of the triangle with your best 1/4" seam.  Press away from the center.

Right Handed
Left Handed
Position the remaining BG and C2 triangles on the sides of the center square.  Again remember to place the square on top of the triangle when stitching with a 1/4" seam allowance. Press seams away from the center.

Next using the Square Squared® tool, line up the X's for the 2" and make your first trim.


Right Handed

Left Handed
Rotate your Diamond in a Square Unit and reposition the Square Squared tool and the two remaining sizes.

Repeat to make 4 Square Squared units.

Finishing


Now that all your units are made it is time to stitch this block together.


Your Block 13-Blockbuster #22 Square Dance is now complete. I look forward to seeing your Blocks, and I hope you will share your photos in the comments section below or on the Graceful Points Facebook Group.  Additionally, you can post your blocks on Facebook or Instagram, making sure to use the #gracefulpointsqal and/or #quiltingaffection designs.  I can't wait to see your blocks.

Come back on Friday, August 2nd for block 14, where we will be introducing the Four Square Patch up tool and making Flying Geese again.  


Tina 
"Designing to Inspire"

Thursday, July 18, 2019

Tuckerize Your Quilt - Guest Blogger - Large Square Squared


Well folks, it is Day 4 of “Tuckerize Your Quilt Blog Hop”! I am guest blogging for Tina Dillard or Quilting Affection Designs and my name is Debbie Chiarelli of Quilts by Debbie. I have been a Certified Instructor for Studio 180 Design since 2016. When asked about participating in the Blog Hop I thought…why not?  I talk endlessly about Studio 180 tools and the way they make the most difficult blocks, easy to create. As a quilter of 30+ years, I am always trying to learn new tricks and find alternative ways to create beautiful quilts. If you’re like me, you may choose to avoid the unique skill of paper piecing. Today, I’m going to show you a technique I’ve learned as an alternative method to paper piecing through the use of Tucker tools. Happy quilting!

Two blocks that I love and have found very easy to do, include the Snail Trail and the Pineapple block and these are the two blocks I am going to demonstrate today!
Moving forward, the only tool you will need to complete these blocks is the Studio 180 Large Square Squared®.  There are quite a few patterns created by Deb Tucker and the Studio 180 Design Group that utilize this tool so I think it will come in handy in your quilting tool box!

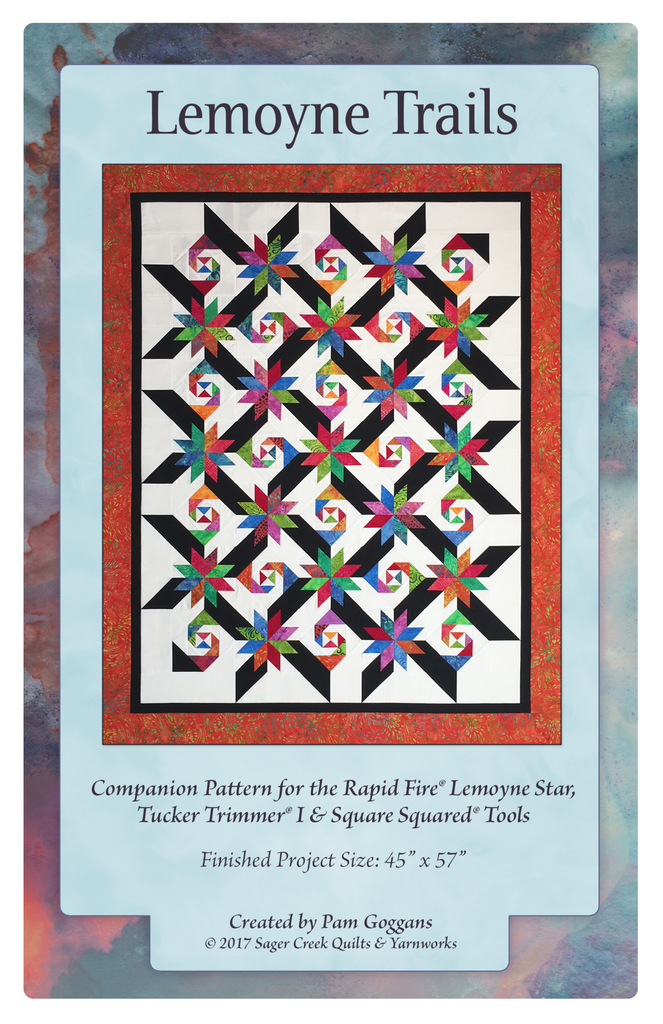
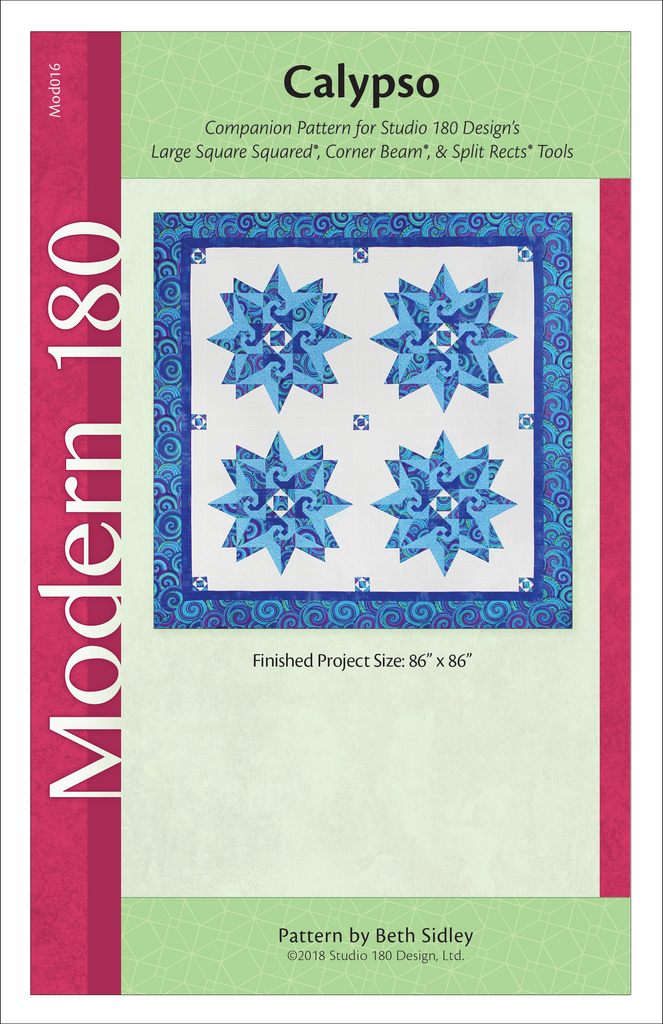
To get us started, here are a couple examples of patterns that have the snail trail block in them:

Leymone Trails

Calypso 


     Filigree     
              

Now, I am going to dive in and show you just how easy it is to make a snail trail block of your own so you can make any of these stunning quilts yourself! Hopefully, this demonstration will get you as excited as I am to use this tool and will have you quilting something new in no time!

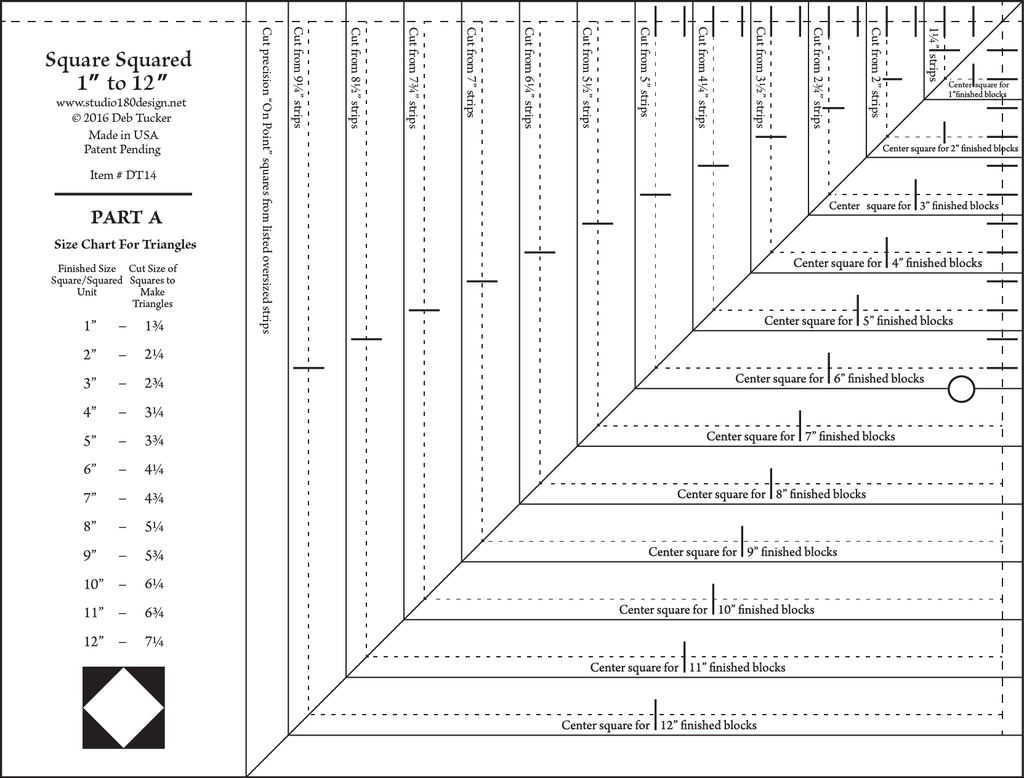
The Large Square Squared® has 2 parts to this tool:

Part A:


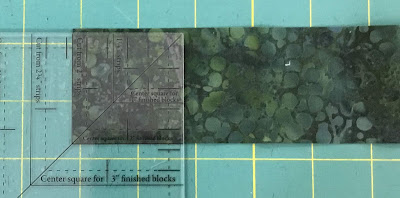
1Step 1: This is what you will start with to make your center square. The tool has markings for strip sizes you will need to make the center square. Here I am showing how to make an 8” square unit. I started with a 2” strip to cut my starting square.


2Step 2: Then you will start to build your snail.  Add the first set of triangles.  Sew each triangle on opposite sides first, iron, then sew on the next two triangles on the remaining sides. Always sew with the square centered on top of the triangle.


This is Part ‘B’ of the tool. This side is used for trim down and the directions are as follows:


Step 1: In this step, you will place your pressed block under the tool and line up the X marked with 2 for 2” block.

For righthanded folks, you will cut on the right side and top. Lefthanded cutters will turn the ruler 90° so the X’s will be on the left. Cut up the left side and across the top.


Step 2: Then, you will lift your tool and turn the unit 180° and line up the X’s and the 2 ½” clean up lines and trim.


Step 3: We will now add the next set of triangles (round 2). Now you can decide if you want your tail to spin left or right, but once you decide here you will need to stick with it for the rest of the block.  I have decided to spin to the right as you can see in the photo.  As before sew on the triangles opposite sides first, press (seams to triangles) then sew on the second set of opposing triangles.


Step 4: we will now trim down this round. We will be going back to the Part ‘A’ tool.  Locate the center square for the 4” finished block window on the Part ‘A’ tool. You line up the intersections of the seam with the center crosshairs the 4” finished unit. The diagonal line on the tool will cross through the intersections of the last set of seams.  Trim. 


Lift the tool and rotate the unit and realign the block using the same crosshairs and also you will be able to line up the trimmed edge with the lines of the center square for 4’ finished block. Now you are ready to trim the opposite side.


Now you are ready to repeat.  Continue to build by adding the remaining rounds follow the diagram below. Remember to continue to add your colors to the right (or Left) to continue as you started. 

Round #
Tool Part
Trimming Lines
Round #3
Part B
4” X and the 4 ½” clean up lines
Round #4
Part A
Center Square for 8” finished block
Round #5
Part B
8” X and the 8 ½” clean up lines


Round #3

   
Round #4


Round #5

   
Finished Unit

Now with the Large Squared Squared Tool® combined with the Stacked Squares Technique Sheet you can make sizes from 1” up to 12” squares. 

The other favorite of mine is the Pineapple Block.  This technique is pattern specific as seen in the Peach Melba® pattern here


With this technique you use the same method of adding rounds that are slightly oversized and trim down.  I will show you a few pictures of how this is put together.

You will start with a 4 patch then add triangles for the first 2 rounds and then you add logs for less waste.


These are the Log and trim down examples. You work with octagon shapes till you add the final corners.


There are 4 rows of logs of background and 4 rows of logs of accent colors.  Then you will add the final triangles of the accent colors then the final trim.


After the final trim you will get the following blocks:

                      
I am working on the Queen size Quilt of this pattern.  I have a total of 48 of these to make and only 30 left to finish.  The Large Square Squared® has made creating these blocks so easy, that I have been speeding through them.


I have enjoyed being a guest blogger of Tina Dillard, Quilting Affection Designs. I hope you will check out the other bloggers of the Tuckerize Your Quilt Blog Hop listed below.  There are still 2 days left. Also, you can always go back and see the previous blogs.  I really enjoy the Studio 180 Design Tools and how they have my quilting adventure easier.  Thank you and Happy quilting!


Monday, 7/15/19 

Tammy Silvers, Tamarinis 
Tina Dillard, Quilting Affection Designs  

Tuesday, 7/16/19

Karen Overton, The Quilt Rambler 
Sarah Furrer, Studio 180 Design 

Wednesday, 7/17/19

Gail Renna, Quilt Haven Threads 
Marie McKay, Ribbon Star Studio

Thursday, 7/18/19 
Deborah Chiarelli, Guest Blogging for Tina Dillard  


Friday, 7/19/19
Michelle Hiatt, Sew On the Go 

Saturday, 7/20/19 
Bonny Peters, Cat Den Mountain Quilts