Pages

Saturday, March 22, 2025

Block Party Block #56 - Birthday Cake Tutorial Part 2


In Part 2 of this tutorial for Block Party Block #56, titled "Birthday Cake," we will focus on the flying geese units and the finishing touches for the block. If you're looking for the tutorial on the Square Squared unit, please refer to last month’s blog, Part 2 of Block PartyBlock #55, where I covered it in detail.

If you missed Part 1 of the tutorial for this block, you can find it HERE. 

To download the block, click on this link: https://bit.ly/BPB56-BirthdayCake

When determining your block size, consult your pattern-cutting charts and tool instructions to establish the starting size for the squares and strips.

Flying Geese

Now, let's discuss those Flying Geese units. Without the Studio 180 Design Wing Clipper tool, I would still struggle to make perfect flying geese units. The tool's instructions demonstrate the nudge construction method, which involves nudging your small square toward the center of the large square by a few threads. In the past, I've noticed that some of my students had difficulty with this method. 

Did you know another approach doesn’t require nudging those small squares? Deb refers to this as the No-Nudge Method. For this method, you cut your small and large squares slightly larger and position the small squares along the edges of the large square. This method provides extra wiggle room for creating those oversized units for that perfect trim down.

Studio 180 Design also provided a No-Nudge Method cutting chart on its Free Downloads page. If you find the nudging method challenging, you should give this a try. 

I will guide you through the No Nudge Method process in this tutorial.

No Nudge Method


First, using the No Nudge Method cutting chart, cut four small squares and one large square to create four flying geese units. 


With your Quilter’s Magic Wand, mark two stitching lines ¼” away from the center diagonal on the wrong sides of your small squares. 


Position two small squares diagonally on opposite corners of the large square, ensuring they align with the raw edges of the large square. Stitch along the drawn lines. 


Cut down the middle.


Press the seams toward the small triangles (or wings).


Position the remaining two small squares on the units, again lining up the raw edges.


Stitch along the lines and cut down the middle, pressing toward the small triangles.

Right-Handed

Left-Handed

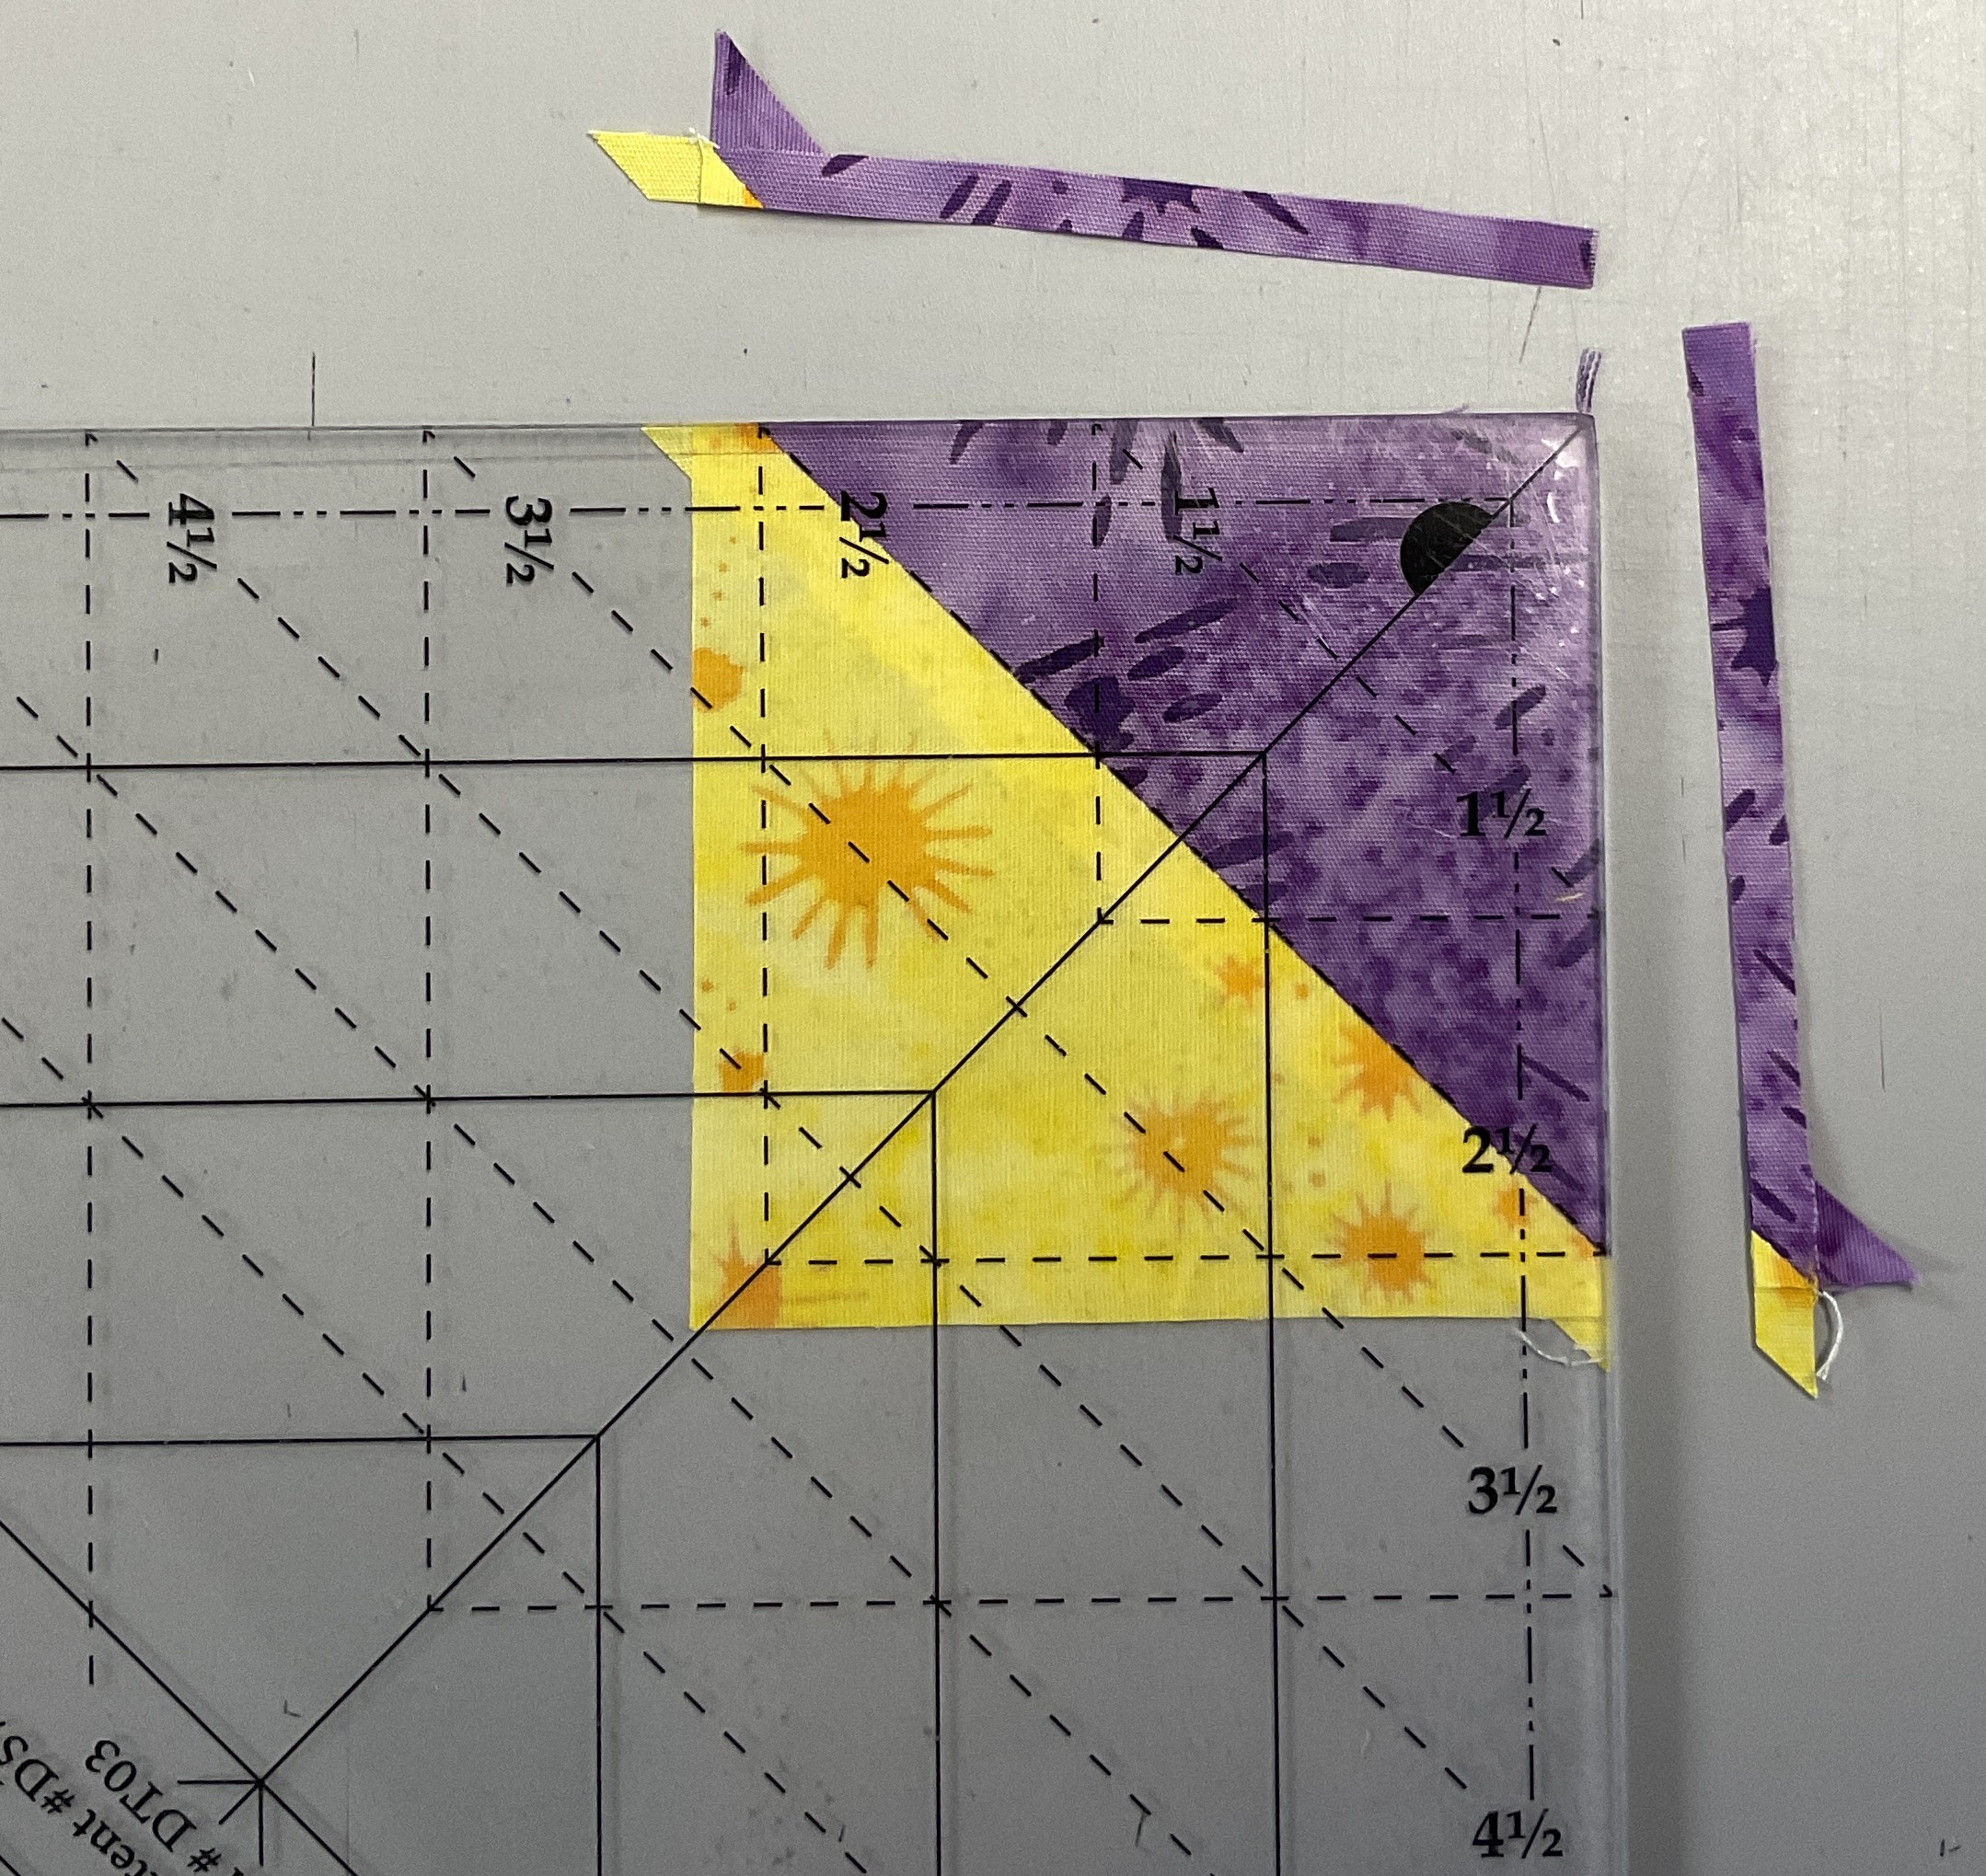
Place your flying geese unit on the cutting mat. Align the Wing Clipper's diagonal guidelines with the seams of the Flying Geese unit. This will automatically center the tool over your pieced unit. Trim up and across the unit.

Right-Handed

Left-Handed

Rotate your flying geese unit 180 degrees and reposition your Wing Clipper to align the previously trimmed raw edges with the correct size for your unit, ensuring the “X” at the top matches the intersection of the seams. Trim up and across the unit.


Repeat this process for all your flying geese units for your block.

Block Construction

Now that all your units are complete, it's time to assemble your block. 


Start by arranging the units to form your block. Next, stitch the units together into rows. Finally, stitch the rows together, pressing the seams open again to complete your quilt top.


Finally, stitch the rows together, pressing the seams open again to complete your quilt top.


You have now completed Block Party Block #56. I hope you enjoyed this tutorial. Please check back next month for another Block Party Block release. In the meantime, feel free to explore the other Block PartyBlocks on my website.

Tuesday, March 18, 2025

March It's All Up to You Challenge - Capped 60 Runner

March’s Island Batik Ambassador Challenge is called "It’s All Up to You," meaning the Ambassadors have a month to create any project of any size, theme, and technique using Island Batik fabrics. This gives us a chance to have a little fun this month.

What was I going to make this month? I knew I had the Sunlit Garden Strip Set and Coordinating fabrics, including Egg White from the Neutrals collection and Vibes from the Marvelous Multis. But what could I do with Strip sets? I wanted to make a new spring table runner for my coffee table.

While reviewing my Studio 180 Design Technique Sheets, I discovered a Star 60 technique that I enjoy working with called the Capped 60. I then opened Adobe Illustrator on my computer, where I kept all my Star 60 shapes, and located a project that needed a few adjustments for a table runner. Now that I had the design prepared, it was time to tackle this quick and easy project.


The project started with the creation of strip sets. I took half of the stack of fabric, cut the strips in half, and began sewing the strips together randomly, pressing all the seams open as I went. This strip set-making method is known as the Mirrored Image Capped 60.


With all my strip sets prepared, I began cutting my oversized Capped 60 units from the half-strip width sets.


Once they are cut out, I need to trim the sides and bottoms of the triangles to the size of the finished capped 60-unit size.


After trimming down the fabric, I divided the stack in half. I then began arranging the units and companion triangles, which I had cut from strips of the Egg White fabric. I randomly placed one stack of the units on one side, replicated that arrangement on the opposite side, and added the Egg White companion triangles down the middle to create rows.


I created half triangles from rectangles and used the Star 60 tool to complete the rows by adding them to each end. I carefully sew the triangles together to maintain my arrangement on the design board.


Pressing the seams is essential for keeping everything flat while I work with these units. Once I have sewn all the triangles into a row, I can add the half-triangles to each end of the row to square it off.


After assembling two rows, I carefully sew them together. I repeat this process for all the rows to create a long runner. 
To finish off the quilt top, I add a thin border.


I used Schmetz needles and Aurifil thread in my Bernina sewing machine to create the quilt top.


I quilted the runner using Hobbs batting on my Bernina Q16 sit-down machine, trying out a circle ruler for the first time. It took me a little while to learn how to use it, but once I found my rhythm, the process went quickly. Considering this was my first attempt, I am pleased with how the quilting turned out. For the back and binding, I chose Island Batik Vibes from the Marvelous Multis collection.


Thank you for joining me as I shared my March project. Be sure to check out the other Island Batik Ambassadors listed below to see what they are working on.

Brenda Alburl ~ Songbird Designs
Renee Atkinson ~ Pink Tulip Quilting
Susan Deshensky ~ Lady Blue Quilts Studio
Brittany Fisher ~ Bobbin with Brittany

Kimberly Flannagan ~ Kimberly’s Quilts

Preeti Harris ~ Sew Preeti Quilts

Mania Hatziioannidi ~ Mania for quilts

Kim Jamieson-Hirst ~ Chatterbox Quilts
Connie Kauffman ~ Kauffman Designs
Connie Kresin Campbell ~ Freemotion by the River
Emily Leachman ~ The Darling Dogwood

Denise Looney ~ A Quiltery
Leah Malasky ~ Quilted Delights
Susan Michaels ~ Dragonfly Fiberart
Lisa Pickering ~ Lisa’s Quilting Passion
Sarah Pitcher ~ Pitcher’s Boutique

Gail Sheppard ~ Quilting Gail
Carol Stanek ~ Stitch with Color
Solomae Stoycoff ~ Cuddle Cat Quiltworks
Jennifer Thomas ~ Curlicue Creations
Suzy Webster ~ Websterquilt

Saturday, March 15, 2025

Block Party Block #56 - Birthday Cake Tutorial Part 1 Flock of Birds


Block Party Block #56—Birthday Cake is a delightful project to create. This block requires the Studio 180 Design Tucker Trimmer, Wing Clipper, and Square Squared tools. Additionally, it uses the Flock of Birds Technique Sheet for the corner pieces.

In this blog, I will provide a tutorial on the Flock of Birds Technique. Part 2 will include the Flying Geese and Block Construction. 

The fabric I used is leftovers from my February Blog Hop Collection. The block is made from Jackie Kunkel’s Canton Village Quilt Works “Cosmic” fabric collection for Island Batik by Lumin Fabrics. This collection is perfect for this quilt, as I aim to create a bright and bold block that lives up to its name. Feel free to mix and match fabrics for your version of the block!

Download your block: https://bit.ly/BPB56-BirthdayCake

First, you need to determine your block and unit sizes. Then, refer to your tool or technique sheet cutting charts to find the starting shape size for each unit you make.

Flock of Birds


The Flock of Birds is among the newest and most sought-after Studio 180 Design Technique Sheets. This unit is a variation of the Shaded Four Patch unit and is easy to create using pieced squares and rectangles. You can use the Tucker Trimmer II and Tucker Trimmer III for this project. 


I recommend looking at the unit diagram on the Flock of Birds Technique Sheet before cutting out your squares and rectangles. This will help you understand where each square and rectangle should go in the unit. To make two units, you will need two small rectangles, two Starting Squares, and one large rectangle.


To begin, you need to determine the size of the finished unit you are making. Next, cut out your Starter Squares pieces. These Starter Squares will be used to create Half Square Triangles. Start by marking the stitching lines on the back of one of the squares with your Quilter’s Magic Wand. 


Place the two starting squares right sides together and stitch along the marked lines. Cut down the middle and press the units open or to one side. The triangle will be centered in the pieced unit. I prefer to open these units to avoid confusion.

Right-Handed


Left-Handed

Next, find the Pieced Square Trim Size on the Cutting Chart in the Technique Sheet. Position the unit on the cutting mat to trim the center triangle side of the pieced square. Using your Tucker Trimmer, align the Pieced Square Trim Size with the seam of the pieced square unit. Trim up and across the unit and repeat for the other piece square. Do not rotate the unit; you only need to trim the center triangle size.


Gather your two small rectangles. Position the pieced square so that the center triangle aligns with the inside short end of the rectangle, as shown in the image above. Stitch along the short side of the rectangle and then press it toward the rectangle. Repeat these steps for the other rectangle and pieced square squares.


Position the two stitched rectangles so the center triangles are aligned toward the center and opposite each other, as shown in the image above. Place the right sides of the unit together and sew along the long edge.


Locate the halfway point between the pieced squares and the stitching size, then snip to the seam at that halfway mark, pressing the seams away from each other.

Right-Handed

Left-Handed

Position the pieced unit on the large rectangle with the right sides facing each other. Locate the 45-degree angle lines using your ruler to create stitching lines on the pieced unit. Align the 45-degree angle line with the last stitch seam and ensure the ruler is positioned correctly at the seam intersection. The new First Choice Ruler is ideal for marking these lines. Draw one line along the longer edge and repeat the process on the other side.


Sew along the drawn lines and trim ¼” away from the two seams. Press toward the larger triangle.

Right-Handed

Left-Handed

Using your Tucker Trimmer, align the Sizing Diagonal line with the sewn seam and the common diagonal down the center along the other seam. Trim up and across the unit.

Right-Handed

Left-Handed

Rotate your unit 180 degrees, replace the Tucker Trimmer, realign the sizing and clean-up lines on the previously trimmed edges, and cut the final two sides of the unit both up and across.

For this block, you will need four flocks of bird units. We will cover the remaining units next week.